Ryobi Garage Door Opener Troubleshooting & How to Guide
Famous for their extensive lineup of power tools and outdoor equipment, Ryobi also has a line of garage door openers. Ryobi garage door opener is one of the simplest garage door openers in the market to install and set up. The garage door openers are robust and sturdy; however, like any other machine, they are prone to breaking down and developing issues over time.
Some issues may require you to call in a professional to diagnose and fix, while some you can quickly fix yourself if you are handy with some work tool. Some Ryobi users find the operation and troubleshooting manual too brief. We will help you diagnose and troubleshoot some of the most common issues with the Ryobi garage door opener.
How do I reset my Ryobi garage door opener?
Resetting your opener’s motor will delete all the saved settings, and you will have to reprogram all the keypads and remote controls after. Follow the steps below to reset the Ryobi garage door opener.
- Ensure the garage door opener router connects to the inner trolley.
- Open the console door at the back of the opener motor to access the programming buttons.
- Press the reset button, and it will pop out.
- Press the Reset button to depress it, and all saved functioned will be deleted.
Ryobi garage door opener manual Wi-Fi setup
The RYOBI GDO (model GD200) has Wi-Fi built into the unit (no need for something like MyQ)that allows you to operate the opener remotely on your smartphone app without additional accessories. To avoid the risk of injury, connect your garage door to the app feature only if your garage door is a sectional door. To connect your garage opener to Wi-Fi:
- Ensure the distance between the garage door opener and the Wi-Fi router is approximately 100 feet (30 meters).
- Download the Ryobi Garage Door Opener Module System App from the App Store or the Google Play Store.
- Follow the instructions on the app to set up an account using your email address.
- Open the app, click the menu on the top left corner and click on ‘Add opener.’
- Long press the Wi-Fi button at the back of the opener motor until it starts to flash to indicate that it is trying to pair with the app.
- Go to your Wi-Fi settings on your phone and click on the RYOBI network.
- Go back to the app and select your home Wi-Fi, and then name the opener.
- Test the connection from your smartphone by operating the garage door, and you will receive a notification on the garage door’s status.
My Ryobi garage door opener refuses to connect to Wi-Fi
If your garage door opener refuses to connect to Wi-Fi, here is how to troubleshoot it yourself.
- Check whether the Wi-Fi router is receiving power. Check the electrical cables and the circuit breaker for any short wires and replace them where necessary.
- Ensure you enter the correct Wi-Fi username and password.
- Confirm that the form of encryption security is either WPA or WPA2.
- If all solutions do not work, reset your Wi-Fi router by long-pressing the reset button on the router for about 30 seconds, and it will delete all connections. Reconnect the garage door opener again.
How to program a Ryobi garage door opener
Just like the case with a Wayne Dalton garage door opener, you will have to program your garage door opener after installation or change the PIN so that the wall mount and remote controls can operate the garage door opener. Follow the steps below to pair the outdoor keypad and remote controls to the garage door opener.
Programming the outdoor keypad
- When programming the outdoor keypad, you have two minutes to complete each step. If you miss the two-minute time limit, the programming information erases, and you have to start again.
- Press and hold the 1 or 3 buttons and the On/Program button simultaneously. The outdoor keypad LED light will flash two times and then remain solid.
- Enter your desired four-digit pin, and the LEDs on the keypad will flash three times to indicate the PIN is stored. The outdoor keypad is now ready to be programmed to the garage door opener.
- Press and hold the Program button on the garage door opener motor and the opener LED lights will turn off, and then the program indicator LED light will flash three times. The opener is now or programming mode.
- Press the On or Program button and then enter the new four-digit PIN on the outdoor keypad. The program button LED at the back of the opener motor will flash three times, and the garage light will turn on.
- Within 30 seconds, press the ) button on the outdoor keypad. The garage door should start moving to indicate programming was a success.
- First, use the outdoor keypad, press the On/Program button, and then enter the PIN to operate the garage door.
Programming the remote controls
- Press the Program button at the back of the garage door opener motor, and the opener LED lights will turn off, and the program button LED will three times.
- Push either the 1 or 2 buttons on the remote control. The green LED light on the remote control will pulsate while the program LED light and the opener LED lights will turn on.
- To test the remote control, press the button you selected and programmed, and the garage door should close or open using this button.
- Repeat this process to program all the remote controls.
How to unlock a Ryobi garage door opener
You can use the indoor keypad to lock the system and prevent you from operating the garage door with the remote controls, outdoor control, and the app. When you lock the garage door, you can only control it using the indoor keypad. Press the Lock button once on the opener’s indoor keypad to lock or unlock the closed garage door.
How to program a Ryobi garage door opener to a car
You can operate your Ryobi garage door opener from your vehicle using HomeLink using the steps below.
- Turn off your car’s engine during programming.
- Locate the in-vehicle control. These controls are usually located either on the rearview mirror or the roof of the car.
- Put the HomeLink system on learning mode by pressing the two outside buttons for about 30 seconds. When the system enters learn mode, the indicator light will start flashing and then release the buttons.
- Hold the opener’s remote control about 3 inches from the in-vehicle controls. Simultaneously press and hold the button on the remote control and the desired button on the vehicle. The indicator light starts to flash slowly and then quickly when the pairing is complete.
- Press and hold the reset button at the back of the opener’s motor.
- Within about 30 seconds, press and hold the HomeLink button on the car to connect the car to the opener’s signal, and the light on the garage door opener will flash once. You may have to repeat this process two to three times before it works.
How to disable beep on your garage door opener?
Some Ryobi garage door opener models have a beep sound when closing or opening the garage door as a warning mechanism. You can disable this feature using the steps below.
- Ensure the garage door is completely closed.
- Press the Down arrow button and the Program button simultaneously for about three seconds, and the opener light will start flashing and then stop.
- Test the beeping sound by opening the garage door and listen to the beeping sound.
Why is my Ryobi garage door opener not responding
When your garage door opener is not responding to the keypad or remote control, there are several reasons that can explain this issue. Here is how to troubleshoot some of the most common reasons why your garage door opener is not working.
The garage door is locked.
If you hear the motor running but the garage door is not moving, you should confirm it is locked. Check if there is any object in the bar access that may be preventing the door from moving. Depress the Lock button on the indoor keypad to unlock the garage door.
The garage door is in manual mode.
Modern garage door openers have an emergency release rope that allows you to raise and lower the garage door manually. If the emergency release rope is easily accessible, someone can accidentally disconnect the automatic operation of the garage door. Check the emergency release rope and reinstall it above six feet from the floor to avoid accidentally disconnecting the opener.
The safety sensor is blocked or misaligned.
The Ryobi garage door opener has safety sensors that detect motion around the garage door. When dirt blocks the safety sensor lenses or the sensors are misaligned, it will act as if it has detected movement around the door. The LED indicator light will turn on, and the garage door will refuse to close. Check the cut or damaged sensor wires and replace them where necessary. The garage door will not work if the sensors are not receiving power. Also, clean the eye of the sensors with a clean lint-free cloth.
If the LED light is still on but blinking, realign the safety sensors. Use the steps below to realign the safety sensors correctly:
- Loosen the fasteners holding the sensors in place.
- Readjust the position of the sensors until the lens on the source and receiver sensors are directly facing each other.
- A continuous red and green LED light will shine when the lenses are correctly aligned.
- Re-tighten the fasteners on the sensors carefully without moving the lenses.
The opener’s power source is faulty.
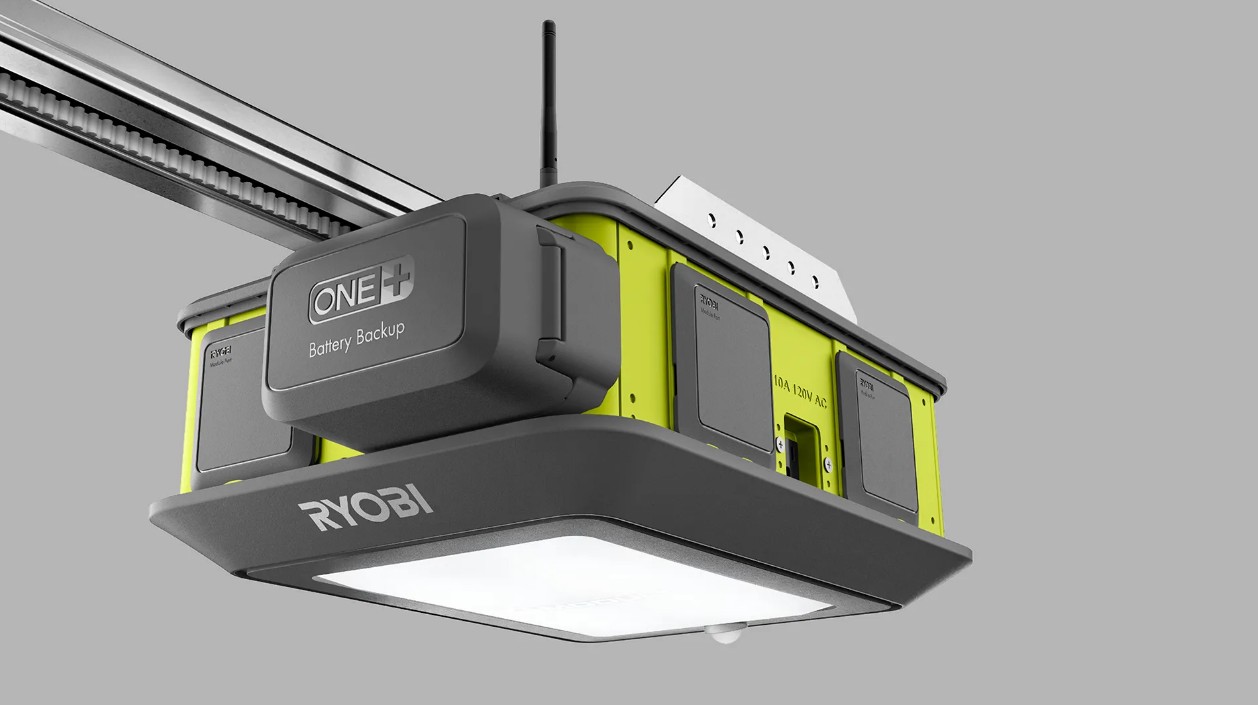
Check if the garage door opener’s power source is working. The Ryobi garage door opener connects to a power supply that is 120 Volts, 60 Hz. When there is a power interruption, the opener automatically switches to DC mode and runs on the battery 18 Volt One+ lithium-ion and nickel-cadmium batteries.
Check for broken wires and the condition of the circuit breaker and replace where necessary. If the opener is on backup mode and using the battery, make sure the batteries are fully operational, fully charged, and correctly inserted into the opener’s motor.
The Ryobi garage door opener has a circuit breaker that protects the AC accessories against electrical overload. If the circuit was overloaded, you need to reset it by pressing the circuit breaker reset button.
The garage door torsion springs are damaged.
When a torsion spring breaks, you will hear a very loud sound similar to a gunshot, and the garage door will drop down and refuse to lift. Torsion springs last about 5,000-20,000 cycles which translates to about 7-12 years. If you notice a broken spring, get a professional garage door technician to repair the door and replace the torsion springs.
Disconnected cables
The garage cables that connect the garage door to the opener’s motor can disengage when the torsion springs break. Call a professional technician to fix the cable as it is a safety hazard in case someone or a car passes through the garage door.
The remote control or keypads are defective.
Check to see if the batteries in the remote control and the wireless outdoor keypad require replacing. Check the electrical wires supplies power to the indoor keypad and replace the wires accordingly. Do not operate the garage door opener if the remote controls or keypads are faulty, as you can risk injury to someone or a pet.
If you replace the batteries and the garage door opening is still not responding to the command, here are a few reasons;
- Your remote control is out of range from the garage door motor. Typically, the remote control works within about 100 feet from the garage door opener.
- Check the antenna on the motor. Look for any damages or anything that could obstruct the signal and ensure it is hanging down from the motor.
- If nothing works, reprogram the keypad and remote control.
The garage door is off its tracks.
The garage door tracks are on both sides of the garage door, guiding the door to the closing and opening positions. Pull the emergency release rope to set the door on manual mode. Try sliding the door manually; if it refuses, the garage door may have popped out of its track. To fix this:
- Lift the door until it lines up with one of the rollers and then hold it in place with a pair of locking pliers. Be cautious and always have someone helping with holding the door if it comes loose and tries shutting.
- Use a pair of pliers to widen the track only on the section where the wheels have come out.
- Place the rollers back to the track and close the track by hitting this section gently with a rubber mallet to reshape it.
- Check for alignment of the track and wheels by manually closing and opening the garage door. If there is misalignment anywhere on the track, repeat the process above.
- Disengage the emergency release rope and test the automation of the garage door opener using the keypads and remote controls.
- Ensure the tracks are clean and well lubricated
The limit setting is out of adjustment.
If the opener’s header bracket is newly installed, the force and limit may not be set right. The opener’s motor can sense how high and low the garage door is supposed to move depending on the door’s weight. Over time the garage door also loses the force and limit. When the limit and force are out of adjustment, the garage door will not function properly. It will either not wholly close or close and keep reversing if the motor assumes it has hit an obstacle. Follow the steps below to learn how to set the limit correctly. Before setting the limit, open the garage door manually by pulling the emergency release rope, raise the door until the trolley locks into the bullet.
To set the travel limit for the open position:
- Open the console door on the motor.
- Press and hold the Up arrow button for about three seconds. When you release the button, the indicator light will blink until the travel limit sets appropriately.
- Press the Up arrow button until the door open completely. For minor adjustments, press and release the Up or Down buttons.
- When the door opens completely, press the Set button to save the travel limit. The Up button will stop blinking and turn solid once the opener saves the travel limit.
To set the travel limit for the closed position:
- Open the console door on the motor.
- Press and hold the Down button for approximately three seconds, and the indicator light will start flashing until you set the travel limit successfully.
- Press and hold the Down button to move the garage door to the closed position you desire. Press and release the Up or Down button to make minor adjustments.
- When the door closes completely, press the Set button at the back of the motor to allow the motor to learn the travel limit, and then the LED light on the Down button will stop pulsating and turn solid.
What does the LED light on the safety sensors mean?
The Ryobi garage door opener comes with two safety sensors that flash an invisible light across the garage door opening. The effectiveness of the safety sensors is dependent on their placement and installation. If an object or person crosses the garage doorway during the closing cycle, the sensors detect it, and the door will automatically stop and reverse to its open position. Therefore, having fully functional safety sensors is crucial. To understand what the sensor LED lights mean, read the chart below.
| Red Light (Source) | Green Light (Receiver) | Problem | Troubleshooting |
| On | On | No problem. The sensors are working well and properly aligned. | No troubleshooting is required. |
| Off | Off | The garage door motor unit is unplugged, or the batteries have no charge. | Connect the AC power supply or charge the battery. |
| Sensor wires from the motor unit are damaged or disconnected. | Reattach the wires or replace the damaged cables. | ||
| Off | On | Wires to the source sensor are damaged or disconnected. | Replace the damaged wires. |
| On | Off | The safety sensors are misaligned. | Align the sensors. |
| Sensor wires from the motor to the receiver sensor are damaged or disconnected. | Replace the broken wires. | ||
| Blinking two times, stop. | On | The sensors are misaligned | Align the sensors |
| The safety sensors are blocked. | Remove the object around the garage doorway and clean the lenses with a clean cloth. | ||
| One or both sensors are faulty. | Replace the sensors. | ||
| Blinking two times, stop. | Off | Electrical cables from the motor unit are damaged. | Replace the damaged wires. |
| One or both sensors are defective. | Replace the sensors. | ||
| Blinking three times, stop. | On | The receiver is in direct sunlight. | Change the position of the sensors. |
| Blinking four times, stop. | On | The source sensor is not transmitting. | Check the wire connection is correct. Get a professional technician to fix the wiring. |
| One or both sensors are defective. | Replace both sensors. |
How to program Ryobi garage door opener indoor keypad
To pair the receiver to the indoor keypad successfully, you should perform each step below within 20 seconds.
- Press and hold the receiver button until the LED light starts to blink or for about three seconds.
- Press the Up or Down button on the indoor keypad, and the LED light on the receiver will blink five times to show that the pairing is complete.
Is the Ryobi garage door opener discontinued?
In August 2017, a unanimous Federal jury in Chicago District Court found the Hong Kong-based Techtronic Industries Co. Ltd (the parent company to Ryobi), guilty of willingly infringing on two US Patents of the Chamberlain Group through the manufacture and sale of its garage door opener under the Ryobi brand sold through The Home Depot. This decision prevents the sale of Ryobi units until 2023.
Conclusion
Ryobi garage door openers are very sturdy and also have a very straightforward installation process. You can fix the more manageable issues yourself, but you can also schedule an appointment with a professional technician to help with the most complex problems.


Do you know where to get replacement safety sensors for my Ryobi garage door opener? My local Home Depot does have the parts