How to Install a Pellet Stove in a Garage
Garages tend to get pretty cold during winter, especially if they are not insulated properly. And if you use your garage for purposes other than car storage, having a heat source in there is essential.
The best option is to get a heat source that generates enough heat to heat the space despite heat loss. This is where wooden stoves enter the chat. And if you wish to avoid getting smoked by a wooden stove, then a pellet stove is the way to go. This article acts as a know-how guide to installing a pellet stove in a garage.
What is a pellet stove?
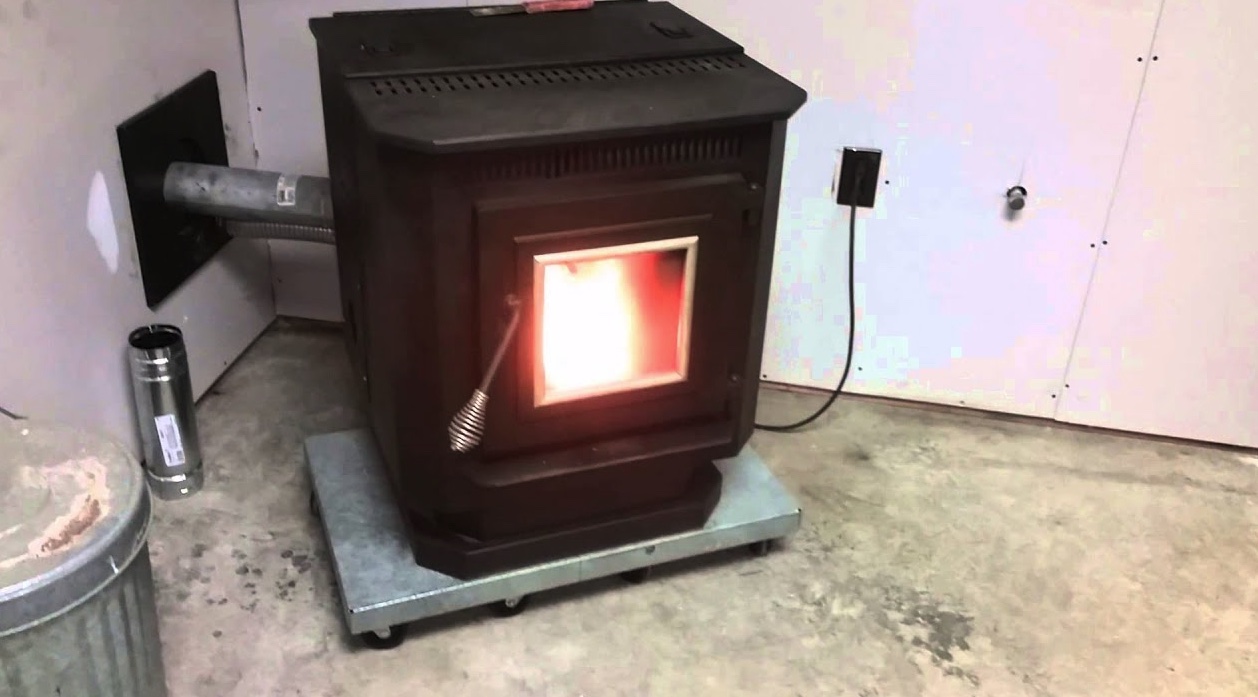
A garage pellet stove uses compressed pellets made of wood or other natural substances known as biomass to create a source of heat. Wood pellets often consist of compressed sawdust, chips, bark, and other wood byproducts.
Pellet stoves are certified by the United States Environmental Protection Agency (EPA) to be between 70% and 83% efficient as a heat source. These stoves are on par with today’s moderately efficient heating systems.
How Does a Pellet Stove Work?
Pellet stoves can be standalone units or fireplace inserts. There are also pellet-fueled furnaces available, which can heat a complete home or support another heating system.
A pellet stove has a combustion blower that draws outside air into the unit through a fresh-air vent and then extracts smoke out through an exhaust vent. There may also be a convection blower that draws room air into the stove and recirculates heated air into the room through a series of heat-exchange tubes.
Some stoves come with an electronically controlled automated pellet feed, making them easier to use than traditional models. A programmable thermostat controls the pellet feed. Some also come with automated cleaning systems, so you don’t have to empty the stove for cleaning as often.
Can I put a pellet stove in my garage?
Yes. A pellet stove can be installed on almost any exterior wall with a simple venting system and an electrical supply. The stove is ideal for a large garage that houses 2 or 3 cars and doubles as a shop or workshop.
However, pellet stoves are probably better used for a detached garage because of the fire hazard. But if properly installed, the fire risk is minimal.
How to install a pellet stove in the garage
Follow these steps to install your pellet stove properly;
Pellet stove installation requirements
- Plump bob
- Jigsaw/ Reciprocating saw
- Jap saw
- Utility knife
- Tape measure
- Screwdriver
Installation steps;
- Place the stove unit in the desired location in the garage to complete a preliminary measuring for the wall covering and chimney system’s ceiling and roof penetration.
- Consult the manufacturer’s specifications for non-combustible wall clearances and make certain the stove position meets or exceeds these requirements.
- Mark a line on the ceiling for the chimney opening, using a plumb bob over the center of the chimney connection flange on the stove.
- Mark a circle to the diameter of the chimney sections that penetrate the ceiling and roof, using a scribing compass.
- Add 4 inches to the hole diameter to allow for a typical minimum clearance to any combustible material, such as ceiling joists or the roof structure.
- Adjust the stove position or chimney configuration as necessary to keep the chimney’s roof penetration as close to centered between roof rafters and ceiling joists as possible.
- Cut through the ceiling sheetrock, if applicable, using a jab saw or utility knife. Then, cut the ceiling hole to accommodate the metal chimney collar.
- Cut the roof sheathing and roofing around the circle’s outline centered on the stove connection, using a jigsaw or reciprocating saw.
- Clear away the roofing around the opening.
- Prepare the roof and install the chimney collar flashing, following the chimney manufacturer’s instructions.
- Verify the hole’s correct location using a plumb bob lowered through the ceiling hole.
- Measure out a space on the concrete floor under the woodstove from the wall line behind the stove to a perpendicular point 18 inches beyond the front edge of the stove’s door opening.
- Use a framing square to align the tape measure.
- Move the stove unit away to access the rear wall.
- Cover an unfinished garage wall, one with no sheetrock installed, with a full sheet of fire-rated sheetrock, positioned horizontally and centered, keeping a minimum of 48 inches on each side from the centerline of the stove location.
- Attach to the garage wall with sheetrock screws and a screwdriver.
- For corner installations, extend the fire-rated sheetrock 48 inches each way from the corner behind the stove.
- Place a full sheet of cement backer board 36 inches high and centered horizontally with the centerline of the stove.
- Do not extend the cement backer board beyond the end of the fire-rated sheetrock.
- Attach to the wall framing with cement board screws and a screwdriver approximately 8 inches apart on each stud.
- Relocate the wood stove and use a tape measure to verify all the required clearances.
- Connect the chimney sections.
- Pass the joined chimney assembly through the roof opening and collar flashing, then slide the base of the chimney assembly over the chimney flange on the stovetop.
- Attach the chimney to the stove flange according to the manufacturer’s instructions.
- Attach the counter-flashing, called a “storm collar,” over the roof collar flashing.
- Run a continuous bead of silicone caulking around the perimeter gap between the storm collar’s inside edge and the chimney’s vertical surface.
- Install the chimney cap. Make certain the cap snaps fully locked onto the top of the chimney assembly.
- Open the chimney flue by turning the metal handle on the side of the chimney, typically about 5 or 6 feet above the floor.
- Light a small newspaper fire in the stove firebox, using matches.
- Adjust the flue as needed to sustain an even smoke draft up the chimney.
Can you install a pellet stove without a chimney?
Yes. You can install a pellet stove without a chimney. The pellet stove can be vented out of an external wall of a home and a flue installed up the outside of an external wall to above the eaves, or a flue can be installed internally and through the roof.
How to install a pellet stove in a corner
Follow these steps for corner pellet stove installation;
- Set up a fireproof pad in the place where you want to install the stove.
- Mark a circle on the wall of the room the size of the pipe from the stove.
- Now drill a 6-inch hole. In this hole, the pipe connected to the stove will go out.
- Join the permanent vent pipe with the stove.
- Make an inch hole in the outer wall of the house.
- Fix the end of the vent pipe with a hole. It will ensure proper maintenance of the combustible surface.
- Now determine the outline of the wall vent pipe and move another line from the stove to another location.
- Next, remove the wall diameter and install a separate divider.
- Trace the diameter of the thimble of the interior wall. You can use large dividers for this purpose.
- First, scrap the circle with the vent-pipe divider with the outliner and cut the outer part of the circle.
- Next, scribe a circle on the wall. Set the divider on the middle part of the outline for this.
- Then use a reciprocating saw to cut out the large circle.
- Make another hole in the external wall following the same process.
- Mark the area where the exterior wall thimbles with the side of the house.
- Cover the pipe, which will pass through the thimble with fireproof insulation.
- To fit the exterior thimble with slots cut off siding, create pressure.
- Connect the screen and elbow with the edge vent pipe.
- Against the wall, drive the mounting plate flush then; by using four screws, fix it.
- Seal all of the vent pipe connections with silicone caulk which can tolerate high heat.
- Then add the exhaust pipe with the stove’s rear part.
- These pipes need to be connected for fresh ventilation.
- The intake vent will also add a back part.
- Then tighten the hose-clamp attachment.
- At the end of the exhaust vent, add an elbow.
- Now, join it with the thimble of the interior wall.
- Then screw the elbow vent pipe.
- Finally, load the hopper with a wood pallet and plug in the stove and confirm if it operates properly or not.
How much does it cost to install a pellet stove?
The installation cost can range anywhere from $1,500 to $7,000. Of course, this depends on the type and size of the pellet stove. Below is the average pellet stove installation cost by type.
Freestanding Pellet stove
A freestanding pellet box stove can be placed anywhere in the garage. The pellet stove installation cost for a freestanding model ranges from $200 to $850. This stove requires little to no vent work. If you need vent work, the installation cost can rise to about $600 to $800 for a ceiling vent.
Wall-Mounted pellet stove
A wall-mounted pellet stove frees up floor space as well. That makes this type of model perfect for a smaller garage. However, pellet stove installation costs for this model are often higher than those for a freestanding unit to account for necessary vent work. Installation costs will range from $500 to $1,200.
Insert pellet stove
A pellet stove insert will need to use your existing chimney as a vent. If your chimney is in good shape, this should be a straightforward process. However, if you need work done on your chimney, you could be on the hook for several thousands of dollars before the pellet stove can be used.
In any case, you’ll need a chimney liner to run your pellet stove, and that can cost between $625 and $7,000 to install.
Pellet stove in garage insurance requirements
It is crucial to inform your homeowner-insurance provider about the installation. Many insurance agents will require a brief visit to the home before and after installation. In addition, some policies will charge a nominal fee for adding a pellet stove.
Certain insurance companies may charge a higher premium because the risk of a house fire is greater with these stoves. If a fire breaks out and the insurance company isn’t aware of the supplemental heating device, insurers might refuse to pay the claim.
Insurance Approval Process
Insurance companies require certain information from homeowners seeking to install wood or pellet stoves. Generally, insurers require an inspection of the stove to check for proper installation and documentation showing a licensed professional did the work.
In addition, if the wood or pellet stove is already in place during the time of the home purchase, the insurance company may require a formal inspection to make sure the stove is up to code and functioning properly.
Mandatory Codes
For an insurance company to approve a wood or pellet stove, homeowners must provide insurers with proof that the stove has been installed per local fire codes.
These codes are a list of rules that regulate stove installation specifications, such as; how close the stove can be to the wall, what kind of base the stove must rest on, and venting details. There are slight differences between the code requirements for wood and pellet stoves. For example, pellet stoves can be closer to the wall than wood stoves.
Can I install a pellet stove myself?
It depends on your DIY skills. A pellet stove requires some expertise to install. Carpentry skills are needed to cut holes in the house for venting, among other skills. You are better off getting some professional help.
Additionally, your insurance agent will require documentation stating that a pellet stove installation expert did the job to approve the installation as part of your policy. Failure to which any potential fires may not be compensated if the pellet is the cause.
Does a pellet stove require electricity?
Pellet stoves require electricity to feed pellets into the burn pot and to run ventilation fans, so your pellet stove will not run properly without a source of electricity. In addition, if there is a power outage, smoke can build up in the pellet stove.
Make sure your stove has a battery backup to keep fans running long enough to consume the pellets in the combustion chamber. Consult a licensed electrician if you consider connecting your pellet stove to a generator.
Safety Precautions
When using a pellet stove, there are a few best practices and safety measures you should follow:
- Install carbon monoxide (CO) detectors to help alert you to potentially dangerous carbon monoxide levels. Install CO detectors on every level of the home, in the vicinity of each sleeping area, and other locations required by any applicable laws/building codes. Make sure you replace the batteries before each heating season. If you hear the CO alarm, immediately move to fresh air and call 911.
- Do not install your pellet stove on the carpet or any flammable surface. You can choose between using a fireproof pad or installing permanent non-flammable flooring. Each stove has varying clearance space between the stove and combustibles, but all of them require remarkably little space. The space should be at least one inch on the sides and the back.
- Dispose of hot ashes safely. Place ashes in a metal container with a lid. Do not put hot ashes in garbage cans or near combustible items. Instead, store the container outside and away from the house.
- Inspect and clean it regularly. Have your stove and vent inspected and ensure cleanings are performed at appropriate intervals to keep it functioning properly. Ensure you know which type of system you have and follow the manufacturer’s cleaning and maintenance directions. Verify that no combustible materials are stored on top of or around the stove.
- Use only recommended pellets. Confirm that you are using the correct type of pellets recommended by the manufacturer to help your stove operate safely and efficiently. Poor efficiency can lead to increased maintenance and poor performance.
- Avoid burns. Be careful when you are near your pellet stove, especially near the glass on the front. Consider putting a guard or gate around your pellet stove to help protect younger children and pets from getting too close to it.
- Follow the manufacturer’s instructions for use and maintenance, and schedule routine maintenance performed by an experienced professional.
Conclusion:
Pellet stove installation should only be performed by a licensed and certified professional installer. Improper installation can potentially lead to fire, smoke damage, and carbon monoxide (CO) poisoning.
Check this too: Is it Safe to Grill in the Garage With the Door Open?
You should also ensure your installer obtains a permit from your local municipality when installing a pellet stove to help ensure that it meets current building codes. Consult your local building official and the manufacturer’s guidelines to understand the minimum safe distance to combustible materials. Lastly, learn how to properly clean your pellet stove, do it regularly, and have a professional inspect and clean it yearly.


