How to Program a Universal Garage Door Opener
Universal garage door openers remotes are designed to be a one-size-fits-all solution for homeowners. Especially homeowners looking for a remote that works with their garage door opener’s motor model. Or homeowners looking for a generic garage door opener.
But you still need to ensure that it is compatible with your garage door motor model. Fortunately, most universal garage door openers work with multiple models in various brands. Keep reading to learn how to program a universal garage door opener.
How to Program a Universal Garage Door Remote
Follow the steps below to program your universal garage door remote;
Items needed
- A step ladder or stool
- Screwdriver (dependent on remote type)
- Paperclip (if motorized opener has a recessed reset button)
To Program a Universal Garage Door Opener Remote with a Learn Button
Step 1: Locate the Learn Button
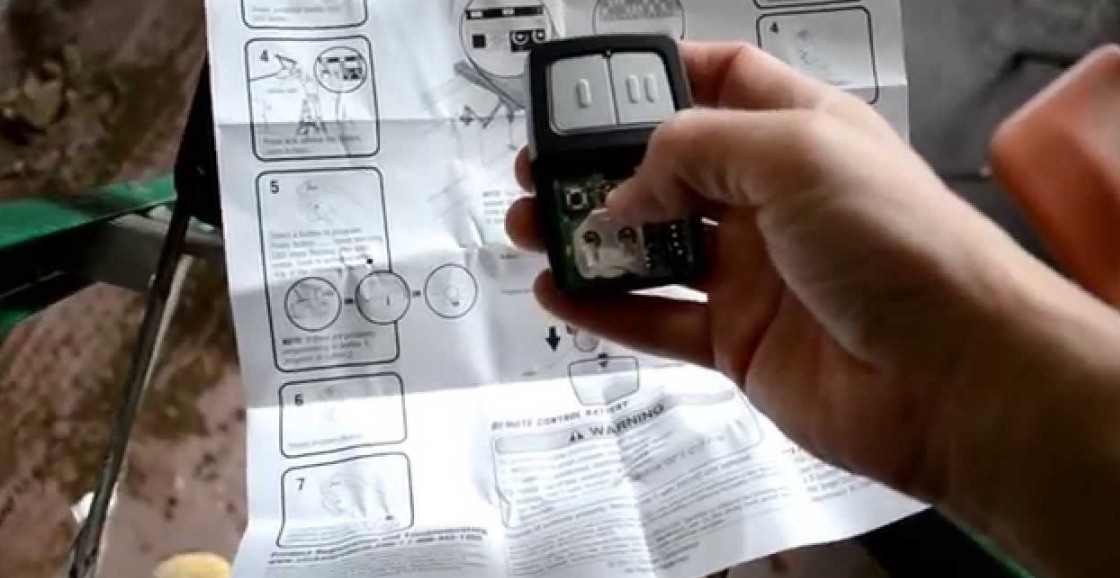
With the universal remote in hand, climb a sturdy work ladder to a height where you can reach the bottom of the garage door opener unit. Go to the garage control panel and look for the button that says “learn,” “program,” or “smart.” The Learn button is located underneath the section of the opener that houses the light bulb. Remove the lens covering to access the Learn button, which should be either orange or purple.
Step 2: Push and Hold the Learn Button
When you press the button on the control panel, the light will sometimes flash instead of coming on. This indicates that programming is in progress. With the Learn button identified, the next step is to press and hold it for about half a minute. And return to the vehicle.
You have about 30 seconds to complete this step. Otherwise, you will have to start over. While you have the Learn button depressed, push and release the button on the universal garage door remote with your other hand. Now go back to the vehicle and press the button on the switch you just programmed.
Push and release the sensor button for one or two seconds. The garage door should open or close. If the door does not move, go back to the main control unit and press the “Learn” button.
Now return to the rover and then press the scheduled button. It may take multiple repeating until it is needed. The opener’s light bulb should flash once to acknowledge that the motor and remote are now in sync.
Alternative method to find the learn button on your garage door opener;
- Press the “ACCESS LEARN” and “RADIO LEARN” buttons simultaneously.
- Continue to keep these pushbuttons pressed for 10 seconds.
- Then press the “ACCESS LEARN” button twice.
- Enter the four-digit password you wish to use.
- Then press the “ACCESS LEARN” button once.
- Press the “LEARN BROADCAST” button twice.
Step 3: Program Additional Universal Remotes
If you have more universal remotes you wish to program, you’ll need to repeat the above steps for each remote.
After that, replace the lens covering on the opener and safely dismount from your ladder. Confirm that each universal remote you programmed works by pushing the button. Your garage door should open or close when activated.
To Program a Universal Garage Door Opener Remote Without a Learn Button
Use this procedure if your remote doesn’t have a learn button. Or if the learn button does not work or is stuck.
Step1: Identify the controller
Identifying the controller comes first. It can be a remote controller that is portable and have a program button or a fixed controller. This can be a standard switch with a “program” button or a “teach” button. Technically, this keypad is still a remote control. However, it is a fixed keypad that mounts on the wall or floor.
It can also be mounted in a car for easy access. The keypad can be on the wall or even on the car. First, check if the remote is fixed or portable. The controller with the program button is easy to set.
If the control button isn’t present, then check for the model on the remote and the type of controller. The steps with remotes can be different. Check if the remote has a light indicator and the arrangement of keys on it. Check the guidelines. Identifying requires the remote to be present. If it’s not with you, look for it and know that the remote is necessary for use.
In addition to the main control buttons, the keypad has some numbered buttons, some of which are in English characters. Another type of keypad without a remote control mimics the main control box of a garage door opener motor.
This mini control box usually has three or four buttons and is mounted on the rearview mirror or other suitable location in the vehicle. It may have LED indicators. Check the make and model of your vehicle online to find out what type of garage door opener lights it is equipped with.
Step 2: Study the control panel
Develop a diagram of numbered buttons and mount them on the garage wall or elsewhere in your home. Examine the control panel to see what the buttons do, how they are positioned, whether there are indicators, and what the lights mean.
Also, read the owner’s instruction manual for important details such as safety instructions, tips, and tricks. Whether you use a numeric keypad or arrows and spaces, the goal is to remove the earlier software and set new parameters.
A new program is a new four-digit code or a special button to open or close a door. You are unsure about where the control panel is located, check on the internet if your vehicle has one and where it is located in the vehicle.
Step 3: Reset the code and memory
The setting will erase all previously stored data, and the screen will be blank. It’s like a clean slate you can set. This will reset the keypad as well. Press the arrow keys and you’ll see the program button, so press them simultaneously. This will take at least 10 minutes.
- Press the programming button, then press buttons 3, 5, and 7 in sequence.
- Once the code has been set, the LED on the keypad will begin flashing.
- Press 3, 5, 7, then enter to check your settings. You then use arrow keys to see if the garage door responds. This example assumes the keypad is mounted on the wall.
- Conversely, you should check the distance if the keypad is in your vehicle.
- Park the vehicle in the driveway, enter the keypad, and see if it works.
- Then pull into the driveway to see the range of the garage door opener keypad.
Note: A code needs to be entered for default settings. The code is usually 357, and it’s the default for almost all models. But you can refer to your user manual if that does not work. You can also find the default value for your keyboard on Google. Once confirmed, enter the code.
To reset the system;
- Press and hold both side buttons at the same time.
- This will take 10 to 20 seconds. When pressed, the LED will turn solid red and then start flashing. When it starts flashing, release the side buttons.
- Select the button you want to change from the remote control and press this button while pointing to the remote control and holding it a few centimeters away from you.
- Press the button on the remote control while pressing the change button on the control panel.
- Both buttons have to be held depressed until the indicator light starts flashing again.
- At first, it will flash slowly, and then it will speed up and flash more often and faster.
- Now release both buttons. The light should go out. Then click on the control button.
- This should turn red and stays red until you release it.
Step 3: Add the new code
Proceed to enter a new code. The code should be something you can remember, but it’s unique to others. Remember the code is for your garage safety, so pick it carefully. Don’t use random numbers without thinking. Forgetting the password will require a reset again.
The charter limit of code depends upon the brand and the model. Adding the upper-case letter will make the code stronger, and the lower case will do the same after carefully selecting and inserting the press next.
Note: Keep the distance of the car remote close so you can set it.
Step 4: Test the remote
After setting up the get and the remote, test the garage gate. Get in your car where the remote is present and press open. The door will open.
Check the remote’s batteries, so the door’s function isn’t slow. If the remote is old, you may have to press it several times. You can replace the garage door remote if it’s not working. As the door opens, the door testing is complete.
To Program a Single Code Garage Door Remote
- Remove garage door remote cover, using a screwdriver, if necessary, to expose the manual switches inside.
- Move manual switches inside the remote to change the code.
- Using a ladder, change the manual switches on the garage door motor unit to match the code within the replacement garage door remote.
- Replace the garage door remote cover.
- Your replacement garage door remote is now reprogrammed – repeat this process with any spare remotes.
- Ensure your garage door is free from obstruction before testing your remote.
To Program a Multi Code Garage Door Remote
- Position your ladder under your garage door opener motor.
- Climb your ladder to access garage door motor control panel.
- Press and hold ‘Learn’ or ‘Door Code’ button (depending on your model, you may need to use a paperclip to press the ‘reset’ button).
- Release button when you see a flashing light appear on your garage door motor.
- Press and hold the desired transmitter button on replacement garage door remote until your motor light flashes again to indicate the signal is being received.
- Press and release ‘Learn’ or ‘Door Code’ button a final time to set the code. A light should blink to confirm the code change. Repeat steps 3 – 6 for additional garage door remotes.
- Ensure your garage door is free from obstruction before testing your remote.
To Program a Garage Door Remote from Another Remote
Use this procedure to clone your existing remote control;
- Press and hold button #1 on your Universal remote and press button #2 four times.
- Release both buttons. A small LED light should start flashing every 2 seconds.
- Press and hold the button on your old remote while holding it approximately 3 cm away from the universal remote.
- Keep holding until the LED light on your universal remote starts blinking rapidly.
- When the LED light on your new universal remote starts blinking rapidly, press and release a button on your new remote that you wish to program.
- At this point, you should be able to clone your old remote codes to a new one.
How to Adjust the Garage Door Remote Control Settings
Your remote must be reset or programmed before you can successfully pair it with your vehicle. Follow these steps to reset your remote;
- Press the programming button on the remote until the LED lights up.
- Select the garage door open/close button.
- Several times Press the appropriate button on the garage door opener for the type of garage door opener.
- Exit this programming step by pressing any other button.
- The LEARN pushbutton press and release the LEARN button on the key.
- Pressing and holding the LEARN push button on the garage door opener will illuminate for 30 seconds, the time it takes for the garage door opener to reprogram itself.
- Click the button on a remote-control button and hold it down until the OPEN indicator lights up.
- The garage door opener indicator light will flash.
- Remove the old code from the available device.
- To remove all previous programming, locate the Learn to Open button.
- It is located on the back of the motor housing, with the backside facing the garage door.
- Depending on the opener model, there is a colored LED next to it. It will need a step stool or ladder to reach the learning button.
- To clear the old code, press and hold the button for at least 6 seconds.
Note: When activating the new remote control, move away from the door when opening and closing it. Remote controls differ in button configuration and programming details. The steps above are general ad can vary for different makes and models. For different steps refer to your user manual.
Programming a garage door opener with the Smart Switch
- Press and hold the button on the Smart Switch controller for 15 seconds.
- This will clear the controller’s memory.
- There are now 30 seconds to program the remote control.
- Using the ladder, quickly step away from the motor housing and press the button on the remote control you wish to program.
- Depending on the garage door model, the remote-control indicator light will flash or light up, or the remote control will flash or click once the remote control has been set.
Programming Your Garage Door Opener to your Car
Start by clearing your car’s garage opener’s memory. Put your car into accessory mode (the mode where your car, but not its engine, is turned on). Then, press the leftmost and rightmost buttons on the panel for 30 seconds. The system’s data is now cleared.
If you aren’t sure where the garage door opener is in your car, try checking the area above the driver’s seat, including below the rear-view mirror. It may also be on a panel next to the steering wheel.
Press the “Learn” button on your garage door opener unit. Find the “Learn” button on the back or side of your garage door opener unit (the big box hanging from your garage’s ceiling). It will be placed next to a small LED light. Once you’ve located the “Learn” button, press it to switch the garage door opener into pairing mode.
To access the “Learn” button, you may need to remove the unit’s light lens, which covers the light bulb inside the unit. In some models, you can open the lens by lightly pressing on it until it swings open. Other models may require a screwdriver.
You may need a ladder to reach your garage door opener unit. Be careful to keep your balance.
Press and hold a programmable button in your car. When you’ve pressed the “Learn” button, you’ll have about 30 seconds to get in your car and select the button you want to program to your garage door. Hold this button until the lights of your garage door opener unit flash or you hear 2 clicks.
Since it can be a little dangerous rushing from a ladder to your car, we recommend that you ask a friend to help you out with this step.
Test and troubleshoot any issues with the opener. By pressing the button you’ve programmed in your car once more, your garage door should open or close.
If this does not work, follow the steps below to troubleshoot:
Check that there’s nothing obstructing the garage door from opening or closing
Be sure that your car is close to the garage door opener unit, parked either right outside the garage or inside it
Check that your car was turned on during the pairing process
Re-do the pairing process once more
If you’re still having trouble, check the manuals for your car and garage door
Program your car with a remote control, as an alternative. In older garage door models, it’s possible to directly program your car garage door opener with a previously programmed remote-control opener. Just hold the remote control next to the car’s garage door opener, and press both the button on the remote control that’s programmed to your door and the button in your car you’d like to program simultaneously. If the light by or on your car’s button begins beeping, then turns solid, you’ve successfully programmed your car.
Note: Newer models of garage doors have security features that no longer let you do this. If you have a newer model, try the steps above, instead.
For certain kinds of garage doors with the Genie brand, you may have to hold the button on your Genie garage door remote control for 10 seconds before pressing the button in your car.
Chevrolet Garage Door Opener Programming
- Switch on the ignition.
- Locate the unit. It is located in three places: on the roof, on the top of the center console, or the rearview mirror.
- Note that the unit has three buttons.
- Simultaneously press both first and third buttons until the vehicle’s interior lights start flashing.
- The button may be necessary to hold it for 20 seconds. When the lights start flashing, go to the next step.
- The garage door transmitter button you want to assign to the garage door opener.
- Press and hold this button while pressing the open/close button on the garage door opener.
- The indicator light on the unit should change from a slow blink to a fast blink, indicating that you have successfully connected the garage door opener.
How to Program the Garage Door Opener in Your Car Without a Remote
Follow these steps if you do not have a remote;
Step 1: Confirm the Type of Controller you’re Using
It could be a basic keypad that has a ‘program’ button or a ‘learn’ button. Technically, this keypad is still a remote device. But it’s a stationary keypad that’s mounted on a wall or floor. It can also be installed inside your car for easy access. Apart from the main control button, the keypad has numbered buttons that sometimes have letters of the alphabet on them.
The second type of non-remote keypad mimics the primary control box on your garage door opener. This mini-control-box will often have three or four buttons mounted on your rearview mirror or some other convenient position in your car. It might have LED indicators. Look up your car brand and model online to see the type of garage door opener it comes with.
Step 2: Study the Control Pad
We’re working with a sample that has numbered keys and is mounted on your garage wall or somewhere on your house. Study the control pad to see what the buttons do, how they’re arranged, whether it has indicator lights, and what those lights do. You should also check the instruction manual for key details like safety advice, tips, and tricks.
Whether you’re using a numbered keypad or blank arrows and boxes, the idea is to erase the previous programming and set new parameters. This could be a new four-digit code or a designated button that opens or closes the door. If you’re not sure where the control pad is, check online to see whether your car has one, and where it’s located in the car.
Step 3: Begin the Programming Process
On some garage door openers, the button is marked ‘program’ or ‘learn’. You’ll find it near the top of the keypad. Press down the button to start your system reset. On the lower end of the keypad, you’ll spot the arrow buttons. On some models, the up-arrow and down-arrow are two separate buttons. On other models, it’s the same button with an ‘up’ side and a ‘down’ side.
Press the arrows and the program button simultaneously and hold them down to flush the system. This could take anything from 3 seconds to 10 seconds, depending on the model that you have. On our sample garage door opener, once the previous settings are erased, the backlights on the keypad will go off, leaving everything on the keypad ‘dark’.
Step 4: Restore the Default Settings
Our sample keypad is manufactured by Genie. All their keypads have a default code of ‘357’. Press the program button then press 3, 5, and 7 in order. Once the code is set, the LED on the keypad will flash. Test your programming by pressing 3, 5, 7, enter. Then use the arrow buttons to see if the garage door will respond. This example assumes the keypad is wall-mounted.
If – on the other hand – the keypad is inside your car, you’ll have to test the distance. Park in the driveway and key in the code to see if it works. Then pull back a bit, reversing towards the road or your gate to see how far the range of your garage opener keypad is. This is useful because you want to know how soon you can open the garage door while you’re driving home.
Step 5: Set a New Code
The Genie default is 357, other brands have a default of 1234, or 0000. Verify the default on your keypad by Googling it. Then reset it to a code that has meaning for you. Some people go with random numbers and letters, but those are easier to forget. On the other hand, don’t pick something too obvious.
Step 6: Do a Deliberate Replacement
Programing your garage door opener without a remote implies your system never had a remote, to begin with. Or you might be reprograming it because you keep losing the remote controller. In this case, you’ll use the remote controller to program your car buttons. Afterward, the remote becomes redundant.
To do this, you need to have your car inside the garage, or within sight of your garage opener control box. Check the car’s inner roof to see what buttons you’re working with. In our example, the Genie set-up has three buttons and a round indicator light. As you start your programming process, you’ll notice the indicator light is off. The light sits above the middle button.
Step 7: Reset the system
Press the two side buttons simultaneously and hold them down to reset the system. This takes 10 to 20 seconds. As you press, the LED will turn solid red then start to twinkle. Once it begins flashing, let go of the side buttons. On your remote controller, select the button you’d like to replace. Press that button while pointing at the control box, holding it a few inches away.
While pressing the button on the remote controller, press its replacement button on the control box. Hold both buttons until the indicator light starts to blink again. It will blink slowly at first, then it will speed up, flashing faster and closer together. Now let go of both buttons. The light should go off. Press the control button again. It should turn red and stay red until you let go.
Step 8: Go to the Main Source
Sometimes, when you press the control box button, the indicator light will blink instead of staying on. This means it hasn’t finished programming itself. Go to the control box inside your garage and look for a button marked ‘learn’, ‘program’, or ‘smart’. Press that button then go back to the car. You have about 30 seconds to finish this step or you’ll have to start from scratch.
Now get back in the car and press the replacement button you’ve just programmed. Hold it down for a second or two. The garage door should open or close in response. If the door doesn’t budge, go back to the main control box and press the ‘learn’ button, then come back to the car and press your programmed button. You may have to repeat this a few times before it takes.
Step 9: Store your Remote Controller Safely
Now that you’ve safely programmed your car buttons to operate the garage door opener, you no longer need your remote transmitter. But you never know when it’ll come in handy, so don’t lose it. We recommend tucking it in the glove box, toolkit, trunk, or another safe location inside your car. You want the remote controller accessible in case your buttons ever get stuck.
On the other hand, if you’re a multi-car family, the remote controller should be stored inside the house. That way, if your car is ever lost, stolen, or another household member needs to access the garage, they can easily find the remote. Take the batteries out and store them nearby to prevent the batteries from depleting themselves or leaching into your remote’s plastic casing.
Note:
You can’t program a garage door opener without a remote controller. But you can use your remote transmitter to reset the garage door opener buttons inside your car. Or you can use an electronic keypad to control the door without a remote.
For keypads, press the arrow buttons and the program buttons simultaneously. Restore the brand’s default code before selecting your own. For control boxes, press the two ‘end buttons’ to clear previous settings. Then use the remote controller to sync your car buttons.

