How to Reprogram LiftMaster Garage Door Opener
When moving into a new home, your garage door opener is a key access point that needs to be updated for security reasons. Or when you install a new garage opener, the garage door remote comes programmed with a default code. This code connects the garage door opener remote with the main system. Since the default code is pretty much universal, it’s important to change the code to prevent unauthorized entry.
You also need to change the default code if you have shared it with non-family members in the past. Remote resetting is also necessary after a new garage door installation. As the remote will remain paired to the old garage door opener. The reset will help to de-link it from your previous garage door opener.
How to Reprogram LiftMaster Garage Door Opener
The difference between the LiftMaster garage door openers program and reprogramming is the only step where you are erasing previous entry codes in reprogramming.
To reprogram your Liftmaster garage door opener, follow the steps below;
First, you need to remove all entry codes:
Erase the original programming for the garage door opener remote that you want to reprogram:
Note: Erasing the memory on your opener will clear out any working remotes or keyless entries. You will need to reprogram them.
- The reset button is located on the side of the control box and serves several functions.
- Pressing the reset button will stop a moving gate during a normal open/close cycle, like a stop button. The operator does not need to be reset after doing this.
Programming Limits Reset : – If a mistake is made while programming the limits press the reset button to start over.
Erase all remote controls and keyless entries
Units with a green, orange, red, purple or yellow LEARN button:
Press and hold the LEARN button on the garage door opener until the LED next to the button goes out (approximately 6 seconds). All remote controls and keypads have been erased.
Erase all remote controls, keyless entries and MyQ® devices from the garage door opener
Press and hold the LEARN button on the garage door opener until the Learn LED goes out (approximately 6 seconds).
Immediately press and hold the LEARN button again until the Learn LED goes out. All codes are now erased.
Now it’s time to Reprogram LiftMaster garage door openers:
Reprogram the remote to your LiftMaster garage door opener. Press and release the “Learn” button on the overhead motor unit; the indicator light will turn on and glow steadily for 30 seconds.
Press and hold the large button on your LiftMaster remote until the main light bulbs in the overhead motor unit flash twice to indicate that the remote programming process succeeded.
Listen for two confirmation clicks if there are no light bulbs installed in the motor unit.
Repeat the steps to reprogram additional remotes to operate your LiftMaster garage door opener.
LiftMaster remote programming guide
Follow the steps below to program your LiftMaster remote control and opener.
Step 1. Open the panel on the garage door opener unit
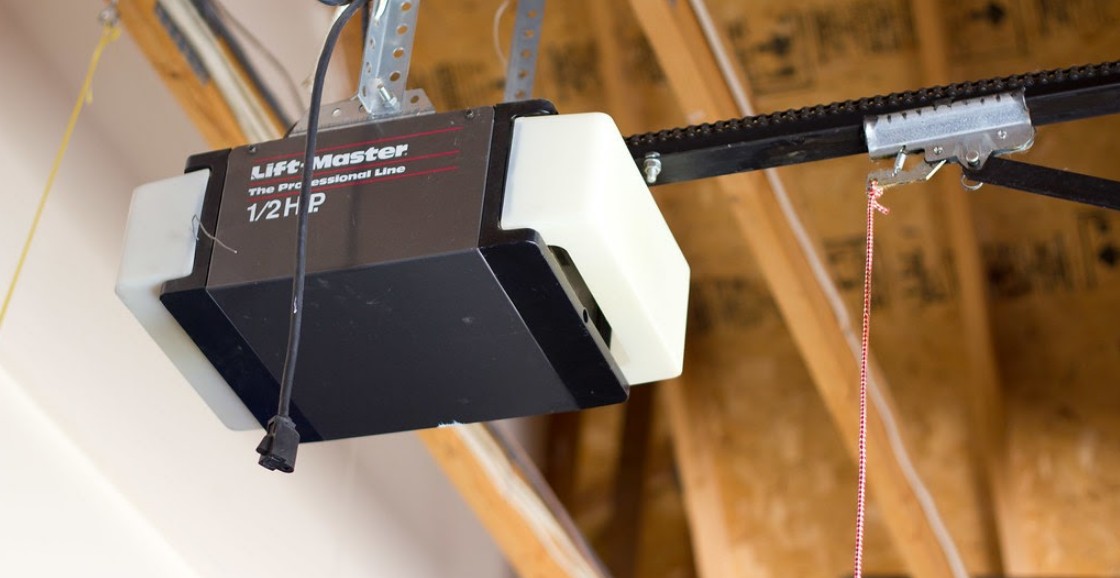
The garage door opener unit is a box mounted toward the roof of your garage. You will need a steady ladder to access the unit.
Locate the placement of the panel on the unit. Some LiftMaster garage door openers have a side panel while others come with one at the back of the unit.
Pull the panel open to access the inside of the motor unit. The panel is attached to the unit by hinges and will swing down when opened.
Pro tip: Before you begin the programming process, ensure that the garage door is safely closed.
Step 2. Locate the ‘LEARN’ button on the motor unit
The ‘LEARN’ button plays a crucial role in programming your garage opener. Inside the motor unit, there is a light bulb and a control panel.
On the control panel, locate a tiny circular or square button labeled ‘LEARN’. The button may be yellow, orange-red, purple, or green depending on your garage opener model. The color of the unit’s antenna wire matches the color of the button so if the wire is yellow, the button will be yellow.
Take note of the small LED adjacent to the button. The LED lights up the same color as the button.
Step 3. Turn on the program button on your remote control
Each style of LiftMaster MAX remote controls has the program button located in a different place.
If yours is an 890MAX and 895MAX, insert a paper pin in a hole on the side of the controller. Push the pin inside to turn on the LED on the front of the controller.
For 893MAX, pull out the visor clip and use it to press the program slot at the back of the remote until the LED lights up.
If you have a keyless remote control, press the * and # buttons at the same time until the keypad light lights up steadily.
Pro tip: The LiftMaster MAX remote controllers generally come with three buttons. You will have to program each button at a time.
Step 4. Pick a button to program
Refer to your garage door opener manual to find out the number of times you should press the button you wish to program on the remote. The number of times the button should be pressed will correspond with the color of the ‘LEARN’ button on your garage door opener unit.
On the manual, you will see that for a yellow ‘LEARN’ button, you only need to press and release the button on the remote control once.
For a purple ‘LEARN’ button, press and release the button on the remote you wish to program twice.
For an orange-red ‘LEARN’ button, press and release the button you wish to program three times and four times for a purple ‘LEARN’ button.
Locate the “learn” button on your LiftMaster opener. If you have a wall control, use this button instead.
Step 5. Program your selected button
After pressing the button on the remote you wish to program the required number of times, press and release any one of the other two buttons on the remote.
If your LiftMaster opener has a MyQ Control Panel, press and release the button twice. Press and hold the button on your remote within 30 seconds of completing the previous step. Hold it down for three seconds.
Now, press the ‘LEARN’ button on the garage door opener unit once and release it. This will turn on the LED next to the button. Depending on your model, the opener lights will blink or the LED lights will go out to indicate that the programming has been successful.
In less than 30 seconds, press and hold the button you chose to program on the remote control until the opener clicks twice and the light bulb in the unit flashes.
Pro tip: Do not hold the LEARN button as this will delink all the remotes from the memory of the door opener unit.
To ensure the programmed button functions properly, press it down. Repeat the steps if you find it’s not functioning correctly.
Repeat the process for other remotes or buttons if need be.
Step 6. Test the remote control
Press and hold the programmed button. If programming is successful, the garage door will open. Follow these same steps to program the other buttons.
How To Program a Liftmaster Garage Door Opener to Your Car
If you’d like to control your garage door from your car, you’ll need to reference your vehicle owner’s manual to locate your car’s transmitter buttons. These are typically located on the console or visor.
After you’ve tested your LiftMaster remote to ensure it works properly, check your owner’s manual to see if your vehicle requires all previously programmed buttons to be reset or cleared before reprogramming them.
Next, follow these steps to program a LiftMaster overhead door opener to your car properly:
- Open your garage door. If necessary, reset or clear the button in your vehicle.
- Locate the “learn” button on your LiftMaster door opener. This button typically looks like a purple, yellow or reddish-orange square.
- Press and release the learn button quickly and firmly.
- Do not hold the learn button down on your LiftMaster garage door remote, as doing so will erase all of the machine’s programming.
- Press and hold the remote-control button for a brief moment. Quickly press the built-in button in your car within 30 seconds of pressing the learn button. You may need to recruit help for this step.
- You will hear a click once the machine has accepted the code.
Note: Programming your car to your garage door opener may take a few attempts, especially if you’re working alone. If successful, your garage door should close when you press the button in your vehicle.
Resetting A Liftmaster Garage Door Remote
A Liftmaster garage door opener will have a button that reads “Learn” on the motor. To reprogram the Liftmaster opener system, you’ll have to:
- Push the button on the garage remote
- Press the button located on the motor
- Hold the buttons until the light on the garage door opener flashes, indicating the system has been reset
How to reprogram your Liftmaster garage door opener
You can change the code on the remote by:
- Pressing the “Learn” button
- Waiting until the light turns on
- Pushing the button on the garage opener remote
Note: After replacing the batteries, you may need to reprogram your remote with your garage door opener. With newer LiftMaster garage door models, you can do this with the “learn” button.
How To Reset Your Garage Door Opener Code
It’s important to reset your garage door opener code somewhat frequently so you can keep your belongings and home secure. Fortunately, the process of resetting your garage door code on your keypad is simple. If it’s time to start using a new pin code to access your garage, we can help you with the process.
it’s helpful to learn how to reset the code when necessary. You may want to reset your code if you:
- Lose your remote
- Move into a new place
- Give the garage code to someone who doesn’t live in your home
- Suspect suspicious activity in your neighborhood
- Think someone has attempted to gain access into your garage
- Can’t remember your old code
Note: Most of the newer garage door openers have a keypad on the inner side of your garage door system. It’s helpful to check your keypad to ensure it’s working correctly and has batteries so you can move forward with the programming process.
Steps To Reset Your Garage Door Opener Keypad
In order to reset a standard set of codes on your LiftMaster garage door opener, all you have to do is press and hold a learn button for about 10 seconds, until a small LED light located beside it turns off. The learn button can have a different color usually located on the back or side cover of your opener. Button color can be red, purple, green, or yellow.Find the “Learn” button on the garage door opener, located on your main unit or on the wall control panel.
- Press the button and quickly release it. You might have to repeat this step if your Liftmaster garage door opener has a MyQ control panel.
- Enter a new pin number on your keypad within 30 seconds of pushing the “Learn” button. Then, hit the “Enter” button.
- The LED light on the garage opener will either blink or go out to show you’ve changed the four-digit keypad pin number.
- Test out your new pin.
After you’ve completed all the steps, your garage door opener keypad pin will be reprogrammed successfully. Once you’ve erased the codes, none of your existing remotes will be able to open the door.
In order to pair your opener to remote again, all you have to do is press a learn button for about a second, until small LED light comes on, and then press the button on your remote control. You should hear a click and your opener’s light will blink, which indicates a successful LiftMaster remote reprogramming.
Note: When choosing a pin number for your garage door keypad, it’s best to choose something simple but secretive. Preferably easy to remember but fairly unique. The garage code should be easy for you and your family to remember but difficult for strangers to guess. Avoid sensitive information, like birthdays, addresses or phone numbers.
How to Clear the Memory on Your Garage Door Opener
Homeowners may want to clear the memory from their garage door opener for many reasons, like if they’re moving into a new home or switching over rental tenants. Most newer garage door openers have a limited amount of storage. Since these systems retain all of the codes for keyless entry, it’s important to know how to clear the memory.
If you must reset or clear the memory from your garage door opener, follow these steps:
- Access your garage door opener.
- Find the “Learn” button.
- Push the button for around six seconds.
- Wait for the LED light to blink or go out.
- Reprogram the necessary codes.
How To Reprogram a Standard Liftmaster Remote Control
A LiftMaster remote control can be programmed to activate many devices, including garage door openers, gate operators, commercial door openers, and external wired-in receivers. Here’s how you program a standard garage door opener remote made by LiftMaster.
Locate the “Learn” button on your garage door opener. It’s on the same side as the antenna. You might have to remove the light lens to access it. The button may be either green, orange, red, purple, or yellow, and beside it is a small LED.
Press and release the “Learn” button.
Within 30 seconds of pressing the “Learn” button, press and hold the button you wish to program on the remote control for three seconds, then release.
The LED indicator light will turn off and/or the garage door operator lights will blink to indicate that programming was successful.
It’s as easy as that!
Resetting A Garage Door Opener
Resetting a garage door opener is slightly different from programming it. When you reset, you erase the remote from the opener’s memory. Resetting might be useful if you have moved into a new house or lost your remote control.
The reset process boils down to three easy steps to reset your opener:
- Locate the LEARN button on the garage door opener
- Press the LEARN but for about 6 seconds or until the adjacent LED light goes off
- Your remote is now delinked from the opener
Pro tip: Unplugging the garage door opener from the power source will not reset or reprogram the remote control or opener.
Below is an in-depth description to help you reset your garage door opener;
Accessing the Garage Door Motor
Set up a ladder beneath the garage door motor in your garage. The garage door motor is a roughly 8 in × 5 in (20 cm × 13 cm) box mounted to the roof of your garage. Open the ladder by pulling the 2 metal halves apart from each other and pressing down on the 2 cross-beams. Then, climb up the ladder until you can comfortably reach the garage door motor.
If you don’t have a ladder, purchase one from a hardware store or a home improvement store. Or, borrow one from a friend.
Open the panel on the left side of the motor unit. If you’re standing in front of your garage door and looking at the motor unit, the left-hand light compartment doubles as a panel covering the unit’s controls. Pull firmly down on this panel until it comes away from the motor unit. The hinges at the bottom of the panel will allow it to swivel down without falling.
The panel placement may differ from one style of unit to the next. The panel may also be located at the back or side of the garage door motor box.
Locate the “Learn” button at the front of the control panel. Once you’ve lowered the light panel out of the way, you’ll see a series of warnings and safety information, a light bulb, and a small control panel. Look over the control-panel area until you spot a small button labeled “Learn.” The button will only be about 1⁄2 inch (1.3 cm) in diameter.
Depending on the make and model of your garage door opener, the button may be yellow and round or purple and square.
Erasing the Motor’s Memory
Press and hold the “Learn” button for roughly 6 seconds. Press firmly down on the button to engage it. When you press it, you’ll notice that a small LED lights up next to the button. Continue pressing down until the LED goes out. This will erase all remote-control and keyless entry codes that had been connected to the garage door.
If your fingers are too large to push the small button, try poking it with the tip of a pen.
Press and hold the button again to erase linked smart devices. If you have a smart phone or tablet linked to your garage door, they will still be active at this point. If you’d like to de-link these devices, press down on the “Learn” button a second time. Hold it down for 6 seconds. When the light goes out, all linked devices will have been de-linked.
LiftMaster smart garage door openers can be connected to smartphones and tablets via the “myQ” setting. To use myQ, download the myQ app from the Apple or Google Play store. Set up an account on the app if you don’t already have one. From there, follow the app’s directions to connect myQ to your home Wi-Fi network and hook it up with your smart garage door opener.
Test the remote-control button to make sure it’s de-linked. Safely climb down from the ladder. Then, fetch your garage door’s remote-control opener. Click the button to check and make sure that the garage door does not open. If you de-linked any smart devices, double check those to make sure they can’t still open your garage door either.
If you have more than 1 garage door, you’ll need to reset each unit individually.
Resetting the garage door opener
Pull off the bulb cover to expose the motor unit’s control panel. Pry off the bulb cover that covers up the unit’s safety warnings and control panel. If your bulb unit has release tabs on the top right and left corners, press those and then pull down on the bulb panel.
Different models of LiftMaster motor units may have the control panel on the back, left, or right.
Press the “Learn” button until the LED light comes on. The “Learn” button should be in the top-right corner of the motor unit’s small control panel. Press it down 1 time and don’t hold it. You’ll see a small LED light illuminate. This lets you know that the motor unit is ready to receive a radio signal from the remote unit.
If you have large fingers and can’t push the small “Learn” button, press it with the tip of a pen instead.
Hold down a button on your remote garage door opener. Within 30 seconds of pressing the “Learn” button, press down on a button on the remote. This will send out a radio signal to the ceiling-mounted motor unit. In the future, when the unit receives that specific signal, it will open the garage door it’s attached to.
On most LiftMaster units, the light attached to the motor unit will light up for 1/2 a second to indicate that the remote’s button has been linked.
Repeat the process with any additional garage doors. Most remote controls have 2 or 3 buttons on them and can be linked to 2 or 3 garage doors. To link another garage-door motor to your remote, move your ladder over to a second or third ceiling-mounted garage door opener. Remove its bulb cover. Press down on the “Learn” button until the LED lights up. Then press the button on the remote control that you’d like to open that door.
Be careful not to press a button that you’ve already linked to another garage door! If you do, pressing the button will open both doors.
Tips
Models of LiftMaster garage door opener may vary slightly from one to the next. Consult your owner’s manual for directions and illustrations specific to your unit.
If the garage door motor unit won’t reset, or stops operating correctly immediately after you reset it, it’s probably broken. Check to see if the opener is still under warranty. If it is, contact the manufacturer and ask them to replace the broken unit.
Consider contacting a garage door specialist if all else fails, as they’ll be able to locate specific problems or malfunctions.
Notes:
- Pull down firmly on the left side of the motor unit, because this is the cover to the control panel. The side should fall down and reveal the controls.
- Press the “Learn” button to de-link any smart devices that are currently connected to your garage door.
- To link a new opener, hold “Learn” until you see an LED light come on. Hold any button on your new remote, and the device should pair automatically.
Safety Warning
Be careful when you’re standing on the ladder. Avoid climbing higher than you need to, and don’t lean very far to 1 side or the other or you could fall over.
Resetting A Garage Door Opener with a Dip System
Learning how to reset your older garage opener is extremely helpful when you’re trying to get in or out of your garage and the system stops working. An older garage door opener will have somewhere between nine and 12 switches inside the main unit and the handheld remote.
For the remote to connect with the garage door opener, the switches must be in the same positions on the garage remote and the main unit. Take the outer covers off both products and check if the switch positions match. If they don’t match, take something narrow like a pen or pencil and slide the switches on the remote control so they’re identical to the main unit. After you complete this step, put the covers back on and test to ensure it works.
Resetting A Garage Door Opener with a Newer System
If you have to reprogram a garage door opener that has a reset button, you’ll first have to find the button that says “Home” or “Learn.” You’ll notice that the button might be next to an LED light or the garage door opener’s antenna. The light will show a different color depending on the type of garage door opener you have.
After you find the reset button, you can begin to reset your garage door opener. While the exact process varies, most models with a button will have you push the button for around five seconds. Another common process requires you to hold the button down until the LED light begins to blink. For many garage door opener systems, that’s all you’ll have to do when reprogramming.
A quick online search of the make and model of your garage door and opener should help you figure out which process will reset it.
How to Reprogram a Garage Door Opener with a Control Panel
Some openers feature a control panel that makes it possible to program your remote control without you needing to climb up to the opener unit. Common styles include multi-functional control panels, motion-detecting control panels, smart control panels with an LCD screen, and doorbell style control panels.
Step 1. Set up your control panel
- Multi-functional and motion-detecting control panels generally feature a labeled ‘LEARN’ button. Press this button twice. The adjacent LED will light up.
- For the smart control panel with an LCD screen press MENU, press the down arrow to navigate to PROGRAM then press the side arrow to select.
- Press the down arrow to navigate to REMOTE then press the side arrow to select.
- For a doorbell control panel, press and hold down the side button then press the front button until the light stays on steadily.
Step 2. Program a specific button on your remote control
Press and release the button on the remote control that you wish to program. Listen out for two clicks to indicate that the opener has been programmed. Alternatively, the garage door opener lights will flash upon the successful programming of the remote control.
Step 3. Test the remote control
- Press the programmed button on the remote control. If you have programmed the control correctly, the garage door will open.
- The above steps show you how to link a handheld remote control to your garage opener. If your car has a HomeLink system you can program it to your opener, eliminating the need for a handheld controller. You can do this from your driver’s seat in just a few simple steps.
- Turn on your car ignition. Be sure to have the handbrake on.
- If programming the HomeLink system for the first time, erase all preinstalled codes. To do this, press the two outer buttons of the HomeLink for about 20 seconds or until the LED starts to flash.
- Point your handheld remote control in front of the HomeLink transmitter. Simultaneously, hold the HomeLink button you wish to program and the Open button on your remote control.
- Release both buttons when the LED starts to blink fast.
- To complete programming, hold the Training button on the HomeLink transmitter until the LED stops blinking.
Notes
- Before programming the remote control, check for possible faults: Resetting and programming can help to ‘reboot’ a remote that won’t work. But, dead batteries, faulty contacts, or a dusty lens might also keep the control from working properly. There are a few things you can do solve these problems:
- Try changing the batteries. Be sure to replace them with high-quality batteries that perform better and last longer.
- Clean and polish discolored/rusty battery contacts. Wipe them out with a clean cloth and use sandpaper to remove any rust.
- Regularly wipe the lens on the remote. A layer of dust covering the lens is enough to keep the remote from transmitting signals to the garage opener.
- Inspect garage opener battery: If the remote is in good working condition but it still will not open the garage door after programming, the opener itself might be faulty.
- Unplug the opener from its power source and use the remote to open the door. If the door doesn’t open, you will need to replace the backup battery in the opener.
- Unscrew the cover of the opener to access the battery. Remove and replace the battery.
- Easy, safe, and convenient access to your garage
To replace the batteries;
- Remove the back cover of your garage door remote
- After flipping your garage door remote over to the backside, you may see a back cover you can remove without tools.
- The cover will come off with ease when you press or slide it.
- If a screw is holding the cover in place, you will need to find a screwdriver of the appropriate size. A good option for smaller screws is to use the extra-small screwdrivers found in glasses repair kits.
- Identify the battery size for replacement.
- Generally, the battery in your remote will be flat with a circular coin-like shape. In other situations, it may be a cylindrical shape. Both battery shapes will pop or slide out very easily.
- You can find the type of battery you will need on the side of the battery. If you can’t find this information, take the battery with you when you go to the drug or auto parts store to replace it. Someone can assist you in finding the correct battery in both locations.
- Gently place or pop in the new one and slide the cover back onto the remote.
Note: always prioritize safety when dealing with garage doors. Keep the door in sight as you perform the programming process.

