How to Load Sandpaper on a Random Orbital Sander
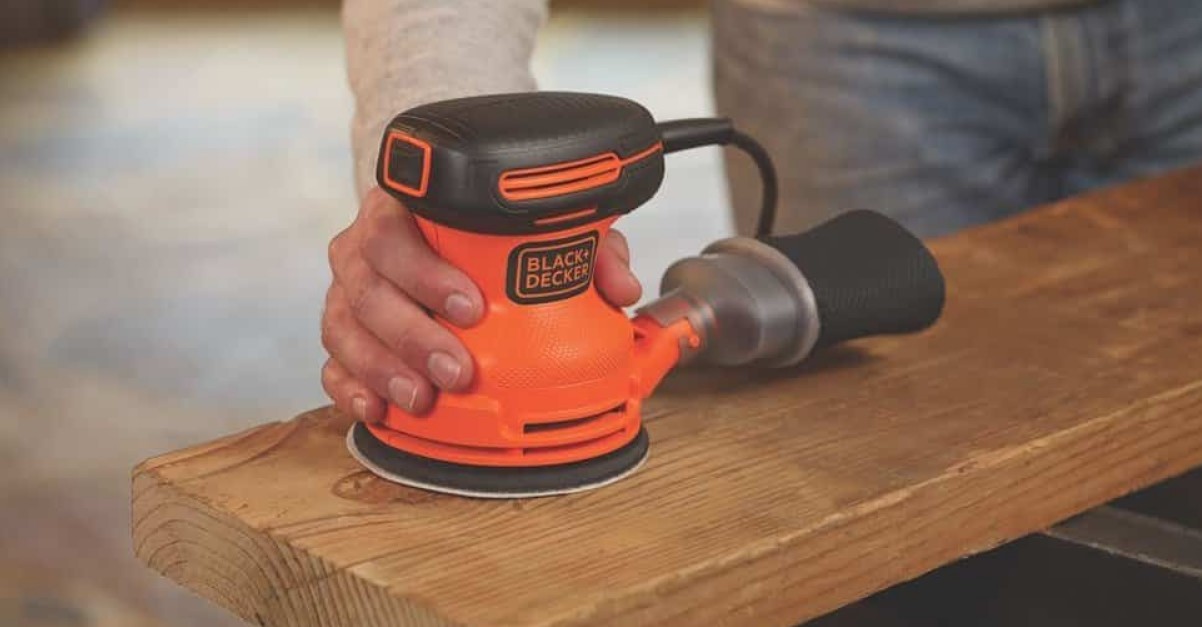
If you ask most woodworkers what sander they would go for, the random orbital sander would be the most popular answer. A random orbital sander is a powerful tool that has made sanding much easier and quicker. They are also versatile and leave a smooth finish with no visible scratch marks due to their random motion.
Most random orbital sanders have a circular sander pad on which you attach a sandpaper disc to buff off surfaces. The sandpaper attaches to the sander pad in a couple of ways; the hook and loop and the stick-on methods make it easier to load the sandpaper onto the orbital sander. Read the article to learn more about the random orbital sander.
How to load sandpaper on an orbital sander
- Unplug the sander cord from power.
- Place the sander on its side on a flat, steady surface.
- Make sure the sandpaper is compatible with the size of the sander, the number of vents on the sander pad, and the attachment style.
- Attach the sandpaper onto the sander.
- Hook and loop sandpaper disc: Hook and loop sandpapers have a rough underside similar to Velcro hooks which attach to the corresponding loops on the sander pad. Hold the sander on the one hand and the sandpaper disc on the other, align the sandpaper disc with the holes on the sander pad and apply pressure. The hooks and loops on both surfaces intertwine to form a strong bond which you can peel back to remove the sandpaper.
- Stick on sandpaper disc: The stick-on sandpaper uses an adhesive underside to attach to the sanding dick. Hold the sander upside down with the sander pad facing up. Peel the paper lining on the bottom side of the sandpaper to reveal the adhesive side, align it and stick it onto the sander pad. Apply pressure with your hand to remove any air bubbles and ensure the sandpaper sticks properly around the edges.
- Sandpaper sheet: There are also square and rectangular random orbital sanders that use a sheet of sandpaper. Open the clip on one side of the sander, tuck the sandpaper edge into the clip, and close it to secure it. Open the other clip, straighten and flatten the sandpaper sheet on the sheet sander pad, and then secure the other edge of the sandpaper under the clip. Make sure the sandpaper lays flat on the sander.
How to make sandpaper stick to a sander
When your sandpaper is not sticking to the sander, the sander pad is worn and needs replacing. The orbital sander will wear out with use and prevent the sandpaper from adhering correctly. Sometimes, the sander pad clogs with sawdust, so you can remove the debris from the surface with a brush but replacing the sander pad is more effective in making the sandpaper stick to the sander.
How to replace the sander pad of a random orbital sander
Go through the steps below to know how to replace the sander pad.
Things you need
- Phillips screwdriver
- Replacement sander pad
- Shop-vac or clean rag
Directions
- Unplug the sander from power.
- Use a screwdriver to remove the screws and remove the sander pad
- Use a shop-vac or a rag to remove sanding dust from the insider of the sander. Cleaning the sander also prevents dust from getting into the motor and damaging it.
- Place the new sander pad on the sander and align the screw holes. Insert the screw into the holes and tighten them with the screwdriver.
- Attach your sandpaper onto the sander pad, and it will stay on more securely.
How to use regular sandpaper with an orbital sander
Sometimes when sanding, we underestimate the number of sanding discs you will need to finish the job and stock up on very few sanding discs. In case you run out of sanding discs in the middle of woodwork, you can use any sandpaper on your orbital sander (if you can’t reuse what you already have). Follow the steps below to know-how.
Materials
- A quarter-inch plywood
- Adhesive spray
- Superglue
- Sandpaper sheet
- Old sander pad
- Shear cutters or saw
- Pencil
Directions
- Trace the circumference of the sander onto the plywood and cut out the circle using a saw or shears cutters.
- Glue the old sanding pad onto the plywood with the fuzzy side up using a combination of the adhesive spray and superglue.
- Attach the sandpaper onto the other side of the plywood with the superglue and then trim off the extra edges with the shears.
- Peel off the old sanding disc from the sander, replace it with your DIY sanding disc with the fuzzy side down and start sanding.
- Do not glue the makeshift sanding disc onto the sander, as you will not be able to access the screws to replace the sander pad.
How to clean an orbital sander pad
Sanding can get very dusty, and the sanding dust will accumulate and clog the sander over time. Occasionally, the edges of the sandpaper discs will lift, and the dust and debris will make a way in between the sandpaper and the sander pad, making it come loose. When the fuzzy or sticky surface of the sanding pad clogs with dust and debris, it prevents the sanding discs from attaching correctly. Instead of replacing the sanding pad, you can fix the problem by cleaning the surfaces, which will also help the sandpaper stick better to the sander especially when sanding tough surfaces like rusty metal surfaces.
Materials
- Acetone
- Lint-free cloth
- Aerosol glue
- Nit comb
Cleaning a sander’s stick-on sander pad
- Disconnect the sander from power.
- Remove the sandpaper from the sander pad.
- Use a dry lint-free cloth to remove the loose dirt and debris.
- Dampen the cloth with acetone and wipe off the surface of the sander pad until it is clean.
- Wipe the rest of the sander’s exterior with the damp cloth with acetone.
- Lightly spray the sander pad with some aerosol glue and let it dry.
- Position the stick-on sanding disc onto the sander pad and apply pressure to help it adhere to the surface.
Cleaning a sander’s hooks and loops sander pad
- Unplug the sander from the power outlet.
- Peel off the sanding disc from the sander.
- Drag the nit comb across the surface of the sander pad vigorously to loosen the debris and dust from the loops of the sander pad.
- Repeat this until the surface is clean.
- Wipe the sander’s exterior with a clean cloth and reattach the sanding disc.
Conclusion
To ensure optimum performance and longevity of any power tools, you have to perform proper handling, maintenance, and storage. The random orbital sander is a very simplistic power tool that will make projects like sanding the deck before repainting very easy. You will need to regularly change the sanding discs and pads and clean the tool using the know-how from the article above. It is best to buy your sanding discs in bulk, but if you run out of sanding discs, you can always improvise with regular sanding paper until you get proper sanding discs.

