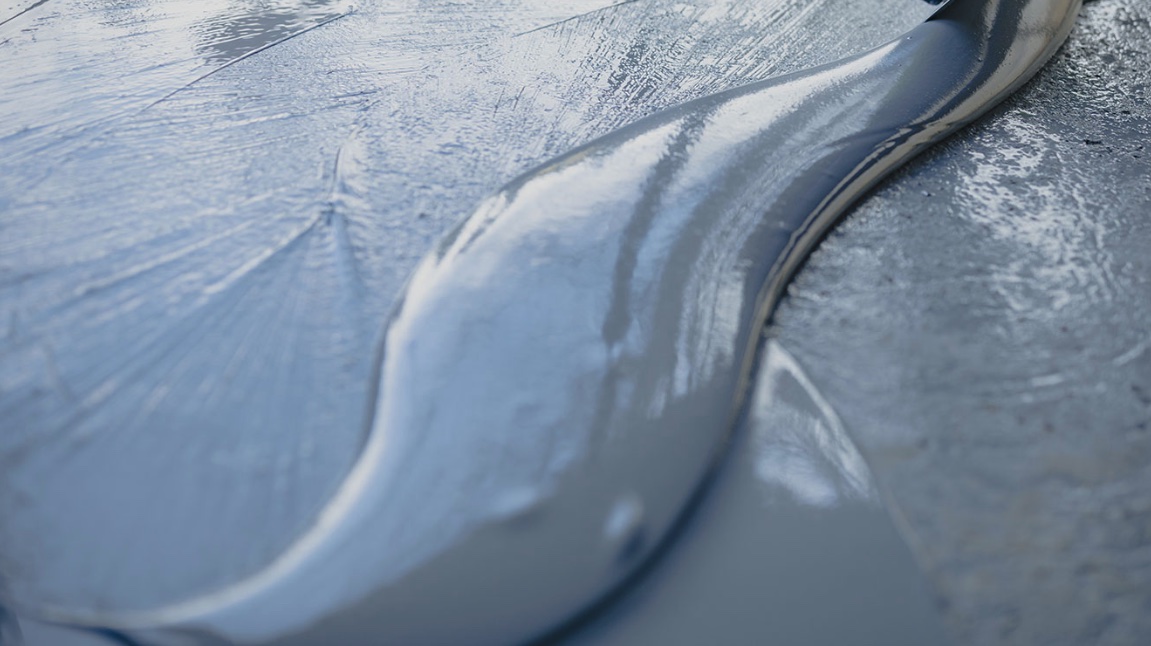
How to Prep a Garage Floor for Epoxy Treatment
Epoxy floors are not only attractive, but they are also durable and wear-proof. In addition, the floor can last for years if properly maintained, making it a worthy investment. However, a lot of work goes into a successful epoxy floor treatment.
Keep reading to learn how to prep for epoxy floor installation.
Do you need to clean the garage floor before Epoxy?
Yes. For a successful epoxy floor application, you must focus on preparation. First, cleaning is done to remove oil, grease, paint, and other types of impurities. The Epoxy may also fail to bind due to the surface not being cleaned properly first, especially if oil or grease interferes.
Cleaning the garage floor must be done using liquid detergent or soap to remove any residue on the floor. If the floor is dusty, vacuuming should be done before washing. When washing the floor, you should pay special attention to areas that have water beads, as these are usually created by oil or grease stains.
Do I need to sand the garage floor before Epoxy?
Yes. To finish preparing an uncoated concrete floor, you need to etch, acid wash, or grind the floor, as a smooth floor will not allow the Epoxy to adhere well. Then, you can rent a sandblaster or diamond grinder and rough up the surface.
How do you prepare old concrete for Epoxy?
The absolute first step before applying your epoxy coating is to prep the garage floor for epoxy. Next, you must clean your floor thoroughly. If you’re working on a concrete base, fill in any cracks or patch areas that need care before you start to clean.
Once the damages, if any, have been repaired, it’s time to clean. Be sure to catch any areas you might overlook while preparing your epoxy coat. Oil spots will need to be removed, and the floor will need to be degreased. Your floor is cleaned properly, and you will want to ensure you vacuum thoroughly to rid of any remaining dust and debris.
Methods
There are three main methods for preparing your floor for epoxy work, so pick the one that best suits your needs.
1. Acid Etching
This technique is the most D.I.Y. option, as other techniques require machinery or skill. It is best used for concrete bases. First, you need to apply the acid solution to your floor. Once it is spread out evenly, use a scrubber, a stiff bristle broom, or a similar tool to work the acid solution.
Once it’s done, let the acid sit for up to 10 minutes, which will allow the process to take effect. Next, you have to remove the spent acid. This can be done by power washing and vacuuming once the floor has dried. Remove the residue before the acid dries.
Finally, you’ll need to neutralize any remaining acid residue. Using a diluted solution of simple green will work well on most floors (approximately 4oz per gallon of water)
2. Diamond Grinding
The second method for preparing your floor is diamond grinding. This method will restore smoothness to your floor, which is needed before an epoxy coating. The diamond grinding method requires machinery; however, it is quite easy. You will need a floor grinder with the proper attachments for your floor.
Once the machine is turned on, use a side-by-side swaying motion to smooth out the entire surface of your floor. After this is complete, vacuum heavily to remove any residue left behind. Always keep the grinder in motion to avoid grinding circular rings and low spots into the floor.
3. Shot Blasting
The final method that can be used to prepare your floor is shot blasting. This technique has various styles, but all require machinery to flatten a surface. Some prefer diamond grinding to this method, but both will get the job done.
The machine will pelt tiny metallic beads into the floor to blast away any stains or damage to the base. The advantage of this, as opposed to diamond grinding and acid etching, is that there will likely not be any residue left over, as the machine captures everything.
However, this technique requires some skill and should be used on larger-scale jobs.
Floor preparation is the most important aspect of achieving a smooth and even outcome. Be sure to research your method of choice before starting the prepping process.
Factors To Consider When Prepping the Concrete
Many factors can affect the adhesion and bonding capabilities of an epoxy floor coating system to the substrate. Therefore, it is necessary to check the conditions of the substrate to identify the proper and correct preparation method.
As such, it is always advisable to field test the suitability of the substrate for adhesion before the actual installation.
Contaminants
Newly placed Portland cement concrete is designed to develop its full design strength typically in 28 days when a polymer system can be applied. A light steel troweled finish produced with minimal surface working is most desirable.
Existing concrete should be structurally sound and void of harmful materials and surface contaminants.
Unstable Ground
Unsound concrete must be repaired or replaced, typically found as cracks, delamination, or eroded joints. DO NOT apply a polymer system over any concrete modified topping, underlayment system, or patches unless approved by the manufacturer.
Unwanted Compounds and Agents
The presence of compounds or agents that have been applied to the surface of the concrete to aid in the curing process may function as a bond breaker if not properly removed. Most curing agents are based on silicones, hydrocarbon oils, sodium silicates, or paraffin that can impede the adhesion of a polymer system.
Always take caution with new construction projects, and it is always best to assume that the concrete has been cured with a compound incompatible with proper polymer adhesion. Even if an approved method of concrete cure was originally specified, the surface should be tested and cleaned as appropriate.
Laitance
Laitance is the top layer of concrete, consisting of cement, water, and fine aggregates, and it may vary in thickness from 0.01″ to 0.1″ depending on several factors such as overworking the placed concrete or excessive vibrating.
Laitance, regardless of thickness, can create a weak surface layer that is insufficient for a proper bond, and it must be removed to achieve optimum adhesion to the actual concrete substrate.
Moisture
Moisture in vapor or liquid can cause adhesion failure and blister at the bond line. As the liquid, water can move through the concrete slab using channels such as cracks, honeycombs, similar voids, or expansion and control joints.
Repairs must be made to eliminate this water to achieve proper adhesion of the polymer system. In addition, moisture in the form of vapor can travel through a concrete slab with no protective vapor barrier between the soil and underside of the slab or an existing vapor barrier that has become damaged.
Vapors may also be transmitted through a porous slab where a substantial variation in humidity or temperature exists below and above the slab’s surface. However, a typical concrete slab retains 3 to 5% of the migrating moisture that is always present and generally will not affect adhesion.
Various testing devices for measuring the moisture content are available to determine if the amount of moisture vapor emitted from the concrete is acceptable for achieving the polymer system’s adhesion.
P.H. Values
The pH level of a concrete substrate, whether too high or too low, will also affect the overall system adhesion or bond strength. The ideal pH value for applying a polymer system is 7, although 6.5 to 9.9 is acceptable and is necessary for obtaining optimum adhesion.
When the pH level is ten or higher, acid etching is required, and when the pH value falls below 6.5, a caustic etch will be required.
Surface Contaminants
These include a variety of foreign compounds that can penetrate the concrete surface and can include curing compounds, free-form release agents, surface hardeners, greases, oils, food by-products, chemicals, previously applied coatings, or simply dust and dirt.
Any of these present contaminants MUST be removed so they will not impede or interfere with the ultimate bond of the polymer system to the concrete substrate.
Carbonation
Carbonation in concrete results from carbon dioxide in the air reacting with Calcium Hydroxide in the presence of moisture. Carbonation is an ongoing process and, over a while, can cause the surface to chalk or powder, creating a bond breaker that will ultimately cause the polymer system to lose adhesion and fail.
Fatty Acids
Fatty acids are saturated monocarboxylic acids that occur naturally in animals, vegetables, and many petroleum-based products, and they can rapidly penetrate the cement portion of the concrete.
The infiltration of these acids causes deterioration of the cement molecules resulting in the loss of adhesion to the concrete. It produces discoloration on the upper surface area of the concrete, which must be removed using abrasive blasting or chipping.
The clean-looking surface below this discolored layer is nonetheless saturated with fatty acids. Therefore, they must be emulsified to remove contaminants and achieve proper adhesion to the polymer system.
General guidelines
1. Repairs of surface irregularities such as sealing cracks can be accomplished after the surface preparation is complete and must be done before applying the polymer system. These repairs should be appropriate and consistent with the system and method of application that will be used.
NOTE: repairs may need to be done before the surface preparation and should be considered before commencing work. Ensure all demolition is complete and finished before the surface preparation.
2. The cove base should be installed before applying the polymer base coat system for best results.
3. It is recommended that, as a general practice, the cleaned concrete be tested to confirm that the substrate preparation has been performed adequately to obtain the proper adhesion of a polymer system. The surface should be tested. Using a simple cup adhesion shear test will determine the cleanliness of the concrete substrate for the adhesion of epoxy coatings and overlays.
4. Wear appropriate eye protection, non-absorbent gloves, and protective clothing when handling chemicals.
5. Always read and refer to the supplier’s or manufacturer’s instructions, warning labels, and MSDS sheets before using any of these products.
Do I need to etch concrete before Epoxy?
Yes, even new concrete needs to be etched before applying epoxies such as Home Depot garage floor epoxy or Rustoleum epoxy. Etching is part of the concrete preparation process. However, proper concrete preparation is the most important part before a coating is applied.
Concrete must be etched before any other material is applied. This includes both Epoxy and paint. Epoxy cannot bond to the surface of unetched concrete. This leads to the peeling and stripping of the failed epoxy coating. Etching is often thought of as a solution to muriatic acid, but you should also consider diamond grinding or shot blasting alternative methods -both require professional application.
When the concrete surface is too smooth, nothing can adhere to it. Since the bond between the floor and Epoxy is incomplete, it’s only a matter of time before the Epoxy begins to lift and peel.
This is, for the record, true for paint as well. No matter what you try to apply to concrete, it simply can’t stick to a perfectly smooth surface. This is why muriatic acid is used to roughen the surface.
Epoxy is a resin that needs to cure. Temperatures that fluctuate during the curing process can lead to peeling floors. Excessive humidity can also keep the floor from hardening properly.
The last reason that epoxy floors peel is that the surface wasn’t prepared properly. The floor must be thoroughly cleaned. Any grease, oil, or dirt left on the floor will prevent the epoxy resin from bonding with the concrete.
Once clean, the floor must also be given enough time to dry. A damp floor, just like a dirty floor, creates a surface to which the resin can’t adhere.
How to Etch Concrete Before Epoxy Application
Most people think of muriatic acid when they think of etching concrete. This is a common method, especially where there’s only a small floor to etch. It’s cheap to do and can be accomplished without special tools. But you can also consider diamond grinding or shot blasting to etch the surface of the concrete.
Diamond grinding uses a floor grinder with special attachments. If you’re unfamiliar with the equipment, this might not be an easy D.I.Y. project. However, it’s easy, without the right technique, to grind uneven rings or spots into the floor.
Shot-blasting pelts the floor with metallic beads. It doesn’t leave the same dust and residue as diamond grinding. However, the machinery is complicated and requires skill. As a general rule, this is only used in large-scale jobs where there’s a lot of flooring to etch.
How To Acid Etch
Since acid etching is considered the D.I.Y. option, it’s the one we’ll cover in detail here. It’s important to note that muriatic acid can be hazardous. This should only be attempted by an experienced DIYer who can work safely with chemicals.
The necessary mixture is 5:10 muriatic acid and water. Use a one-gallon mixture for every 100 square feet. Be sure to apply the mixture evenly, avoiding puddles. Remember to wear safety gear like goggles, boots, and gloves.
Scrub with a stiff bristle brush, allowing it to set on the concrete until it stops bubbling. Alternatively, you can use a sprayer to apply it across the floor.
Then, rinse thoroughly with clean water. The solution should dry fairly evenly in a few hours – if it doesn’t, rinse again. You don’t want puddles to develop, as the acid will be more concentrated in those spots.
Finally, you need to neutralize any remaining acid. There are many methods for this. A simple one is to mix two pounds of baking soda in five gallons of water. Apply to the surface in the same way that you applied the acid. Keep wet for ten minutes while the mixture works, then rinse off.
Note: The concrete needs to dry thoroughly after etching. Damp concrete won’t bind correctly with Epoxy, which can cause peeling. Too much humidity can also be problematic. A moisture level of 12% is ideal if you have a tool for measuring. Typically, you should leave the concrete for at least 48 hours to dry.
Can I Put Epoxy Over Sealed Concrete?
No. Epoxy will be ineffective on this surface. If you’re determined to epoxy the concrete, you’ll have to remove the sealant first. However, acid etching, as described above, also removes sealant from concrete.
A sealant will also prevent the Epoxy from adhering, though it can be removed by acid etching. Sealed concrete is meant to protect the concrete. It’s a finishing surface, and anything placed on top cannot adhere. This goes for Epoxy, as well. Epoxy won’t be able to break past the sealed surface to stick.
You can tell if the concrete is sealed by spilling a cup of water on it. If it absorbs into the concrete, then the surface is not sealed. It’s safe to use Epoxy on this surface. If the water sits on top of the cement, a sealer has been applied.
Should I prime concrete before Epoxy?
Yes. Priming the concrete will help the Epoxy adhere much better. Below are some benefits of priming a concrete floor that you cannot afford to overlook;
Epoxy primers are thin, providing a better adhesion as they penetrate the concrete substrate allowing a better bond.
Primers provide a better chemical bond when using thicker epoxy base coats. This results in a longer-lasting and more durable concrete floor coating.
Elimination of air bubbles and pinholes that are formed due to the outgassing of the concrete*
Ability to achieve a higher dry film thickness and coating uniformity as it is not soaking into the concrete.
Effective in providing a moisture resistance for concrete flooring that has moisture problems.
Primers form a tenacious waterproof barrier for concrete flooring that is devoid of an effective Damp Proof Membrane (D.P.M.) which usually results in virtually any paint lifting and peeling off the surface.
Most epoxy primers are moisture tolerant and work well when applied on concrete that has not fully dried from being cleaned or acid etched.
Some primers are specifically manufactured as oil blocking primers. These solvent-based primers are designed to cover concrete contaminated by oil and can’t be completely cleaned.
How To Choose The Correct Floor Primer
Professional Primers are formulated to penetrate deeper into the substrate’s pores to achieve a better mechanical bond. Their adhesion is often greater than the top coat due to the inclusion of adhesion promoters.
Specialist primers are formulated to cope with all sorts of situations from rising damp, oily surfaces, dusty, unstable substrates, and the many and varied surfaces from concrete to ceramic and from metal to marble.
Due to the penetration capabilities of professionally formulated primers, the surface build is usually lower, but one that provides a great chemical bond with the subsequent top coat or screed.
Primers are also designed to seal the surface from the outgassing of the concrete, where the air will rise and be expelled from the concrete. This can be due to numerous reasons, including a rise in temperature or a change in humidity.
Therefore, using a primer that is specifically manufactured to resist water pressures from below and completely block the possibility of rising damp is highly recommended.
Due to their lower viscosity and thinner film build, primers soak further into the surface. This helps to fully seal the entire surface area, particularly the small voids and divots found on every concrete floor. For this reason, the air is less likely to push up, and if it does, the bubble will pop, and the resin, being thinner, will generally revert and refill the ‘hole’ caused by the bubble.


