How to Program a Garage Door Opener to a Car
The ability to control your garage door opener with your car is a game changer. It makes parking during bad weather convenient. There are multiple ways you can program your garage door and connect it but before you are able to do that, you need to program your garage door opener to your car.
Fortunately, it is relatively easy to program the garage door opener. It should not take longer than 5-10 minutes. Depending on your preparedness and ability to comprehend programming instruction. Additionally, having a helper will make the process much easier.
Keep reading to learn how to program garage door opener to car.
How to Program a Garage Door Opener to a Car
Follow these general guidelines to program your garage door opener to your car;
Note: alterations and differences may exist depending on the specific type of remote you have. Different remotes may have alternative programming processes. These directions apply to the more “universal” remotes on the market.
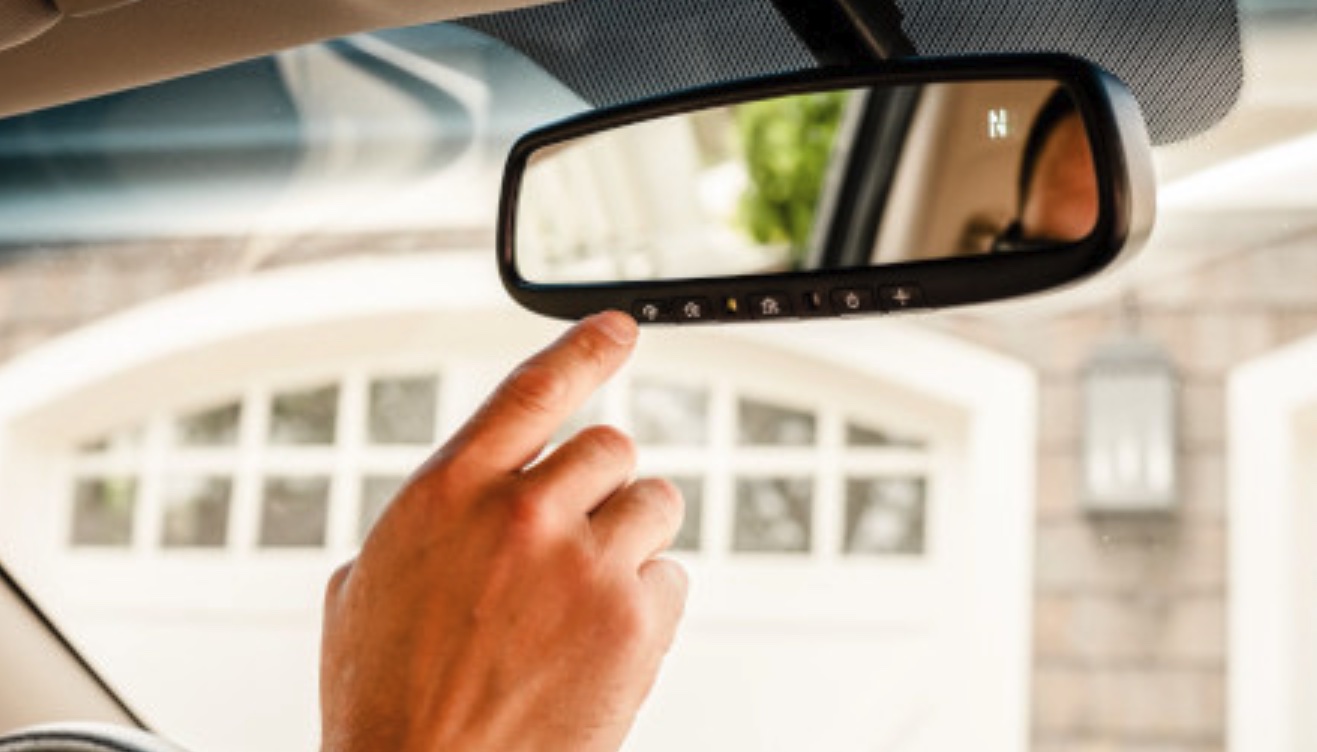
Prep your Car
Clear your car opener’s memory. Even if you’ve just picked up this car, clear its opener’s memory so that you’re starting the pairing process on a clean slate. Put your car into accessory mode (the mode where your car, but not its engine, is turned on). Then, press the leftmost and rightmost buttons on the panel for 30 seconds. The system’s data is now cleared.
If you aren’t sure where the garage door opener is in your car, try checking the area above the driver’s seat, including below the rear-view mirror. It may also be on a panel next to the steering wheel.
Program your Door Opener
Press the “Learn” button on your garage door opener unit. Find the “Learn” button on the back or side of your garage door opener unit (the big box hanging from your garage’s ceiling). It will be placed next to a small LED light. Once you’ve located the “Learn” button, press it to switch the garage door opener into pairing mode.
To access the “Learn” button, you may need to remove the unit’s light lens, which covers the light bulb inside the unit. In some models, you can open the lens by lightly pressing on it until it swings open. Other models may require a screwdriver.
You may need a ladder to reach your garage door opener unit. Be careful to keep your balance.
Press and hold a programmable button in your car. When you’ve pressed the “Learn” button, you’ll have about 30 seconds to get in your car and select the button you want to program to your garage door. Hold this button until the lights of your garage door opener unit flash or you hear 2 clicks.
Note: it can be a little dangerous rushing from a ladder to your car, we recommend that you ask a friend to help you out with this step.
Troubleshooting Failed Programming
Test and troubleshoot any issues with the opener. By pressing the button you’ve programmed in your car once more, your garage door should open or close. If not, take some of the following steps while troubleshooting:
- Check that there’s nothing obstructing the garage door from opening or closing
- Be sure that your car is close to the garage door opener unit, parked either right outside the garage or inside it
- Check that your car was turned on during the pairing process
- Re-do the pairing process once more
If you’re still having trouble, check the manuals for your car and garage door
Programming with a Remote
Program your car with a remote control, as an alternative. In older garage door models, it’s possible to directly program your car garage door opener with a previously programmed remote-control opener.
Hold the remote control next to the car’s garage door opener, and press both the button on the remote control that’s programmed to your door and the button in your car you’d like to program simultaneously. If the light by or on your car’s button begins beeping, then turns solid, you’ve successfully programmed your car.
Newer models of garage doors have security features that no longer let you do this. If you have a newer model, try the steps above, instead.
For certain kinds of garage doors with the Genie brand, you may have to hold the button on your Genie garage door remote control for 10 seconds before pressing the button in your car.
For systems with a hand-held transmitter
Before you begin, Ensure the remote’s battery is new.
Inspect the garage door opener that attaches to your garage door for a “learn” button. You can usually find this button near the antenna radio receiver on the opener.
Next, press and release this button to start programming it to your vehicle. Systems will usually have an LED light that illuminates to indicate when the opener is trying to pick up new radio frequencies.
Take the garage door opener remote and press down the button you want to use as your primary control for opening and closing the door. Press the button for 5-10 seconds, as Hawley advises. The LED light will turn off when the remote is synced with the opener.
For systems with an in-car transmitter
Park your vehicle in your garage.
Next, locate your vehicle’s control panel for the garage door opener. In most cars, it’s near the other primary control buttons or somewhere above the driver’s seat.
There should be a “program” button. Depress it until an LED light flashes.
The vehicle’s built-in remote should then indicate that it’s either automatically linked to the opener or that it’s ready to accept a new keycode command to finish syncing the remote to the opener.
A flashlight and a ladder are two other helpful tools for whichever of you is pressing the opener’s “program” button during the process.
Note: Some systems will require you to press the opener’s program button at the same time as the vehicle’s program button. In this case, you’ll need to enlist a friend to help complete the pairing process.
How to Program Your Garage Door to Your Car Without a Remote
The process for connecting your garage door opener to your car without a remote is slightly different;
- First, you’ll want to find the garage door opener control panel in your car. It can be located above the driver’s seat or somewhere near the rest of the vehicle’s primary control buttons in most car models.
- As noted, your control panel likely has a few different buttons. One of them may be labeled “program” or something similar.
- If your panel includes a “program” (or similar) button, push and hold it for a few seconds until a light flash, or as otherwise directed by your car manual.
- Once keyed, the remote should be ready to accept a new keycode command or automatically link to a garage door opener within its vicinity.
- To ensure your opener connects to the correct garage door panel, Ensure your car is parked in your garage.
- In some instances, while performing the steps above, you may need to use the program button on the control box of your garage door opener as well, perhaps even simultaneously, for a connection to be established. Again, we suggest that you consult your car manual as well as the manual for your garage door opener for further information on additional programming procedures.
- After programming a new keycode or linking the control panel to your garage door opener, allow the buttons to rest for a few seconds.
- After a few seconds, test your program by using the remote button and attempting to open the garage.
How to Program a Remote Control for Your Garage Door
- Press the “Learn” button on your garage door opener unit. Locate this button on the back or side of your garage door opener unit (the big box hanging from your garage’s ceiling). It may be next to a small LED light and antenna. Once you’ve located the “Learn” button, push it to switch the garage door opener into pairing mode.
- To access the “Learn” button, you might have to remove the unit’s light lens, which covers the light bulb inside the unit. In some units, you can open the lens by lightly pressing on it until it swings open. Other models may require a screwdriver.
- You might need a ladder to reach the garage door opener unit. Be sure to keep your balance while on it.
- Press a programmable button on your remote. After putting the garage door opener in pairing mode, you’ll have about 30 seconds to press a programmable button on the face of your remote control. Push this button to program it to the garage door opener.
Troubleshoot the opener to fix any remaining issues. Push the button on your remote control once again to test the garage door. If everything’s gone according to plan, the door should now open or close. If not, troubleshoot the issue by following these steps:
- Check to see if the remote’s battery is dead
- Ensure that there are no obstructions around the garage door
- Repeat the pairing process
- Consult the manuals for your garage door and remote control if you’re still having trouble
How to program the garage door opener on a HomeLink system
This system is compatible with nearly all garage door opening systems, including Liftmaster, Chamberlain, Craftsman, Genie, Overhead Door, Allstar, Wayne Dalton, and so forth. Ensure the garage door opener operates on a frequency of 288-433 MHz. You should be able to find the frequency of your unit on the back of the handheld transmitter.
Note: The receiver, handheld transmitter, and in-car transmitter must all be in good operating condition to ensure success when you program the garage door opener. Ensure that children and pets stay away from the garage.
To program your garage door opener;
- Insert a new battery in the handheld transmitter. Turn the key to the accessory (“ACC”) position before you begin programming the garage door opener.
- For first-time programming (or if you think the garage door opener has been previously programmed), press the two outer buttons on the transmitter for about 20 seconds, until the light starts flashing.
- On the transmitter, hold the button to be programmed down until it begins flashing slowly (20-30 seconds). Keep holding the button down for the next step.
- Grab the handheld transmitter in your other hand and point it toward the flashing light from about two inches away. Press the operating button on the handheld unit.
- Once the light starts flashing faster, the frequency has been entered into the HomeLink transmitter. Release both buttons.
- This step is easiest with a helper. You will need a ladder and, quite possibly, a flashlight. On the garage door opener receiver (i.e., the motor, located inside the garage), press the training button (also called a “smart” or “learn” button). The button may not be labeled, but it will have a small light next to it that flashes when the button is pressed.
- In the car, with the key still turned to ACC, press the button you programmed earlier on the in-car transmitter for three seconds. Remove your finger from the button, then press again for another three seconds. If the garage door hasn’t moved yet, press the button for another three seconds. Once the door moves, the garage door opener has been programmed.
If your garage door opener programming is unsuccessful;
- Unplug the receiver for a minute, then try again.
- Ensure your new battery in the handheld transmitter is installed correctly.
- If you still can’t properly program the garage door opener, call the HomeLink customer service department (1-800-355-3515).
- If problems persist, you may need to purchase a new garage door opener.
Note: if the indicator light stays on continuously, the programming is complete, and the garage door opener should function. If the indicator light flashes or if it flashes briefly before becoming continuously lit, you have 30 seconds to perform the following step.
How to Program a LiftMaster Garage Door to Your Car
To program your Liftmaster garage door opener, follow these steps;
Study the lay of the land
The first thing you should do is examine and become familiar with the make and model of your garage door opener. You may determine the model of your Liftmaster and learn the locations of its buttons by consulting the user manual for the device.
Additionally, search for the Homelink buttons that are pre-installed in your vehicle. It is necessary to check the keypad to see if there is a button labeled “program,” “learn,” or another button with a similar function.
The location of these buttons is typically found above the seat of the driver. Each car model is designed differently, and the buttons may differ.
Now that you know where the control button for your Liftmaster garage door opener model is located, you need to examine it to see what each button is used for.
If you want to see the most essential information regarding your controller, the user manual that came with your garage door opener is the best thing to consult.
The control panel for your garage door will probably include a button labeled “program” or “learn code” on it. The objective is to clear out any previously programmed settings and enter new ones. However, before you begin, you need to understand the keys clearly.
Reset your Car’s Programming
Now is the time to go into your vehicle and delete any old memories stored in the buttons on your dashboard. This is to restore the default settings on your Liftmaster.
To accomplish this, press and hold the first button on your panel while simultaneously pushing and holding the third button too for a few seconds.
The LED light, typically red, will turn on when you continue holding the buttons down. Maintain pressure on the button until the LED light begins to blink. This process can take anywhere from 5 to 20 seconds to complete, depending on the type and model of your Liftmaster.
You should release your grip on the buttons as soon as you observe the light flashing. After this, you have successfully reset that memory to default.
Program the Garage Door Opener
Now, go inside your garage and look for the control for the garage door. You should look for a button that says either “program” or “learn code.”
You can usually find them on the back side of your garage door opener. Once you have located the button in question, press it, and a LED light will begin flashing after it has been activated.
After this, you have around 30 seconds to complete the process. Go inside your vehicle and hit the button that has been programmed three times.
Your garage door opener should be connected to that button once you accomplish this. When you have finished doing this, the garage door should begin to close. Ensure that your vehicle is the appropriate distance away from the garage doors for them to function properly.
Test the Programming
After you have finished all the steps involved in the programming process, it is time to test it to see whether or not everything is operating normally.
Get in your vehicle, drive a short distance from your garage, and then on the way back, when you are standing in front of the garage, press the button to see if the garage door opens. If it does, you have successfully programmed your automobile to work with the Liftmaster garage door opener.
How to Program the Chamberlain garage door opener to your Car
To program your Chamberlain garage door opener, follow the steps below;
- Press the “Learn” button on your door control, if it has one. Not all door controls (the device on your wall you can use to open your door) will have learn functions, but yours may. If your door control has a plastic cover that’s able to be lifted off, it may be located right underneath it. Press this button once to access the door control’s pairing mode.
- If your door control looks more like a doorbell, you may be able to access the “Learn” function by holding the light button on the side of the device while pressing and releasing the front button.
- If you have a smart door control, you can activate pairing mode through its menu. Navigate to the program tab of the menu, then select “remote.”
- Push a programmable button on your remote control. Select and press one of the face buttons on your remote control—it doesn’t matter which one. The garage lights will flash, or you might hear 2 clicks. This tells you that you’ve successfully programmed your remote control.
- Some types of remote controls, like the Chamberlain Universal Remote, may need to be put into pairing mode before they can be programmed. If you press the bottom button for 15 seconds, then release it, the remote will be in pairing mode for 60 seconds.
- Use your remote control to test out your garage door opener. If the garage door opens, the device has been successfully programmed. If not, you may have objects near the door obstructing it. If this isn’t the problem, you may have to try programming the remote control with the garage door opener.
How to Program a Chamberlain Door Opener Keypad
- Find the “Learn” button on your garage door opener. This button is above the antenna wire that hangs from the garage door opener’s motorhead. If your button is hidden by a light cover, you’ll need to remove this cover first. Next to the “Learn” button is a small LED light, which is used to identify the type of garage door opener you have.
- Look at the LED light inside the opener to find your opener ID. The color of the LED light indicates the type of garage door you have, which determines your opener ID. Check the manual of your door opener keypad to figure out what ID corresponds to your garage door.
- Although there are exceptions, a rule of thumb is that doors with a red/orange LED have an ID of 2, doors with a purple LED have an ID of 3, doors with a green LED have an ID of 4, and doors with a yellow LED have an ID of 8.
- However, your specific garage door brand may have a different ID, so double-check your manual to be sure.
- Press and hold the * and # buttons on your keypad. Your keypad will flash for a bit, then stop, at which point you can let go of the buttons. It’s now ready to be programmed.
- Program your keypad. Enter a 4-digit PIN, which can be anything you choose, then press the # sign. After this, enter your ID number, and press the # sign again. Your keypad is now programmed.
- Press the “Learn” button on your garage door opener. You don’t have to hold it for long—a simple push, then immediately release it. Your garage door opener can now be to be paired with the keypad.
- Enter your PIN number, then the “0” key. For most garage door models, after entering this code, your keypad will be paired to the garage. If you have a Genie or Overhead Door unit, press the “0” key twice.
- Test your keypad. Wait until the lights of your garage turn off. Then. enter your PIN into the keypad, before hitting the “0” key. If your garage door opens, you’ve successfully programmed your device.
- Change your PIN (if needed). If you’re looking to reprogram your PIN code, simply enter your existing PIN code, press *, enter your new PIN, and press * again. Test your new code by entering it into the keypad and pressing the “0” key.
- Start by looking for a “learn” button somewhere on your garage door opener (the actual machine the door is attached to in your garage). While the button may have a different name, it should be similar in nature and is usually near the antenna radio receiver.
- Most of the major buttons, like “learn,” have LEDs next to them indicating when they are being pressed and/or receiving commands.
- Once you locate the appropriate “learn” button, press and release it, which should put the control unit of your garage door opener into a programmable state. At this point, it will be open to new radio frequencies.
- From here, take your garage door opener remote, which should have at least one or two buttons that can be pressed to open and close your garage door.
- With this remote, push the button you want to use as your primary control for your garage door for a few seconds. In most cases, 5 to 10 seconds is usually a safe bet to ensure you have achieved the necessary duration of time.
- Once the garage door opener’s control unit is no longer waiting for a programmable signal, the LED light should turn off.
- Test your new program by using the remote control and attempting to open and close your garage door
- Again, this process may need to adapted depending upon your remote and garage opener’s specific programming requirements. If the above process proves to be unsuccessful for you, try to locate the user manual for your particular remote and garage door opener and follow the instructions located within. If you can’t find the manual on hand, do an online search to see if it’s available.
How to Program a Chamberlain Remote Control with the Garage Door Opener
A remote control is needed to operate the garage door opener should your car programming malfunction. To program a Chamberlain remote;
- Find the “Learn” button on your garage door opener. The “Learn” button is how you’ll be programming your remote. It’s located above the antenna wire that hangs from the garage door opener’s motorhead (the garage door opener is located on your ceiling). It may be covered by a light cover, which you’ll need to remove to access it. Next to the “Learn” button is a small LED light, which is used to check the compatibility of the opener with remote controls.
- Check the LED light inside the opener for compatibility. The color of the LED light lets you know if your remote is compatible. The LED light next to the learn button tells you which radio frequency the garage door opener uses. You can see what kinds of openers your remote is capable of working with by checking its manual.
- Garage door openers come with a few different colors for their “Learn” buttons—red, yellow, green, and purple. Keep in mind that over time, red buttons can look orange, and purple buttons may appear brown.
- While current Chamberlain garage door remotes are compatible with nearly all doors produced after 1993, some older remotes may have more limited compatibility.
- If your garage door opener isn’t compatible with your remote, you may want to purchase a newer model.
- Clear your garage door opener’s memory (optional). If your door was previously programmed, clear its memory. Have your garage door opener forget its previous connections by holding the “Learn” button for about 6 seconds. The LED light for the “Learn” button should turn off, at which point you’ll know that your garage door’s previous connections have been cleared.
- Push the learn button on your garage door opener. Switch on the programming mode of your garage door opener. This just takes a simple button push—press the learn button on your garage door opener, then immediately release it. Your garage door opener can now be to be paired with a remote control.
- Press a programmable button on your remote control. After pressing the learn button, you have 30 seconds to program the remote. Push one of the face buttons on your remote control—it doesn’t matter which one. The garage lights should flash, or you may hear 2 clicks. This lets you know that you’ve successfully programmed the remote control.
- Some types of remote controls, like the Chamberlain Universal Remote, may need to be put into pairing mode before they can be programmed. If you press the bottom button for 15 seconds, then release it, the remote will be in pairing mode for 60 seconds.
- Test out your garage door opener. Push the programmed button on your remote again to test the connection. If your garage door opens, you’ve successfully programmed your remote. If not, you may have to do some troubleshooting.
Try some of the following steps:
- Ensure that the area around the garage door is clear.
- Check your manual once again to Ensure that your opener is compatible with your garage door.
- Redo the programming process.
- If nothing else works, contact Chamberlain customer service.

