How to Program a HomeLink Garage Door Opener Without a Remote
If you have lost your original HomeLink garage door remote, operating it can be a bit of a pickle. This can be especially complicated if you have a new car and you need to link it to the garage door opener.
Keep reading to learn how to program your HomeLink system without the original remote.
How to Program a HomeLink Garage Door Opener Without a Remote
Ensure your automobile is turned off, all doors are locked, as well as the key is taken from your vehicle. Then clear all prior factory programming using the key from the vehicle. You should also lock the door. To lock the door, press the two buttons from the outside of the car’s HomeLink at that moment.
Keep holding them both firmly till the vehicle LED begins to flicker quickly. This procedure could take minutes so when the flickering ceases, release your grip, and then all the previous programs might be cleared.
After you’ve finally removed the factory programs, you may start customizing the HomeLink device. To begin, pick and choose the HomeLink key that will serve as the vehicle garage door operator. Then tap and hold this key, as well as the broadcast icon.
Continue to hold both buttons together till the HomeLink Indicator begins to blink faster. It has been flashing at a reasonably slow speed before setting, so pay more attention to the modification.
Next locate the ‘learn’ key as it varies in every vehicle, but mostly in vehicles; you can find this near where the Radiohead meets the floppy antennae. Once you’ve found the learn key, hold it firmly till the led indicator illuminates. In many cases, a red light will indicate that you do have 30 sec to finish this process.
Lastly, start putting the program on a trial if you think you’ve done a good job programming it. Try pressing the preset key within the car to test if the garage door opens or closes on instructions to determine if indeed the process is done accurately. If it happens, you’ve correctly set up the HomeLink without a remote.
For Rolling Code
For rolling code Garage door opener that means as a protection precaution, the code updates automatically for each use. It’s sort of like installing a new lock each time you leave the house with a different key. The rolling code is used for most modern devices.
Make sure the car door is locked, and the key is out of the ignition. Inf you attempt to go through the process of programming a HomeLink garage door opener without a remote will not work if the car door is open or the key is in the ignition. Because of this, the first thing you need to do is make sure the door is closed, and the key is out.
Clear out any previous programs
To do so:
- Push and hold the two buttons on the exterior of your car’s HomeLink interface at the same time.
- Click them before you see that the LED in-car starts blinking easily. It could take up to a minute.
- Program the button of your choice as the transmitter for in-car garage doors
- Press and hold down the desired HomeLink button with the transmit button.
- Hold these two buttons down at the same time until you see the HomeLink LED start flashing at a much more rapid pace.
- Keep in mind that it should have been blinking at a slow pace prior to programming.
- Press the learn code button
The “Learn” button on your garage door opener is located above the antenna wire that hangs from the motor head, it may also be under a light cover. The “Learn” button will be either green, red/orange, purple or yellow.
- Once you have located the button press it momentarily.
- Upon pressing the button, the indicator light will turn on.
- It will be a red light in most cases.
- When you see it starting to blink, you will need to complete the programming process within 30 seconds.
- Test out the system
- Press the programmed button and see if it opens and closes your garage door. If it does, you have been successful. If it does not, go through the series of steps again.
For Fixed Garage Door Opener
There are tiny switches that you can move around to generate whatever passcode you want. Find it similar to your phone’s password. It will remain the same until you feel it is no longer secure, at which point you will replace it.
Note: there are no guidelines for programming a HomeLink garage door opener without a remote if you have an older unit. There is no way to manually set a code in the HomeLink system. In order to program it, you must use a remote.
The process is mostly the same. Make sure the key is not in the ignition, the door should be closed, clear out any old programming, etc.
You only need to hold the remote up to the HomeLink button you want to program and push both that button and the remote button at the same time.
- Hold them until you see the LED on the in-car remote begin to flash rapidly.
- After that, it should be a duplicate of the remote.
- Once you program the door opener, you can then add a new remote.
The first thing you need to do is buy a replacement from the opener’s original manufacturer. You can also buy a universal multi-brand remote. Ensure that your garage door opener is compatible with the new remote.
Ensure that your new remotes are compatible and have good batteries before programming.
- Use a ladder or a bench to access your garage door opener unit. Also, make sure that your new remotes are within arm’s reach.
- Find the “learn” or “smart” button at the back of your opener unit. Although some units have this button on the outside, many units have it hidden by a rear cover.
- Press and hold the “learn” button for one second, then release. The LED indicator light beside the “learn” button should light up.
- Within 30 seconds of releasing the “learn” button, press and hold the button that you want to program on your new remote.
- Release your remote’s button once you see the LED indicator blink.
- Repeat steps 3 through 5 for any other remote that you want to add.
- Once done with programming all new remotes, test them on the garage door by pressing their programmed buttons.
HomeLink Garage Door Training
Note: Before programming HomeLink, make sure that people and objects are out of the way, and park your vehicle outside of the garage. Also ensure you have a new battery for your garage door remote for more accurate programming.
If your garage door opener uses rolling code, you may need a stepladder or other sturdy, safe device to reach the “Learn” or “Smart” button later in the programming.
HomeLink and Garage Door Training Steps:
For your first-time training HomeLink, it may be helpful to clear your HomeLink. To do this, press and hold the outer two HomeLink buttons for 10 seconds. DO NOT release until the indicator light changes from solid to flashing rapidly. Skip this step when training additional buttons.
Holding your garage door remote 1-3 inches (3-7 cm) away from your HomeLink buttons, simultaneously press and hold the HomeLink button you would like to train and the button on your handheld garage door remote. DO NOT RELEASE until the HomeLink indicator light changes from flashing slowly to either solid or flashing rapidly.
Press and release the trained HomeLink button. If you have a fixed code device, your HomeLink indicator light will be solid, and pressing the trained HomeLink button should now activate your garage door.
If your garage door is not functioning, and the indicator light is flashing rapidly, you likely have a rolling code device, and have a few more steps to complete, which we will get to in the next section (“Rolling Code Training”).
Rolling Code Training:
Have a second person to help you to make the following steps quicker and easier.
The next steps are time sensitive, and may need to be tried multiple times.
If you are unable to reach the “learn,” “smart,” or “program” button, we recommend using a stepladder or other sturdy, safe device. Do not stand on your vehicle to complete these steps.
On your garage door opener in the garage, locate the “learn,” “smart,” or program” button. The shape and color may vary by manufacturer.
Press the learn, smart, or program button. Depending on the brand of your garage door opener, the indicator light may begin blinking.
Within 20 seconds, return to your vehicle and press and release the programmed HomeLink button. Repeat the “press and release” sequence up to 3 times to complete the training process. HomeLink should now activate your rolling code equipped device.
To train other buttons, skip the “clearing” process at the beginning of this video, and simply follow the other few steps using an un-programmed HomeLink button.
Clearing:
Before returning a leased vehicle or selling your vehicle, it is best that you clear any programmed HomeLink buttons.
To do this, simply press and hold the outer two HomeLink buttons for 10 seconds, until the HomeLink indicator light changes from solid to blinking.
Reprogramming a Single HomeLink Button:
When the following procedure is performed, buttons which already have devices registered to them can be overwritten without clearing other programmed buttons.
Press and hold the desired HomeLink button.
Continue holding the HomeLink button for about 20 seconds, and the HomeLink indicator light will start slowly flashing. While continuing to hold the HomeLink button, position the garage door remote 5-30cm below the HomeLink buttons and press and hold the garage door remote until the HomeLink indicator light changes from slowly flashing to solid or rapidly flashing. This change indicates the frequency signal has been learned.
Press and hold the programmed HomeLink button and observe the indicator light.
If the indicator light is solid, programming is complete, and your device should activate when the HomeLink button is pressed and released.
If the indicator light blinks rapidly, proceed with “Rolling Code Training.”
How Do I Program My HomeLink to My Car?
Now that you have at least one working remote for your garage door opener, you can now program your car’s HomeLink system to open your garage door as well.
Before you start programming your car’s garage-opening button, you need to do a few safety checks:
Ensure that the area around the garage door is clear of people or objects.
Check if your remote’s battery is still strong because the programming procedure consumes more battery charge than basic door opening or closing.
If you have a rolling code garage door opener, then you need to keep the garage door open. You also need to position a bench, chair, or ladder under the opener’s main unit.
Make sure that you can readily press the opener unit’s “learn” or “smart” button easily. Unscrew or open any panels that are hiding the button.
How To Program A HomeLink System
If you’re programming your car’s HomeLink system to your garage door opener for the first time, then the following steps are perfect for you.
Before following the steps, make sure that you have your programmed garage door remote as well as your vehicle’s keys with you.
Start your vehicle and park it outside the garage, preferably close enough to the garage door or from where you want to use your HomeLink system.
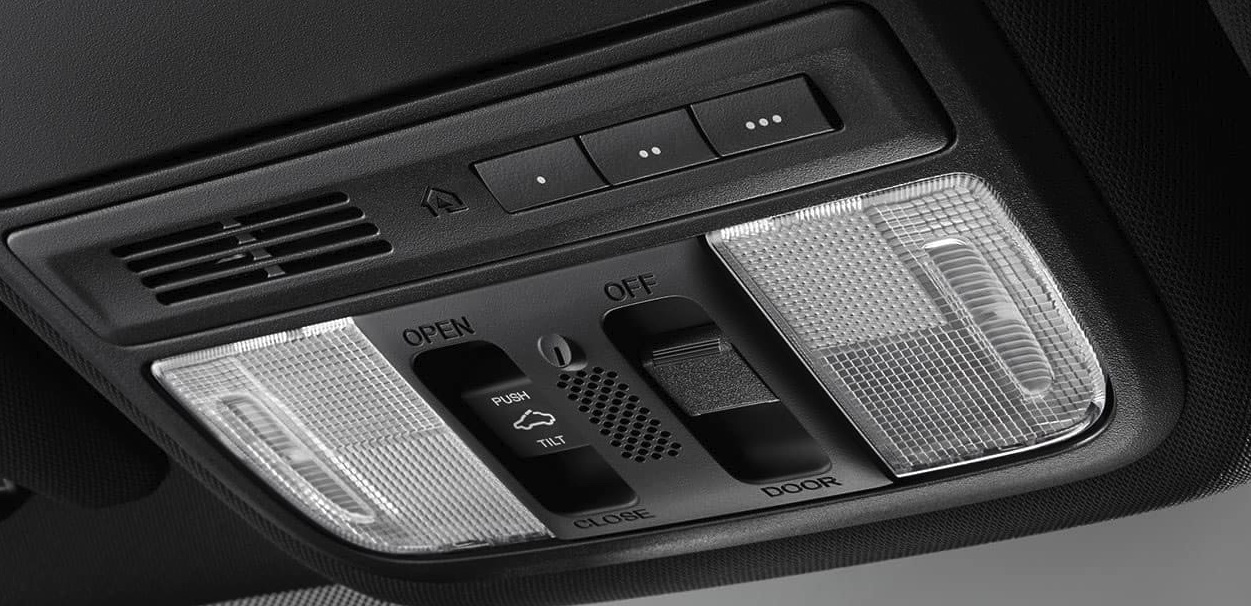
While inside your car, find your HomeLink buttons. In factory-installed HomeLink systems, the buttons should be in one of three possible areas:
- The driver-side visor
- The overhead console, near the map lights or reading lights
- At the bottom of the rearview mirror
With the engine running or the ignition in the “on” position, hold up your garage remote near the HomeLink buttons (approximately one to three inches away).
At the same time, press and hold the remote’s programmed button and the HomeLink button that you want to program.
The HomeLink button’s indicator light will start to blink slowly. The next few steps will depend on whether you have a rolling code or a non-rolling code opener.
For Non-Rolling Code Openers
The HomeLink indicator light will change its pattern from slowly blinking to a solid light. Release the remote and HomeLink buttons once this happens. Press the programmed HomeLink button twice to end the programming and close the non-rolling code garage door.
For Rolling Code Openers
The HomeLink indicator light will blink faster if you have a rolling code garage opener. Release both the remote and the HomeLink buttons once you see this change. On some rolling code openers, this is already sufficient. You may press the HomeLink button twice to end programming and operate the garage door.
However, if your garage door opener doesn’t respond, you will need to follow a few more steps:
- Ensure that the parking brake is set and keep the ignition on.
- Step out of your vehicle and go inside your garage to access the opener’s main unit.
- Press and hold the unit’s “learn” or “smart” button for one second. After the opener unit’s LED indicator lights up, release the “learn” button.
- Within 30 seconds after releasing the “learn” button, you must return to your vehicle and complete the following steps.
- Press and hold the assigned HomeLink button for 2 seconds, then release.
- Repeat this press, hold, and release pattern 3 times.
- Press and release the assigned button normally, without holding. Your garage door opener should now respond.
Note: Your HomeLink system’s three programmable buttons can open three different garage doors or home devices. Of course, each button needs to be programmed separately and each device should be HomeLink-compatible.
Reprogram HomeLink garage door opener
- Press and hold the two outside buttons on the HomeLink® system until the LED starts to blink, release buttons.
- Press and hold the desired HomeLink® button and the transmit button on your rolling code transmitter at the same time until the HomeLink® LED changes from a slow blink to a rapid blink. (Your system is now programmed)
- Locate the learn code button on your garage door opener. (These are located under the light cover or on the rear panel depending on model)
- Press the learn code button on the garage door opener, a red LED will start to blink. (You will have 30 seconds to complete programming)
- While the LED on the garage door opener is blinking, return to the vehicle and press the pre-programmed HomeLink® button 4 times. (Or until the garage door operates).
For newer garage door models;
First, you’ll need to identify the model of your garage door opener before using these instructions to program your opener to HomeLink®. It should be Destiny®, Odyssey®, or Legacy® 850.
Then identify the serial number (shown as S/N), which can be found on the back or front of opener depending on the model. The first 5 digits of the serial number should be 11291 or greater. For any serial number smaller than 11291, please visit these HomeLink® programming instructions.
Setting Up the Remote Or Ensuring It Is Set Up
- Press chosen button on remote, if red, skip step 1. If green then proceed to number 2.
- If you press your chosen button and the LED light is red, then your remote is already set to program and you may skip the rest of step 1.
- If the LED light is green then hold the button you’ve chosen until both a red and green LED light are shown together.
- Once they are both lit, let go, and quickly press and release the chosen button twice.
- The next time you press it the light should be red.
- This signals that your 3-button remote is now ready to program to your HomeLink® system.
Setup HomeLink Button
- Choose the HomeLink® button that you want to use to open your door.
- For the three-button remote hold the same button you changed to the red LED for about 10 seconds.
- Once both the red and green LED lights are on and while continuing to hold the remote button down, press your HomeLink® button at the same time until the indicator light on HomeLink® blinks slow and then fast.
- Once it blinks fast, release both the remote and HomeLink® button. You are now ready to program your HomeLink® to your garage door opener.
Programming HomeLink to Your Garage Door Opener
Step 1: On the opener, press and hold the square program button until the round blue LED light comes on then release the button. The long LED light will flash purple.
Step 2: Press the desired HomeLink button for one second and then release. Press that same button again for one second and release again. On the opener the long LED and the round LED light will both turn blue and then turn off. Pressing the HomeLink button again will cause the garage door to move. HomeLink has now been programmed for your Overhead Door garage door opener.
Note: If you cannot find your program button on the power head, refer to your Operation Manual.
Ford HomeLink programming
- First, turn on your vehicle.
- Then, hold your old garage door transmitter a couple of inches away from the HomeLink button panel. You’ll find this panel on the overhead visor of your driver’s seat.
- Press and hold both the transmitter button and the HomeLink button you’d like to program with your garage door opener. The HomeLink indicator light will switch from a slow blink to solid or flashing rapidly. Once it switches, release both buttons.
- Then press and hold the HomeLink button again for 5 seconds.
- Your indicator light should become solid now and you should be able to open your garage door!
- If your garage door doesn’t open, follow these extra steps:
- Press and hold the learn/smart button on your garage door opener motor inside your garage.
- Within 30 seconds, return to your vehicle and press and hold the HomeLink button for 2 seconds. Release and press again for 2 seconds.
- Now, your garage door should be linked and you should be able to open it with the HomeLink button.
How to Set Up Toyota HomeLink
Setting up and using the HomeLink system in your Toyota is a simple and straightforward process, and should only take a few minutes. All you need is your current garage or gate opener, be within range of said garage or gate, and of course your new Toyota. Once ready, follow the written instructions to set up your HomeLink system.
- Hold your garage or gate remote within 1-2 inches of your Toyota HomeLink system.
- Press and hold both the remote button and your desired HomeLink button. The HomeLink indicator light should now begin flashing quickly, or show solid green.
- Release both buttons, then press the HomeLink button twice to confirm.
- Press the HomeLink button once to test garage door functionality. If the door does not open, continue with steps 5-7.
- Enter your garage and locate the garage door opener. Once located, press the LEARN or SMART button on the back of the device.
- Return to your Toyota within 30 seconds, and press the HomeLink button three times.
The door should now be paired, and can now be opened with both your remote, and the HomeLink system.
HomeLink mirror programming without remote
Follow these steps for mirror programming;
Bluetooth-Enabled Mirrors
- From your HomeLink Devices screen, select your paired HomeLink Mirror.
- Select which of the three buttons you would like to use to activate your garage door, then select ‘Garage Opener’.
- Continue to follow the prompts to complete your garage door programming.
Legacy Training – Non-Bluetooth Mirrors
- From your HomeLink Devices screen, select the menu icon.
- From the main menu, select ‘Opener Programming’.
- Then follow the step-by-step programming instructions to program/reprogram a button or reset your HomeLink device.

