Ryobi Leaf Blower How to and Troubleshooting Guide
Ryobi gadgets have a reputation for being durable and efficient. Their leaf blowers are highly ranked due to their powerful engine and long battery life. However, even the best gadgets do break down from time to time. Keep reading to learn how to use your leaf blower more efficiently and troubleshoot any problems it may have.
Ryobi Leaf Blower Won’t Start
Here are the top reasons why your Ryobi leaf blower won’t start;
Worn out Spark Plugs
Inspect the spark plug for signs of wear or damage. If the porcelain insulator is cracked, an electrode is burned away or damaged, or there is heavy carbon buildup at the electrode, replace the spark plug.
To determine if the spark plug is defective, use a spark plug tester. You should see a strong spark between the tester’s terminals when the engine is cranking. If there is no spark, this indicates that the spark plug is defective and should be replaced.
Clogged Carburetor
The carburetor might be clogged. A clogged carburetor is most commonly caused by leaving fuel in the leaf blower for a long period of time. Over time, some of the ingredients in the fuel may evaporate, leaving behind a thicker, stickier substance.
This sticky fuel can clog up the carburetor and prevent the engine from starting. If the carburetor is clogged, try cleaning it with carburetor cleaner. If cleaning the carburetor isn’t effective, rebuild or replace the entire carburetor.
Defective Recoil Starter
The recoil starter assembly engages the crankshaft to turn over the engine. If the recoil starter assembly is defective, the leaf blower won’t start. Remove the starter assembly and inspect it to determine if it is working properly.
When you pull the starter rope, tabs extending from the pulley and cam should grab the hub on the engine, causing the engine to turn. When you release the rope, the tabs should retract and the rope should rewind back on the pulley.
Check this too: Best 20 Gallon Air Compressor
Faulty Recoil Starter Pulley
The recoil starter pulley winds up the starter rope when the rope is not in use. If the recoil pulley is broken or stuck, it won’t be able to rewind the starter rope. As a result, the engine won’t start. If the recoil starter pulley is broken, replace it.
Broken Rewind Pulley and Spring
The rewind spring might be broken. When the starter rope is pulled and released, the rewind spring recoils the starter rope onto a pulley. If the rewind spring is broken, the rope won’t be able to recoil onto the chainsaw pulley.
As a result, the engine won’t start. If the rewind spring is broken, replace it. Many rewind springs can be replaced individually, but it may be easier to replace the entire rewind pulley and spring assembly.
Broken Rewind Spring
The rewind spring might be broken. When the starter rope is pulled and released, the rewind spring recoils the starter rope onto a pulley. If the rewind spring is broken, the rope won’t be able to recoil onto the chainsaw pulley.
As a result, the engine won’t start. If the rewind spring is broken, replace it. Many rewind springs can be replaced individually, but it may be easier to replace the whole recoil starter assembly.
Clogged Fuel Filter
The fuel filter might be clogged. A clogged fuel filter is most commonly caused by leaving fuel in the leaf blower for a long period of time. Over time, some of the ingredients in the fuel may evaporate, leaving behind a thicker, stickier substance.
This sticky fuel can clog up the fuel filter and prevent the engine from starting. If old fuel was left in the leaf blower, drain the old fuel from the fuel tank and replace the fuel filter.
Clogged Spark Arrestor
The spark arrestor is a small screen that prevents the engine from emitting sparks. Over time, the spark arrestor can become clogged with soot. If the spark arrestor is clogged, the engine may not start. To unclog the spark arrestor, remove it and clean it with a wire brush. You may also replace the spark arrestor.
Clogged Air Filter
The air filter may be clogged. If the air filter is clogged, the engine will get too much fuel and not enough air. As a result, the engine may not start. If the air filter is clogged, replace it.
Defective Ignition Coil
The ignition coil sends voltage to the spark plug while the engine is running. If the ignition coil is defective, the engine may not start. Before replacing the ignition coil, ensure that the spark plug is working properly.
If you have confirmed that the spark plug is working properly, test the ignition coil with an ignition coil tester. If the ignition coil is defective, replace it.
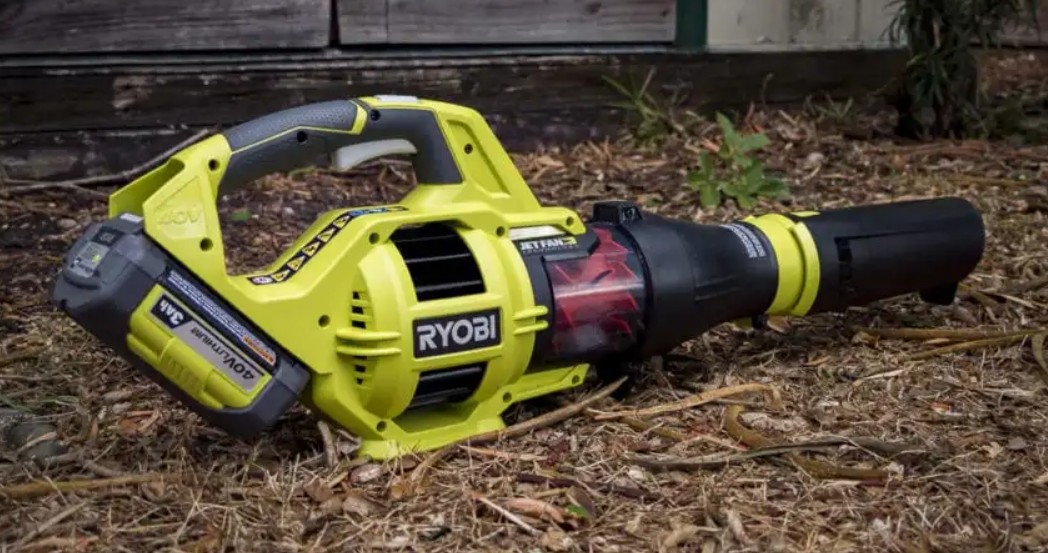
How Long Does A Ryobi Cordless Leaf Blower Last?
If you run the Ryobi cordless leaf blower constantly at full speed, you will achieve runtimes of approx. 20 minutes with the 2.0 Ah battery and around 40 minutes with the 5.0 Ah pack. Run times of the larger batteries are correspondingly longer.
Ryobi Leaf Blower Carburetor Cleaning
The leaf blower carburetor can get clogged either by a poor air filter, dirty fuel, or sitting fuel. This can lead to various issues such as hard starting, poor running, decreased performance, and poor fuel economy. Follow the steps below to clean the carburetor.
Items Needed
Here is a list of the tools you’ll need to complete the carburetor cleaning.
- Carburetor cleaner
- A small container
- Screwdrivers or Allen keys to loosen the bolts
- Spark plug spanner
- Compressed air blower or fan blower
Cleaning steps;
- Remove the carburetor from the leaf blower.
- You can remove the carburetor by following these easy steps:
- Drain the fuel in the pan or tub to empty the fuel tank.
- Disconnect the spark plug connection to prevent any harm.
- Unscrew the air filter cover carefully.
- Carefully remove the carburetor by loosening the screws.
- Disengage the air-box from the carburetor throttle and choke levers.
- Eliminate the fuel lines for the complete removal of the carburetor.
- Make sure to remember the removal process for the reinstallation process.
- Carefully pull the carburetor off by dismounting it from the engine while protecting the engine gasket.
- Clean the dust, dirt, or debris by using compressed air, soft bristle brush, and carburetor cleaner solvent for easy and quick cleaning.
- Fill a metal pan with carburetor cleaner and place the carburetor in the pan to soak for several minutes.
- Pick up the carburetor and allow as much of the cleaner to drain off as possible.
- Wipe the outside dry with a clean rag.
- Clean the fuel filter by using carburetor cleaning spray for dust and brush for the clogged dirt.
- You can use the tube applicator to blow out the carburetor housings.
- You can also clean the housings directly spraying through the fuel connecting tubes.
- Using compressed air, blow out the extra solvent and rest of the residual from the carburetor ports to ensure the complete cleaning.
- Use compressed air to dry out all the ports, housings, and the entire carburetor.
- Reassemble the carburetor by following the disassembly process in reverse.
- Blow out any cleaner left in the passages of the carburetor, using pressurized air.
- Block the low and high mixture screw holes with your fingers, and spray carburetor cleaner through the pickup orifice.
- Blow air through the orifice to dry it, and reassemble the carburetor to complete the job.
- Reconnect the fuel lines to the carburetor correctly.
- Set the carburetor right back into the air-box by performing reverse tracking.
- Install the carburetor by adequately mounting the screws at the specific location on the engine.
- Reconnect the spark plug wire for spark ignition.
Safety Reminders;
- Clean the air filter by checking the flow of the air through it during the carburetor cleaning process.
- Ensure the proper protection of eyes and skin to prevent any harm from the solvents.
- Clean and replace the air and fuel filters as required.
- Refill the engine with the clean, new, and fresh oil after the cleaning process.
- Make sure before reinstallation that there is no leakage and blocking in the fuel lines and the primer bulb.
How to Replace the Carburetor on a Ryobi Handheld Gas Leaf Blower
If falling leaves and a faulty blower are threatening to bury you beneath a pile of debt and debris, it’s time to face the fix. Whether you are a seasonal garden enthusiast or a seasoned landscape professional, eReplacementparts.com provides the parts, procedures, and facts you need to fearlessly fix what fails you.
A steel heart within a device comprising plastic, metal, and wire; the carburetor fuels the vital fires that keep your small engine alive. While routine maintenance and tuning can help extend the life of this device, time and trauma sometimes decide otherwise. Difficulty starting, rough idle, high idle, false-start, no-start, excessive fuel consumption, fuel leakage: these are the signs of a carburetor in decline. When they begin to multiply, it might be wise to change the entire assembly.
When all attempts have failed to revive a once-thriving carburetor, this article will guide you through the steps required to replace and reignite the steel heart of your machine.
- Remove the air filter cover.
- Unscrew the retaining bolt and pull gently to remove the air filter cover.
- Remove the air filter base.
- Remove the two nuts holding the air filter base using a ratchet wrench.
- Remove the air filter base.
- Remove the throttle cable from the carburetor.
- Retract the throttle arm slightly to create slack in the throttle cable; remove the cable from the carburetor assembly.
- Remove the fuel lines from the carburetor.
Note: It is advisable to clamp the fuel lines prior to removal. If you do not have fuel line clamps, you can drain the fuel from the fuel tank.
- Clamp fuel lines with fuel line clamps.
- Use a flathead screwdriver and/or long-nosed pliers to disconnect the fuel lines from the carburetor.
- Remove the carburetor from the engine.
- Slide the carburetor assembly off of the retaining bolts and away from the engine.
- Remove the carburetor gasket from the heat dam assembly (or verify that the gasket is still connected to the carburetor throttle plate).
- Reinstall the carburetor assembly.
Note: During installation, ensure that the throttle plate is facing the engine, and the choke plate is facing away from the engine.
- Reinstall the carburetor gasket.
- Reinstall the carburetor assembly.
- Reinstall the air filter base.
- Secure the air filter base and the carburetor to the engine with the two nuts removed earlier.
- Reinstall the fuel lines.
- Reattach the fuel lines to the carburetor and remove the fuel line clamps.
- Reinstall the throttle cable.
- Retract the throttle arm slightly and using long-nosed pliers — install the throttle cable into the attachment recess.
- Reinstall the air filter cover.
- Reposition and seat the air filter gasket; align and secure the air filter cover.
Ryobi Leaf Blower Running Rough
Below are some reasons why your leaf blower is running rough;
Clogged Carburetor
The carburetor might be clogged. A clogged carburetor is most commonly caused by leaving fuel in the leaf blower for a long period of time. Over time, some of the ingredients in the fuel may evaporate, leaving behind a thicker, stickier substance.
This sticky fuel can clog up the carburetor and cause the engine to run roughly. If the carburetor is clogged, try cleaning it with carburetor cleaner. If cleaning the carburetor isn’t effective, rebuild or replace the entire carburetor.
Clogged Fuel Filter
The fuel filter might be clogged. A clogged fuel filter is most commonly caused by leaving fuel in the leaf blower for a long period of time. Over time, some of the ingredients in the fuel may evaporate, leaving behind a thicker, stickier substance.
This sticky fuel can clog the fuel filter and cause the engine to run roughly. If old fuel was left in the leaf blower, drain the old fuel from the fuel tank and replace the fuel filter.
Clogged Air Filter
The air filter may be clogged. If the air filter is clogged, the engine will get too much fuel and not enough air. As a result, the engine may run roughly. If the air filter is clogged, replace it.
Damaged Spark Plug
Inspect the spark plug for signs of wear or damage. If the porcelain insulator is cracked, an electrode is burned away or damaged, or there is heavy carbon buildup at the electrode, replace the spark plug.
To determine if the spark plug is defective, use a spark plug tester. You should see a strong spark between the tester’s terminals when the engine is cranking. If there is no spark, this indicates that the spark plug is defective and should be replaced.
Clogged Spark Arrestor
The spark arrestor is a small screen that prevents the engine from emitting sparks. Over time, the spark arrestor can become clogged with soot. If the spark arrestor is clogged, the engine run roughly. To unclog the spark arrestor, remove it and clean it with a wire brush. You may also replace the spark arrestor.
Ryobi Leaf Blower Dies at Full Throttle
Below are some main solutions for handling the issue;
Clean the Air Filters
A clogged air filter may cause your blower to idle roughly as well. Air filters can be cleaned to ensure they run properly and should be inspected as part of your normal blower maintenance routine.
If the air filter in your leaf blower is partially plugged, it can cause your engine to run, but die at full throttle. The air filter is designed to prevent debris from entering the engine, and over time this debris can accumulate and lead to a clog. When it is clogged, the air filter will allow just enough air through to the engine to idle, but when you engage the throttle, it will shut down.
Clean or Repair Fuel Filters
If the fuel filter is partially clogged, the engine still may have enough fuel reaching it to start up and to idle for a while. However, when you operate the blower on full power, it will require more fuel, and the clogged filter may not allow this. Therefore, the engine will die at full power.
The fuel filter in your leaf blower is located inside the fuel tank and is attached to the fuel line. The function of the fuel filter is to prevent debris in the fuel tank from entering the fuel line and the blower’s engine.
You will need a screwdriver or hook to pull the fuel line out of the fuel tank to access the fuel filter. Be sure there is little to no fuel in the fuel tank before you begin this repair. As with all repairs, it is best to disconnect the spark plug before…
Clean your Mufflers
The function of the muffler is to decrease engine noise from your leaf blower. The spark arrestor prevents sparks from the engine from exiting the blower and potentially starting a fire. When your leaf blower expels exhaust gasses, they travel through the exhaust port into the muffler and spark arrestor.
Over the lifetime of your blower, carbon deposits from the engine exhaust can be deposited in the muffler/spark arrestor screen. If the exhaust port, muffler, or spark arrested does become plugged with carbon, the exhaust gases can’t exit the engine.
This can result in your engine dying at full throttle. These deposits can build up over time, so it is recommended that you clean your muffler/spark arrestor during routine maintenance.
Unclog the Carburetor
Your leaf blower’s carburetor controls the mixture of fuel and air that enters your engine. If the carburetor is clogged, it may not allow fuel into the engine, which will cause the engine to run, but die when the throttle is engaged.
Often you can disassemble your carburetor, clean it, and re-install it to fix this symptom. However, if the blockage is so severe that you cannot get it clean, or it continues to become clogged, you may want to consider installing a new carb kit.
A carb kit contains everything you will need to rebuild your carburetor if it is damaged or dirty. To avoid confusion when putting your carburetor back together, it is a good idea to make note of the order in which you remove certain carburetor parts. To keep the carburetor in good working order, it is recommended to clean it as part of your regular…
Damaged Fuel Lines
As with the fuel filter, a damaged fuel line can deprive your engine of fuel, causing it to run briefly but die when the throttle is engaged. Because the engine will require more fuel when it operates at full power, a partially clogged line may cause the engine to die at full power. A small crack in the fuel line can also let air in, which can result in this symptom as well.
Ryobi Backpack Blower Stalls When the Throttle Increases
When the trigger is pressed and the throttle is increased on a backpack blower, a metal wire pulls open a vent on the carburetor, allowing more fuel into the passages. The increase in fuel translates into an increase in engine speed. If the throttle is stalling, a problem is occurring in the fuel delivery system and an insufficient amount of fuel is reaching the carburetor to power the engine. This problem often occurs in conjunction with the use of bad, old, or poorly mixed gas.
- Unscrew the cap on the backpack blower’s fuel tank.
- Drain any gas that was mixed more than one week ago from the fuel tank into the approved fuel container.
- Scrub the walls of the tank with the brush and rag.
- Pull the pickup nozzle and attached fuel up into the tank opening with the metal hook. Pull the pickup nozzle off the end of the fuel line.
- Replace the pickup nozzle if it’s dirty or the screen is clogged. Insert the new pickup nozzle into the end of the fuel line.
- Set them back into the bottom of the fuel tank.
- Unscrew or unhook the air filter cover.
- Pull the air filter pad from the filter box.
- Wash the air filter in water soapy with dish detergent.
- Rinse it under cool water and give it one night to dry thoroughly.
- Reinstall the air filter and cover to the engine.
- Mix a fresh batch of blower fuel.
- Pour the two-stroke engine oil and regular unleaded gasoline into the approved fuel container.
- Combine them using the mix ratio provided with your model’s fuel specifications.
- Shake the gas and oil for one minute before putting it into the fuel tank.
- Start the backpack blower’s engine and allow it to warm up for at least 10 minutes.
- Find the three carburetor adjusting screws on the side of the carburetor.
- Insert a small screwdriver onto the idle speed screw, which is often set apart from the high- and low-speed screws.
- Rotate the idle speed screw clockwise until the blower starts blowing on its own.
- Turn the idle speed counterclockwise again until the blower stops.
- Rotate the screw clockwise again to the highest engine speed before the blower starts working.
- Insert the small screwdriver onto the low-speed adjusting screw, often marked with an “L.”
- Turn the screwdriver clockwise until the engine produces a higher-pitched surging sound.
- Stop turning the screw and move it counterclockwise until you hear a bubbling sound from the engine.
- Move the low-speed screw between these two extremes to find the cleanest, smoothest engine sound.
- Fine-tune until the engine sounds its best.
- Depress the trigger and check the acceleration of the engine.
- Increase the low-speed screw 1/8 turn clockwise if it’s still sluggish.
- Readjust the idle speed in the same manner once the low speed is set.
Ryobi Leaf Blower Loses Power When Hot
A gas-powered leaf blower uses a combustion engine to generate power. Normally, when this engine burns gas, the vapors and heated gases are vented away, so the engine can stay cool enough to keep running. If the engine dies after warming up, it is likely the engine is overheating and automatically shutting down to prevent more serious damage.
Vapor Lock
Vapor lock occurs when the fuel already inside the carburetor overheats and the vapors cause the fuel pump to lock up. A vent on the gas cap allows those heated gases to escape, which prevents the fuel inside the tank and in the fuel system from overheating.
To check for vapor lock, after the engine shuts down again, unscrew the gas cap slightly and try starting the engine again. If it runs without shutting off again, the vapor lock is causing the problem. Replace the gas cap, or clean it thoroughly with a brush dipped in fresh gasoline.
Blocked Air Supply
As the engine starts moving, the internal temperatures also start rising. To keep the engine running, cooler air needs to be brought in, and the heated gases need to escape. If the air filter or muffler are blocked, the engine will overheat and shut off again.
To fix this, take out the air filter and wash it in soapy water. Then clean the spark arrestor screen inside the muffler, and scrub out the muffler and exhaust port with a brush. Finally, brush off the fins around the cylinder.
Warped Diaphragms
The carburetor inside a leaf blower uses several plastic diaphragms to bring fuel into the carburetor, mix and measure the fuel and send it off to the cylinder. These diaphragms can warp after several seasons of use.
This warping will cause the fuel to stop moving through the entire circuit, and the engine will shut off. Usually, this happens when the engine starts heating up, as the diaphragms aren’t completely shot yet. Remove, disassemble and clean the carburetor. Also, check for any perforations in the diaphragm and gaskets.
Cylinder Problems
If the engine is dying in rough fits and shakes, and the starter rope is hard to pull out after the engine dies, the likely cause of the problem is inside the cylinder. If air is entering the cylinder from a leak around the seals, the result is a loss of compression.
This compression is required to keep the piston and crankcase moving, and, without it, the engine can’t start. Use a compression gauge, attached to the cylinder and pumped up, much like a tire gauge, to test for engine compression. If the compression reading drops off rapidly, take the leaf blower to a mechanic.
Ryobi Leaf Blower Only Runs With The Choke On
If your blower only runs with the choke on, you probably have an issue with your carburetor. The choke in your leaf blower draws fuel into the carburetor. It is used to make a cold engine easier to start. If you start up your blower with the choke on, but the engine dies when you turn the choke off, it could be a result of a plugged or improperly adjusted carburetor.
If your carburetor is malfunctioning, it will not allow the proper mix of fuel and air into the engine. The choke can temporarily solve this problem when you turn the blower on, but as soon as the choke is disengaged your engine will die.
- If your carburetor is damaged, you may need to replace it entirely.
- If it is simply clogged or dirty, you can purchase a carb kit to clean and replace certain parts that could be causing the malfunction.
Note: You may need to re-adjust the carburetor to get it running with the choke off.
To do so;
- Locate the adjustment screws (one marked L for low, and one marked H for high).
- Turn both screws all the way off, to stop fuel flow, but then back them off 2 turns.
- Turn on the engine and allow it to warm up.
- Turn the L screw clockwise until the engine slows.
- Then, turn it counterclockwise until it slows again.
- Set the adjustment screw at the midpoint of these two turns.
- Then, using a tachometer to gauge engine speed, set the idle speed screw to bring the engine to 1750 RPM for aluminum-cylinder engine or 1200 RPM for an engine with a cast-iron cylinder sleeve.
- At full throttle, turn the high speed or main jet screw clockwise until the engine begins to slow.
- As before, now turn the screw the other way until the engine slows again.
- Set the adjustment screw at the midpoint of these two turns.
Carburetor Kit
If your carburetor is clogged, it can cause your leaf blower’s engine to die when the choke is disengaged. You can disassemble it, clean it, and replace individual parts with a carb kit. Once your carburetor has been unclogged, cleaned, and re-assembled using the carb kit, the engine should run with the choke off. If your carburetor is damaged, it may need replacing.
Ryobi Leaf Blower Starts Then Dies
Common solutions for: Ryobi Leaf blower starts then dies
Spark Arrestor
The spark arrestor is a small screen that prevents the engine from emitting sparks. Over time, the spark arrestor can become clogged with soot. If the spark arrestor is clogged, the engine may stall. To unclog the spark arrestor, remove it and clean it with a wire brush. You may also replace the spark arrestor.
Clogged Carburetor
The carburetor might be clogged. A clogged carburetor is most commonly caused by leaving fuel in the leaf blower for a long period of time. Over time, some of the ingredients in the fuel may evaporate, leaving behind a thicker, stickier substance. This sticky fuel can clog up the carburetor and cause the engine to stall. If the carburetor is clogged, try cleaning it with carburetor cleaner. If cleaning the carburetor isn’t effective, rebuild or replace the entire carburetor.
Fuel Filter
The fuel filter might be clogged. A clogged fuel filter is most commonly caused by leaving old fuel in the leaf blower. Over time, some of the ingredients in the fuel may evaporate, leaving behind a thicker, stickier substance. This sticky fuel can clog the fuel filter and cause the engine to stall. If old fuel was left in the leaf blower, drain the old fuel from the fuel tank and replace the fuel filter.
Air Filter
The air filter may be clogged or dirty. If the air filter is clogged, the engine will get too much fuel and not enough air. As a result, the engine may stall. If the air filter is clogged, replace it.
Ryobi Leaf Blower Won’t Stop Running
Not being able to turn off the engine is a relatively rare symptom, but one we can help you with. If this occurs, there are multiple parts to check, such as the harness, lever, rod, trigger, and more. Follow our repair guide to help you better identify and fix your problem accurately;
Levers
A lever actuates the ignition switch on your leaf blower. When the ignition switch is set to the “on” or “run” position, the circuit that the switch controls are open. In other words, no current is flowing through the switch.
To turn the engine off, the ignition switch is set to off or a kill switch is depressed. This creates a circuit from the ignition coil straight to the engine ground. As a result, the spark plugs will not fire and the engine shuts off.
If the lever on your leaf blower is damaged or malfunctioning, it will not allow the circuit to be created, and the engine will not turn off. If the lever becomes damaged or malfunctions during operation, you will not be able to turn off the engine. A damaged lever may also result in your engine being unable to turn on if the damage occurs while the machine is not running.
Switches
The ignition switch is turned on or off to control the ignition circuit. However, if your engine relies on the ignition switch to complete the circuit and shut down the engine, a damaged switch can result in the engine continuing to run. In either setup, the switch would be the culprit. If the switch is an on/off type it is creating a circuit to the ground when it is off.
The circuit opens when it is switched on, allowing the current to flow to the spark plug. In a kill switch setup, the switch normally does not create a circuit that allows the engine to start and run. When you want to shut the engine off, the switch is depressed and held. This creates a circuit to the ground which shuts off the engine.
Harnesses
The wire harness in your leaf blower houses the wires that connect the ignition switch to the ignition coil and protects them from being damaged. If the wire harness is faulty, it can result in loose or damaged wires.
This in turn disrupts the function of the ignition switch and does not allow the engine to turn off. If damage is done to the wire harness while the blower is not operating, it will result in the engine being unable to turn on.
Triggers
Many electric blowers have trigger switches that could cause the motor to stay on. The trigger in your leaf blower can also be known as the throttle control lever and controls the speed at which the blower is blowing air. If the trigger on your leaf blower becomes damaged or stuck, it will affect your ability to control the power of the blower. This will keep you from being able to turn off the blower engine.
Rods
Some blower switches could be activated by a part called a rod. This completes or interrupts the ignition circuit, turning the engine on or off. Like the function of the lever above, if the rod is damaged or malfunctioning, it could result in the engine becoming unable to turn off.
Ignition Modules
The ignition module in your leaf blower is also known as the ignition coil. The ignition coil or module works with the flywheel to induce electricity and subsequently sends voltage to the spark plug. Often when there is a malfunction in the ignition module, it is a result of a faulty or damaged wire or a bad connection.
If the wire mounting tab for the kill wire broke off the ignition coil, you will not be able to turn off the engine. As you will be working near the engine of the leaf blower for this repair, be sure to disconnect the spark plug and empty the fuel tank before you begin the job.
Ryobi Leaf Blower Only Works On Choke
Gas-powered leaf blowers have a choke mechanism that is meant to be used when cold starting a leaf blower. When the choke of a leaf blower is engaged the carburetor supplies more fuel to the engine, therefore, making it easier to start the leaf blower engine.
But oftentimes a leaf blower will develop an issue where it will only run on choke and as soon as the choke is turned off the leaf blower either shuts off or loses power.
Below are some reasons why the leaf blower only works on choke;
Clogged leaf blower carburetor
If you have been using your leaf blower for a while now chances are the jets inside the carburetor have gotten clogged preventing proper fuel supply to the engine. Your leaf blower requires a perfect mixture of air and fuel in order to work properly. But if the carburetor of a blower gets clogged it can restrict fuel supply and allow too much air into the engine. So when you use choke it restricts airflow and sends more fuel into the engine which allows the blower to run but not properly. The carburetor of a leaf blower can get clogged due to the following reasons:
● Damaged air filter:
If the air filter material gets cracked or damaged it can allow dirt and debris to enter the carburetor. When you keep using a leaf blower with a damaged air filter the dirt can quickly accumulate inside the air filter and completely clog it. You can find Leaf Blower Air Filters here.
● Dirty fuel:
Using dirty fuel in your leaf blower can quickly clog up the carburetor and the fuel lines. Leaf blowers have tiny carburetors and even a small amount of debris from dirty fuel can clog them.
● Engine oil in the carburetor:
If the level of engine oil is higher than normal or the leaf blower is tipped in the wrong direction it can result in engine oil getting inside the carburetor and clogging it.
Fixing a clogged leaf blower carburetor
Fixing a clogged leaf blower carburetor is a relatively simple task and it doesn’t require any advanced tools either. All you need is a container of carburetor cleaner to clean the clogged carburetor. You can follow the steps for cleaning a clogged leaf blower carburetor above.
Air fuel mixture setting of the carburetor is too lean
Lean air/fuel is the most common reason for a leaf blower only running on choke. As we explained earlier if your leaf blower engine is not getting an ideal mixture of air and fuel it will not be able to run.
And in the case of a lean air-fuel mixture, your leaf blower engine will not able to get enough fuel. This results in the leaf blower shutting off after running for a few seconds, or the leaf blower not starting at all, or the low performance of the leaf blower.
People apply the choke when the leaf blower isn’t running normally which sends too much fuel to the engine, and doing this is equally bad for the engine of a leaf blower. In most cases, people use choke because their leaf blower is not idling and shuts off. In this case, you may have to simply adjust the idle screw, but if your leaf blower is not producing any power without engaging the choke then you will have to adjust the mixture as well.
How to adjust the mixture of a leaf blower with a single adjustment screw;
- Locate the adjustment screw on the side of your leaf blower’s carburetor.
- Turn the leaf blower on and turn the screw half turn at a time on either side until the engine starts idling smoothly and does not die.
- Rev the leaf blower to make sure that it runs properly on higher RPM.
- If the leaf blower is not running properly at a higher RPM range adjust the screw again until it is running smoothly at both high and low RPM ranges.
- If your carburetor does not look ok replace it for a new one.
How to adjust the mixture of a leaf blower with multiple adjustment screws:
Locate the screws on the side of the carburetor. There might be 2 screws marked as “H” for adjusting the mixture at high RPM speed, “L” for adjusting the mixture at low RPM speed. In addition to these two screws, there can be a third screw marked as “C” which controls the mixture adjustment for idling RPM speed.
For the screw marked with “H” simply turn the screw clockwise until it goes inside. Now give the screw an anti-clockwise turn then start the leaf blower engine and increase the throttle to high while turning the “H” screw anti-clockwise half turn at a time until the engine starts running properly at high RPM.
For the screw marked with “L”, you will turn it clockwise until it feels tight. Then turn the screw anti-clockwise half a turn and start the leaf blower engine. Keep adjusting the screw on minor adjustment at a time until the engine runs smoothly at low RPM and at idle.
If your leaf blower’s carburetor has an adjustment screw marked as “C” adjust this screw half turn at a time in either direction while the leaf blower is running until the engine starts to idle optimally.
If your carburetor does not look ok replace it with a new one. You can find Leaf Blower Carburetors here.
Damaged or corroded carburetor
If your leaf blower’s carburetor is damaged or corroded it will suck air into the system and as we explained earlier, too much air and not enough fuel is bad news for the engine.
Damage to the carburetor cannot be fixed which means you will have to get a new carburetor because the damaged carburetor causes a serious issue in the long run.
Is it ok to keep using a leaf blower with the choke on?
No. Choke supplies too much fuel to your leaf blower engine and this can result in a lot of problems. By running a leaf blower on choke you are going to get a very bad fuel economy. The engine will lose power and you can even seize the engine.
Excess fuel in the combustion chamber can wash away the engine oil from the walls of the chamber resulting in poor lubrication and carbon build-up. As a general rule of thumb, avoid running a leaf blower on choke for long intervals.
Ryobi Leaf Blower Runs for 5 Minutes Then Dies
If the engine on your blower runs then dies, you might need to check the tank vent, ignition coil, or gas cap. Our repair guide can help you identify your problem and show you how to fix it with the right part. Our repair information is a general guide to help you, but for more specific repair information related to your model, check your owner’s manual.
Clogged Fuel Filters
A plugged fuel filter can cause your engine to start, run for a while, and then die. The fuel filter on your leaf blower connects to the fuel line and filters out any debris that may be in the fuel tank. Over time, this debris can build up in the filter and make it more difficult for fuel to enter the lines and ultimately get to the engine.
If the obstruction is minor, the engine will run for a little while before dying, rather than almost immediately after the engine starts. To fix the issue, you may be able to clean your fuel filter, but if it is faulty or damaged it will need to be replaced.
Damaged Spark Plugs
A bad spark plug can cause the engine to die at any time. When your leaf blower is running properly, the spark plug will ignite compressed fuel and air with every rotation of the piston within the cylinder.
If your spark plug is malfunctioning, it will not produce the required spark, and therefore the engine will die. As mentioned, if your spark plug is faulty, this can happen to your engine at any time.
Plugged Gas Cap
A vented gas cap can cause this problem. If the vent is plugged, a vacuum will form as the fuel level drops. After a while, the vacuum will be stronger than your carburetor’s ability to pump fuel and the engine will die.
To solve this problem, you can allow the engine to sit for a short period of time, or you can remove and replace the gas cap. After you apply one of these solutions, the engine should start again.
Obstructed Fuel Lines
The fuel lines on your blower carry fuel from the tank to the engine. If these fuel lines are obstructed, it can’t allow the proper amount of fuel to enter the engine, which will cause it to run for a short time, but ultimately stall out.
You may be able to clean out the fuel lines and solve this problem. However, because these lines are usually made of plastic, they can crack and begin to leak. This can allow air to enter the fuel system which will cause it to die after a short period of running.
If the crack is small, this can cause the engine to die somewhat unexpectedly, as very little fuel is leaking out. If you discover a crack in your fuel line, you will most likely need to replace it.
Faulty Ignition Modules
Your leaf blower’s ignition coil provides voltage to the spark plug, which then ignites the fuel mixture that runs the blower. A faulty ignition coil will normally only fail once the engine has run long enough for the coil to become hot.
If you discover that your blower is dying after it runs for a little while (basically until it gets hot), your ignition coil may be faulty and will likely need to be replaced. To determine whether your ignition coil is the cause of this symptom.
To test the ignition coil;
- Disconnect the spark plug from the engine and (while it is still connected to the ignition coil) setting it on the engine itself.
- Then run your engine and look for a spark from the spark plug.
- If no spark is present, it could be the result of a faulty ignition coil.
How to Replace the Ignition Module on a Ryobi Handheld Gas Blower
If falling leaves and a broken blower are threatening to bury you beneath a pile of debt and debris, it’s time to face the fix. Whether you are a seasonal garden enthusiast or a seasoned landscape professional, eReplacementParts.com provides the parts, procedures, and facts you need to fearlessly fix what fails you.
The ignition module is responsible for generating electricity, which it then transfers to the spark plug. Without electricity, there can be no spark, and hence; no internal combustion. While there are various reasons for ignition module failure, the primary symptoms usually manifest in the form of extreme difficulty starting your blower, and eventually, a no-start condition.
- Remove the blower tube.
- Twist and pull the tube away from the blower.
- Remove the side housing from the blower.
- Remove the two screws securing the base extension to the housing.
- Remove the base extension from the housing.
- Remove the screws securing the side housing.
- Separate the side housing from the main assembly.
- Remove the fan.
NOTE: rotating the nut causes the fan and the motor shaft to rotate concurrently, precluding your ability to loosen the nut from the shaft. You can avoid this by removing the spark plug and binding the cylinder with a short length of starter rope.
- Using a spark plug boot puller tool, remove the spark plug boot.
- Use a ratchet wrench to unscrew the spark plug; remove the spark plug.
- Thread a short length of starter rope into the cylinder to fill the space between the top of the piston and the top of the cylinder. This will prevent the piston (and motor) from moving during fan removal.
- Remove the nut holding the fan on the motor shaft; remove the washer.
- Remove the air filter cover and side cover by unscrewing the retaining bolt and pull it gently.
- Remove the retaining screws and remove the side cover from the blower.
- Remove the throttle cable from the carburetor.
- Retract the throttle arm slightly to create slack in the throttle cable; remove the cable from the carburetor assembly.
- Remove the remaining half of housing from the engine assembly.
- Remove the screws securing the housing to the engine.
- Separate the housing from the engine assembly. Note the position of the spacer tube and washer on the engine shaft, as these may slide readily from the assembly.
- Remove the ignition module wires.
- Using long-nosed pliers, disconnect the (black) ignition wire from the wire terminal.
- Extract the screw connecting the (red) ignition wire to the top of the ignition module.
- Disconnect the red wire from the module.
- Remove the screw securing the ignition module to the engine.
- Remove the ignition coil from the engine.
- Install the new ignition module.
Note: There are two magnets located on the side of the flywheel, which must be aligned with the base of the ignition module. Rotate the flywheel to adjust the position of the magnets.
- Set the ignition module in place ensuring alignment with the magnets on the flywheel.
- Install (but DO NOT TIGHTEN fully) the mounting screw removed in step 11.
- Install the red ignition wire.
- Insert (but DO NOT TIGHTEN fully) the second screw through the eyelet of the red ignition wire and through the ignition module into the engine.
- Set the gap between the ignition module and the flywheel.
Note: An ignition gapping gauge is recommended to accurately complete this step. However, if you do not have an ignition gapping gauge (measuring .014 inches or .35mm) it is generally acceptable to use one (1) thick business card or two (2) thin business cards as substitutes.
- Pull the ignition module away from the magnets on the flywheel and insert the gapping gauge between them.
- With the gauge still in place, securely tighten both of the mounting screws.
- Remove the gapping gauge.
- Using long-nosed pliers, reinstall the black ignition wire to the wire terminal on the ignition module.
- Reinstall the engine housing.
- Slide the washer over the motor shaft and seat it into the flywheel recess.
- Align the housing above the motor shaft and slide it into position. (Ensure that the spark plug connector is not obstructed or pinched by the housing.)
- Secure the housing to the engine with the screws.
- Slide the spacer tube onto the motor shaft.
- Install the motor housing and secure it with the screws removed earlier.
- Retract the throttle arm slightly and using long-nosed pliers install the throttle cable into the attachment recess.
- Position and seat the air filter gasket; align and secure the air filter cover.
- Slide the first of the two large washers over the motor shaft beneath the impeller.
- Install the impeller onto the motor shaft and place the second large washer into position above of the impeller.
- Install and securely tighten the impeller retaining nut using a ratchet wrench.
- Remove the temporary binding rope from the cylinder.
- Reinstall the spark plug and reattach the connecting end-cap.
- Reinstall the side (fan) housing.
- Align the fan housing with the holes in the main assembly. The two halves should snap together when properly aligned.
- Secure the fan housing with the screws.
- Slide the base extension back into the housing and secure it with the screws.
- Slide the blower tube onto the main assembly and twist it to secure it in position.
Check this too: How Do I Protect My Garage Floor from the Snow?
How to Replace a Ryobi Leaf Blower Air Filter
Leaf blowers blow leaves around and in the process, they also draw in dirt, dust, and other debris. To prevent the machine from ingesting enough contaminants to clog up or wear down the engine, most gas leaf blowers have air filters. The air filter must be cleaned regularly for your leaf blower to perform optimally.
- Unplug or turn off your leaf blower.
- Make sure you even disconnect the spark plug for safety reasons.
- Remove the cover for the air filter – usually, all this involves is unscrewing it
- Turn the cover over to find the air filter
- Remove it from the unit
- If it is a sponge air filter, wash it in detergent and water. Then rinse thoroughly.
- You may also want to add a few drops of oil to the sponge air filter.
- Make sure the air filter dries out completely
- If it is so filthy as to make it unredeemable, purchase a new one
- In either case, when ready, replace the air filter in the unit and replace the cover
- Reconnect the spark plug
Note: leaf blower manufacturers recommend that you clean and/or replace the filter after approximately 20 hours of usage.
How to Replace the Gas Tank on a Ryobi Handheld Gas Blower
While the gas tank on your blower is designed to withstand a variety of impacts and environments, most tanks will begin to show signs of wear within a few years. Accidental impact, careless transport, and improper storage can also affect the longevity of a gas tank.
Cracks and leaks are some of the most common damages. Mounting hardware can also loosen under the torque of the engine. To replace the damaged gas tank, follow these steps;
- Unscrew the retaining bolt; remove the air filter cover from the engine.
- Remove the fuel lines from the carburetor.
Note: It is advisable to clamp the fuel lines prior to removal. If you do not have fuel line clamps, you can drain the fuel from the fuel tank.
- Clamp fuel lines with fuel line clamps.
- Use a flathead screwdriver and/or long-nosed pliers to disconnect the fuel lines from the carburetor.
- Remove the gas tank from the engine.
- Remove the three screws holding the gas tank to the engine.
- Remove the gas tank assembly from the engine.
- Install the new gas tank.
- Install the new gas tank into the engine compartment.
- Securely attach the new gas tank to the engine with the mounting screws.
- Identify the FILTERED fuel line.
- Remove the cap from the gas tank.
- Visually identify which fuel line contains the fuel filter.
- Identify the carburetor pipes.
- Place your finger over either of the carburetor pipes. With your other finger, press and release the primer bulb several times. If the primer bulb becomes HARDER (preventing further priming), you have isolated (and identified) the RETURN pipe.
- If the primer bulb becomes SOFTER (and fails to return to its original position), you have isolated (and identified) the INTAKE pipe.
- Reinstall the fuel lines.
- Install the FILTERED fuel line (identified in step 5) to the INTAKE pipe of the carburetor (identified in step 6).
- Install the fuel RETURN line to the RETURN pipe of the carburetor.
- Reinstall the air filter cover.
- Reposition and seat the air filter gasket; align and secure the air filter cover.

