How Do You Secure a Wooden Shed to the Ground?
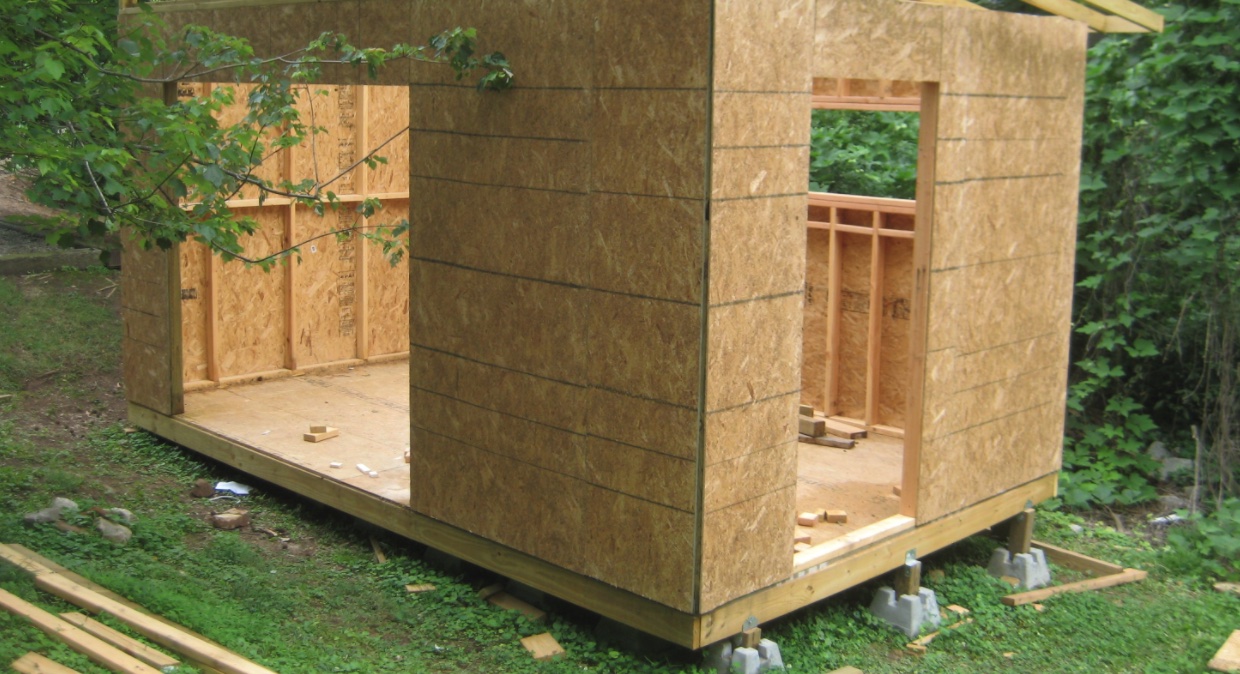
A wooden shed is a cost-effective storage option for storing your tools, gardening material, and other items you would rather not have in your house. However, if you live in a windy area or a hurricane-prone location, your wooden shed is highly likely to fly off in the wind.
Keep reading to learn how to fix a wooden shed onto the ground, concrete, or gravel for increased stability.
Do wooden sheds need to be anchored?
Yes. This is a reliable way to secure a shed onto the ground to prevent it from being moved or lifted by wind or water due to the increase in windstorms and flooding rains across North America in recent years. The National Building Codes and local ordinances have been modified to reflect the change and review. It is better safe than sorry.
Reasons why you need to anchor a shed;
Meet Local Regulations
With each new disaster come recommendations to help reduce the potential for future damage. To encourage compliance, local codes are amended to reflect the trend and needs.
Some local ordinances are very helpful and logical. For example, they identify the minimum requirement for different shed sizes and materials.
Add Strength and Stability
Securing your storage shed to the ground adds strength to the structure and stability. In addition, smaller sheds are lighter, especially if made of plastic or light steel.
Safety
Thunderstorms can have gusts strong enough to snap trees or tumble trailers. Hurricane tie-downs will help to protect your property and others too. You have an added danger if you have electrical power to your shed and the wind carries it away.
Protect Against Wind Damage
Anchoring your shed helps protect your shed contents and protect others by ensuring it does not fly off in the event of a storm. So protecting your shed from wind damage is important. By securing your shed, you’re also protecting others too.
Note: before buying or building a shed, determine how to secure it from the wind.
Insurance Reasons
With rising, property damage costs due to the wind come insurance costs. In addition, many insurance companies have a rider that requires sheds and outbuildings to be properly secured.
What happens if you don’t anchor a wooden shed?
The shed’s contents will also be airborne if the shed gets blown away. Additionally, your shed could get blown away during tornadoes or hurricanes. So any damage to your neighbor’s property caused by your airborne shed is an automatic expense to you, which is a liability you would rather avoid.
How to anchor a wooden shed
Concrete is the best way to anchor a shed securely, but augers can also be used. Depending on the type of shed, anchoring is usually inexpensive and fairly easy to do.
There are different types of cables, metal straps, galvanized connectors, twist-in anchors, and concrete tie-down options. The size and material of the shed determine the minimum type or size of tie-down needed. For more stability, you can use hurricane tie-down straps for sheds.
How to anchor a wooded shed into gravel
The best way to anchor a shed into gravel is with concrete piers. They’re inexpensive and not too difficult to put in:
- Drill or dig the holes, tamp some gravel into the bottom
- Slide a sonotube in to form it up
- Level it to the needed height, and fill it with concrete
- Set a galvanized anchor bracket in before the concrete sets
- Align and level the brackets, and you’re all set to secure your shed
How to anchor a wooden shed to concrete
Anchoring your shed in concrete will not only help protect the shed from being blown over. It will also help prevent the shed from suffering from water damage due to contact with the ground.
Anchoring a Newly-Built Shed
Anchoring essentials; – galvanized anchor bolts.
Note: They need to be long enough to anchor into the concrete, go through the sill plate, and then through the wood, with enough room for the washer and nut. 4-inch long anchor bolts would be the best. To figure out how many you need;
- The bolds need to be 12 inches or less from the corner,
- And there should be no more than 6 feet apart.
- Use these factors to determine the number you will need.
Follow these steps to anchor a shed to concrete;
- Pour the Concrete and Set the Anchors
- Once the concrete has been poured, you can place the anchors right into the wet concrete.
- Note: ensure that enough anchors poke out for the sill, the wood frame, and the washer/nut.
- Then let the concrete cure.
- Use a drill press or some other type of drill to drill holes into the metal sill plate that are large enough to fit over the anchor bolts.
- Use the right drill bit or tool for the type of metal sill you are using.
- Note: Ensure you get sills of the appropriate size for the wooden frame you are building or your shed.
- Then place the sills over the anchor bolts.
- Use polyurethane glue to secure the sill plates.
- Then drill holes through the wood you will be using to build the shed’s frame.
- The holes should be large enough to fit over the anchor bolts
- Then place your wooden frame on the ground and onto the anchor bolts.
- Finally, add the washers and then all of the nuts. Use a hex wrench to tighten all nuts, making sure that they are secure.
How to anchor a shed to an existing concrete slab
The procedure for anchoring to an existing concrete base is quite different. Follow the steps below to anchor a shed to a concrete base;
Items needed;
- Foundation anchor plate
- T-strap
- Tapcon screws. Or other reinforced concrete screws
Note: for a normal shed using 2x4s for the frame, use 1/4-inch Tapcon screws 3 inches in length. For thicker wood, use Tapcon screws that are longer than 3 inches.
Anchoring steps
- Start by measuring and marking the concrete
- You will need to place a Tapcon screw through the floor frame and into the concrete every 16 inches between the studs.
- If you have a large shed built with super heavy materials and live in a very windy area, decrease the spacing to 12 inches.
- For added strength and security, place Tapcon screws on both sides of each corner of the shed.
- Make sure you make a visible mark using a marking tool.
- Then drill the pilot holes into the concrete.
- For 1/4-inch diameter screws, use a drill bit that is slightly smaller than a 1/4-inch.
- The pilot hole diameter should be slightly smaller than the actual screw to ensure a secure hold.
- Use a hammer drill with a drill bit designed for concrete. A normal power drill and drill bits will not work for concrete.
- Then use a drill or socket wrench to drive the Tapcon screws into the pilot holes.
Note: Do not over-tighten the screws to avoid stripping the concrete thread or snap them.
How to anchor a wooden shed to bare ground
Here is a step by step guide to help you to bolt a wooden shed to the ground;
Determine the kind of ground you want to anchor your shed
If your shed is built on top of a concrete slab or you’re anchoring your shed on dirt, soil, grass, or gravel, it is very important to determine the ground type.
Find the proper anchors for your shed
If you’re building a new shed, consider using galvanized anchor bolts, or heavy-duty galvanized held down by your anchors.
Prep the ground
Mark, drill holes, and screw the augers or dig down depending on the anchors you will be using.
Check this too: Can You Store a Propane Tank in the Garage?
Install your anchors
Your anchors can be anchor bolts, hold downs, brackets, expanding bolts, augers with cables/straps, or a combination of any or all of them.
Anchor the shed
Tighten the bolts and make sure that you have a washer in place
Note: Ensure that your anchors are secured and tight. Also, ensure that you have adequately bolted the roof together with the walls to make it hurricane ready.
Conclusion
If you are unsure what would be best to use to anchor your shed, you can use a shed ground anchor kit. It should have all the things you will need to anchor your shed. Be sure to get one best suited for your shed size so you can have enough augers or bolts for the job.


