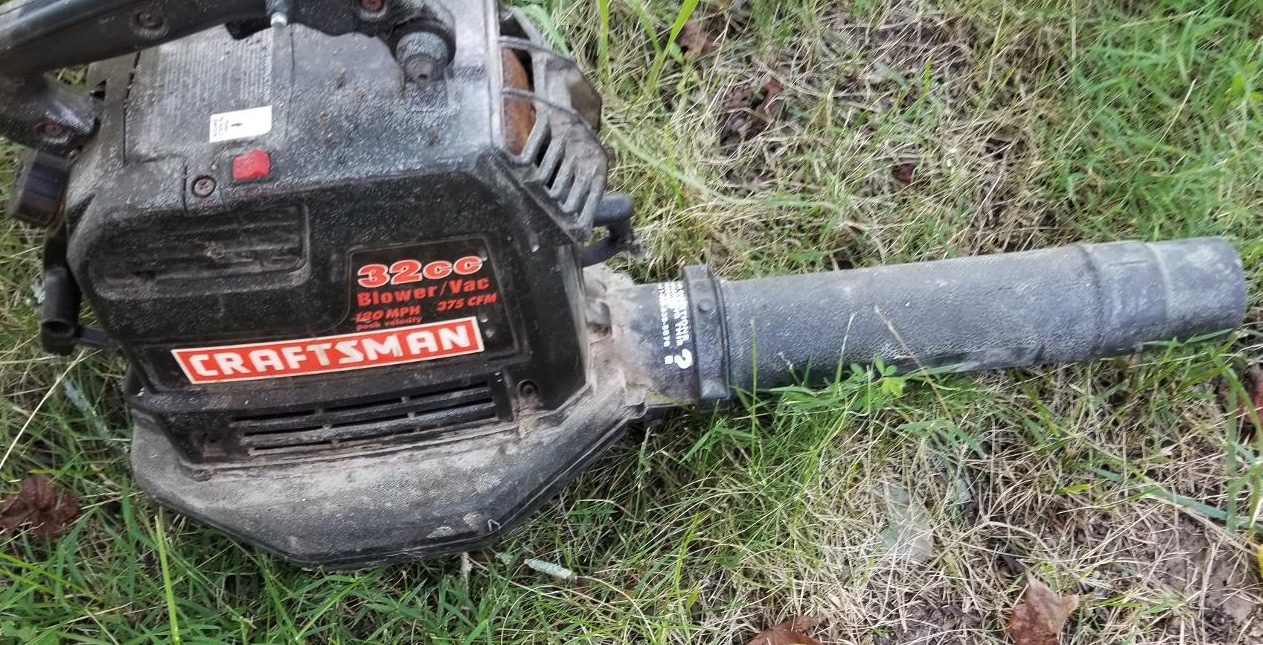
Craftsman Leaf Blower How-to & Troubleshooting Guide
Craftsman tools are a popular and well-trusted brand within the power tool industry. Both professionals and DIYers regard their tools as above average. Similar to their other tools, the Craftsman leaf blower is typically lightweight and ergonomically designed, easy to use and maintain.
However, you may experience several issues with their gas-powered and battery-powered models. The Craftsman leaf blower looks pretty simple, but all components must work together, making troubleshooting time-consuming and difficult. We will review the common Craftsman leaf blower issues and advise on easy-to-follow solutions.
How to assemble the Craftsman leaf blower
If you just received a new Craftsman leaf blower, follow the steps below to assemble the parts. In case the leaf blower comes already assembled, take out all the parts and reassemble it to ensure all the fasteners are secure. Also, always inspect the parts for cracks and breaks before using the leaf blower. It is standard for the fuel filter to rattle when the fuel tank is empty.
Blower tube assembly
- Align the upper blower tube with the grooves in the blower outlet, then slide it into place and turn the blower tube clockwise to lock it. In some models, you may have to press a button on the blower outlet, insert the blower tube then release it to secure it in place.
- Match the slots on the lower blower tube with the tabs on the upper blower tube, then turn the upper tube clockwise until it locks into place.
- When you assemble the upper and lower leaf blower tubes correctly, the arrows on the tubes will also align.
- To remove the tube, turn the knob counterclockwise to loosen the tubes, then pull them out.
High-speed nozzle assembly
- Use the high-speed nozzle when you need greater airspeed.
- Line up the slots on the nozzle with the tabs on the lower blower tube, then slide it onto the upper blower tube.
- Turn the nozzle clockwise until it clicks securely into place.
Vacuum bag assembly
- Open the zipper on the vacuum bag and fit the smaller end of the elbow tube through the zipper opening.
- Close the zipper on the vacuum bag completely.
- Detach the blower tubes from the engine.
- Insert the elbow into the blower outlet on the engine, then turn the knob clockwise to secure the elbow tube.
Vacuum tube assembly
- Insert the screwdriver tip into the latch area of the vacuum inlet. In some models, you have to press the button on the
- Tilt the screwdriver’s handle towards the front of the blower to release the latch while pulling up the vacuum inlet cover with your other hand.
- Hold the vacuum inlet cover open, then fit the upper vacuum tube into the vacuum inlet. Turn the vacuum tube counterclockwise until it clicks into place.
- Insert the slanted end of the vacuum tube into the upper vacuum tube.
How to clean a carburetor on a Craftsman leaf blower
The carburetor is an essential part of a gas-powered leaf blower. It mixes the air and fuel in the proper proportion for the engine’s spark ignition and combustion process. Cleaning the carburetor is part of the leaf blower maintenance that ensures your leaf blower works sufficiently, prevents corrosion, and saves the need for other costly repairs and replacements.
Dirt from poor fuel quality and a clogged fuel filter can restrict the carburetor and affect the engine causing reduced power or stalling. Also, the air intake can dry out the fuel in your carburetor, leaving a sticky residue that sticks to the insides of the carburetor and builds up over time, therefore affecting its performance.
Lastly, if the carburetor smells of turpentine or a chemical odor different from the smell of gasoline, it’s probably overdue for a deep clean. Follow the detailed guide below on how to clean your Craftsman leaf blower carburetor.
Things you’ll need
- Metal pan
- Carburetor cleaner
- Compressed air
- Clean rags
Instructions
- Switch off your leaf blower and allow it to cool down.
- Locate the carburetor on your Craftsman leaf blower and remove it. The process of removing the carburetor varies between modes, but there is the general procedure:
- First, drain the fuel out of the fuel tank.
- Next, disconnect the spark plug to prevent the leaf blower from starting accidentally.
- Finally, unscrew the air filter cover and take out the air filter.
- Check the air filter condition and ensure it is clean and free of blockage. If it is not clean, wash it with soapy water, rinse it and allow it to dry completely.
- Loosen the screws holding the carburetor in place and remove them from the leaf blower.
- Disengage the airbox from the carburetor throttle and choke levers.
- Then disconnect all the fuel lines connections to the carburetor. Note the location and placement of all the other carburetor components.
- Prepare the carburetor cleaner as per the packaging instructions.
- Soak the carburetor and the other removable carburetor components in the carburetor cleaner for about 10 minutes.
- Take a brass brush and scrub all the metal parts and a nylon brush to clean the plastic parts. Ensure all the vents and holes are.
- Rinse the carburetor and its components with clean water and air dry thoroughly. Then, use compressed air to clean any excess moisture from the small holes and vents.
- Reattach all the removable parts of the carburetor onto the main carburetor body. Re the fuel lines to the carburetor correctly, then place the carburetor back into the airbox.
- Mount the carburetor screws to ensure it set securely in place.
- Replace the air filter and air filter cover.
- Reconnect the spark plug.
How to adjust the carburetor on a Craftsman leaf blower
The carburetor in the Craftsman leaf blower comes from the factory with a standard-setting. This setting provides an optimum fuel-to-air mixture under the most operating conditions.
However, adjustments may be necessary under the following circumstances:
- The engine will not idle when your release the throttle.
- The engine bogs down during operation.
- The leaf blower will produce excessive vibration and chugging.
Follow the steps below to adjust the timing of your leaf blower carburetor properly.
- Turn off the engine and place the leaf blower on a workbench. Allow the machine to cool down below touching it.
- Locate the carburetor on your Craftsman blower. The carburetor is usually attached to the air filter and fuel line and generally on the left side of the engine. However, the specific location will vary depending on the model and size of the leaf blower.
- Find the adjustment screws. The Craftsman leaf blower has two screws for adjusting the timing of the carburetor. One is the idle speed screw that controls how fast or slow the leaf blower idles, and the other is the mixture screw that controls the air and fuel ratio that enters the engine.
- The idle speed and idle mixture adjustment screws are closest to each other on the carburetor side, while the main mixture adjustment is on top.
- Turn the mixture screw and idle speed screw one complete turn counterclockwise with a flathead screwdriver.
- Then turn the idle speed screw one to two turns counterclockwise beyond where the screw touches the throttle plate.
- Start the engine but let it idle for a few minutes. Then push the engine throttle control to maximum and very slowly rotate the main mixture screw counterclockwise until the engine sputters and bogs down.
- Turn the throttle control screw clockwise until the engine begins to sputter. Take note of the number of turns between the two throttle settings that cause the engine to turn off. Then turn the screw to the mid-range; this is the optimal carburetor setting.
- Wait a few seconds for the carburetor adjustment to take effect and re-tune the screws if the engine doesn’t run smoothly.
- Repeat the procedure with the idle mixture screw and idle speed screw with the throttle control on slow or idle speed. Again, turn the screws to mid-range, then test the engine.
- Test your leaf blower at idle and again with the engine at full throttle. If the leaf blower engine dies or runs roughly, adjust the screws 1/8-turn at a time while it is still running until it runs smoothly at both idle and on full throttle.
Why won’t my Craftsman leaf blower start?
Your Craftsman leaf blower requires the proper fuel-to-air ratio, compression, and a spark to start. If anything interrupts any of these requirements, the equipment won’t start. If your leaf blower doesn’t start, follow the checklist below to identify the issue and know how to fix it before you throw out your leaf blower.
Fuel
The Craftsman leaf blower has a 2-stroke engine that uses a precise gas-to-oil ratio. The engine runs on unleaded gasoline mixed with premium quality synthetic 2-cycle air-cooled engine oil ratio 40:1.
This translates to 3.2 ounces of oil for every gallon of unleaded gas. You can also use commercial premixed 2-stroke engine fuel. However, over time, using the wrong fuel mixture will affect the engine and eventually prevent it from starting.
Stale fuel is another common reason your leaf blower won’t start. If you store your leaf blower for a prolonged time, the fuel separates and degrades in the carburetor. You need to drain all the fuel from the system and clean the carburetor with some commercial carburetor cleaner.
Stale fuel can also block the fuel filter and fuel lines. If cleaning doesn’t help, you may have to replace them.
Air
The carburetor mixed fuel and air for the spark plug to ignite and start the engine. Therefore, sufficient airflow is as essential as fuel. Insufficient air supply prevents enough oxygen that supports combustion.
Leaves, dust, and other debris can clog the air filter and restrict air intake. Clean the air filter regularly with mild dishwashing soap, rinse it thoroughly, and air dry. Also, check the air inlet pipe for clogging as it could be clocking airflow to the filter.
Spark arrestor
The spark arrestor prevents sparks from the engine from flying out of the leaf blower and starting a fire. Unfortunately, the spark arrestor wears down over time and becomes clogged with soot.
- Remove the spark arrestor and do a deep clean. Soak it in soapy water to loosen the soot and scrub it down with a non-abrasive brush. Rinse it properly and allow it to air dry completely. If all the gunk doesn’t come out, you need to replace it.
Spark
The engine requires a spark to ignite the fuel and air mixture to run. The ignition system of your leaf blower, consisting of a spark plug, ignition could, and spark plug wire, should be working for the engine to start. Check all the components for any problems for repairs or replacements.
- First, remove the spark plug wire from the spark plug. Look for cracks in the insulation and replace the wire if necessary. Next, blow into the boot since dirt can prevent electric current from passing through to the spark plug.
- Check the wire from the on/off switch of the leaf blower. Ensure the switch makes contact when in the on position.
- Then remove and inspect the spark plug for any signs of damage. Check if the ceramic part has broken or carbon residue on the electrodes could be affecting the spark production. You can try cleaning the electrodes with fine-grit sandpaper, but replacing the spark plug may be best as they are inexpensive.
- Test the spark plug with a spark plug tester and see if it is undamaged. When installing a new spark plug, ensure the electrode gap is correct according to Craftsman specifications.
- If none of the above solutions work, try replacing the ignition coil with the help of a service agent.
Flooded engine
If the spark plug feels wet, it indicates a flooded engine; that is, excess fuel has entered the combustion chamber without any ignition. Unburnt fuel in the engine can prevent the engine from starting. If you suspect flooding, tilt the engine for the fuel to drain out through the spark plug opening, let the spark plug dry, and then refit it.
Check this too: Echo Leaf Blower How to and Troubleshooting Guide
Compression
If your leaf blower’s fuel, air, and spark are correct and it still won’t start, there could be a compression issue.
- Pull the recoil starter and feel for resistance. If there is not much resistance, there is low compression in the engine. As a result, you’re likely to feel air blowing from the engine or reduced air pressure around the engine.
- Ideally, the leaf blower should draw air into the intake manifold via the air filter housing. However, it should only leave the engine through the exhaust manifold leading to the muffler—any other air leaks indicate poor compression.
- A common cause for poor compression is the incorrect installation of the spark plug. The spark plug fitting must be sufficiently tight. Otherwise, air will enter the engine’s combustion chamber through the spark plug opening. Remove the spark plug and refit it correctly; however, do not over-tighten it as it can damage the spark plug or the thread in the engine head.
- Another common cause for low compression is a damaged or worn engine head gasket or damaged valves. Repairing the head gasket will require a level of expertise from a service agent.
On/off switch
Over time the on/off switch of your Craftsman can become faulty. If you notice the switch sticking, delaying to start, or working intermittently, chances are it is defective. If the switch is defective, you may have to replace the entire leaf blower with a new one.
How to replace starter rope on Craftsman leaf blower
The starter rope of the Craftsman leaf blower spins the crankshaft. When you pull the rope, it causes the flywheel to engage, and the engine starts. Sometimes the starter rope can malfunction and fail due to age and use, and you will have to replace it.
Unlike other leaf blower brands, the starter rope on the Craftsman leaf blower doesn’t out as the entire recoil assembly. Therefore, you can easily replace the starter rope on its own. However, you have to leave the spring undisturbed in the housing as it is difficult to replace. Follow the steps below to replace the starter rope or recoil starter on your Craftsman leaf blower.
- Place the leaf blower on a level surface and disconnect the spark plug wire from the spark plug.
- Use a Phillips head screwdriver to open the screws holding the fan housing to the engine and remove the housing.
- Remove the screw holding the rope pulley. Then remove the rope pulley by twisting it gently counterclockwise while lifting it. Ensure not to disturb the recoil spring in its housing underneath the pulley.
- Detach the rope from the pulley.
- Prepare a replacement cord with the same diameter and length as the rope you’re replacing. Move aware from the engine and melt the ends of the rope with a lighter, then twist them in a rag to make it easier for threading.
- Feed one end of the rope through the hole in the fan housing, then feed it through the top hole on the inside of the pulley.
- Wrap the rope counterclockwise around the pulley ratchet, then secure the end by tucking it under the wrapped rope. Pull the rope tightly to ensure it is secure.
- Tightly wind the rope counterclockwise around the pulley ratchet and leave about 10 inches unwound.
- Reposition the pulley into the housing and push it down firmly to secure it in place, then close the pulley screw.
- Pull the 10-inch length of rope taught, then twist the pulley twice counterclockwise to put tension on the spring.
- Align the notch on the rim of the pulley with the hole in the housing. Then while holding the pulley with one hand, pull the rope tight from outside the housing. Allow the pulley to unwind and then wrap the rope around itself.
- Replace the fan housing and secure it with its screws. Reconnect the spark plug wire and test the leaf blower.
Craftsman battery leaf blower is not charging.
A fully-charged Craftsman leaf blower will usually work without hiccups. However, when the lithium-ion battery doesn’t have a charge, the power tool won’t work. The lithium-ion batteries for your Craftsman leaf blower are highly durable and long-lasting when well maintained. However, similar to all lithium-ion batteries, they can eventually stop working. Some of the factors that can affect the lifespan of your leaf blower batteries include:
- Storage: The first thing you want to do if you notice your Craftsman battery isn’t holding a charge is check the storage. It’s essential to keep your leaf blower and its battery in a place away from extreme temperatures, sunlight, or humidity.
- Temperature conditions: Using your Craftsman leaf blower outdoors on a hot day may affect the battery’s performance. You have to limit how much time you expose the power tool in high temperatures or take frequent breaks to avoid interfering with the life of your Craftsman battery.
- Charging cycles: The life expectancy of a Craftsman battery will depend on how often you charge it. For instance, overcharging will shorten the lifespan of any power tool battery because it allows for more discharge cycles than necessary, causing permanent damage to your lithium-ion cells.
When your Craftsman lithium-ion batteries don’t charge, then several factors can cause this issue.
Check for any corrosion on the Craftsman battery charger and battery contacts.
If the rust is present, use extra fine-grit sandpaper to remove the rust from the battery contacts on the charger and battery.
Check if the battery is in sleep mode.
The leaf blower will go on sleep mode when the battery has been discharged too much and stored for a long time without charging. This is because the charger will not provide enough voltage to ‘kick start’ the battery back to life.
Lithium-ion battery sleep mode is a feature that protects the battery cells from damage. When lithium-ion cells discharge too low, they can become unstable and produce short circuits that cause overheating within the battery.
To test if the battery pack is on sleep mode, place it on a powered battery charger and if the red light flashes, the battery is deeply discharged.
If it is on sleep mode;
- First, test the battery with a voltmeter.
- If it has a voltage of above 1.5, connect the battery to a charger for boosting.
- Connect the battery to the charger, and it will pre-charge the battery until it reaches standard voltage, then begins fast charging. Fortunately, the Craftsman charger has a ‘boost’ feature for deeply discharged batteries.
- If it has a voltage of 1.5 and below, it is too undercharged and can risk exploding if you charge it. It is best to discard it properly and buy a new one.
- After boosting, check the voltage using a voltmeter again. If it has a higher reading than before, the boost has worked, and you can connect it to your charger.
- If the voltage is the same as before the boost, the process was unsuccessful, and you should consider buying a new battery.
Alternatively;
- Take another fully-charged Craftsman battery and use a wire to connect the positive(+) terminal of the old battery to the new battery’s positive (+) terminal.
- Then do the same for the negative(-) terminals.
- Leave them connected for about 10 to 10 minutes as the new battery charges or boosts the old battery.
Note that it’s important to always leave a little charge on your battery when storing it for not more than six months. For example, when storing your leaf blower battery for winter, leave at least 40% of the charge.
Check the temperature of the battery.
A Lithium-ion battery will usually charge at temperatures between 32°F to 113°F (0°C to 45°C). Outside these temperatures, the Craftsman battery won’t charge.
If the battery becomes too cold, especially in the winter, you have to warm it up to room temperature before charging it. The same goes for leaving the battery outside in the heat. Again, you will need to cool down the battery temperature to room temperature before charging it.
Check if the Craftsman battery is too old.
The 40-volt lithium-ion battery of your Craftsman tool has a set lifespan. The typical lifespan of any 40-volt lithium-ion battery is two to three years or around 300 to 500 charge cycles. A battery charge cycle is a period of use from fully charged for discharging then fully charged again.
If your Craftsman battery is 3 to 4 years old, it will start to degrade and underperform. It won’t hold sufficient charge anymore or might not charge at all. You will have to get a new battery park for your leaf blower.
Check the charger
Test the battery charger using the following steps if your battery pack seems okay.
- Plug your battery charger into an electrical outlet. Ensure the power supply is the standard household voltage of 120 volts, AC only, 60 Hz.
- Turn on your voltmeter and ensure there is power getting to the meter. Connect the test probes into the voltmeter, then set the selector switch to the highest level for DC volt.
- Take your Craftsman battery pack and ensure no corrosion or leaking fluid.
- Connect the positive end of the battery with the red probe. Then place the black test probe on the negative terminal of the battery.
- Observe the voltmeter and where the pointer is indicating. If it is on the left side or negative side, switch the test probes.
- If it is on the right side, it will show the battery is receiving some charge. The number it points to on the meter determines how much charge it has received.
- Check the battery charger to see how much power it is giving off if there is still a negative reading from the batteries. A negative reading indicates a defective battery charger, and you should replace it. On the other hand, if the charger has sufficient power flowing through it, the batteries are likely bad and won’t hold a charge.
Cordless Craftsman leaf blower does not start.
Battery-powered leaf blowers are very straightforward power tools as they have fewer mechanical parts compared to the gas-powered variety. Unfortunately, this makes troubleshooting a cordless leaf blower that won’t start a straightforward task. Nevertheless, here is a checklist you can use to identify the issue of a Craftsman leaf blower that won’t start and how to repair it.
Battery
Make sure you’re using batteries that work and have a full charge. Attach the battery pack to the battery charger, and the charger will communicate with the battery circuitry to determine the condition of the battery pack. If the battery is defective, the red indicator light on the charger will start flashing, and the green indicator light will be off. Dispose of the bad battery pack and get a new one.
Leaf blower contacts
Check the contacts in the battery compartment of the leaf blower. If they have corroded, try removing the rust with fine-grit sandpaper. Then reinstall a fully charged battery pack and test if the leaf blower starts. If the battery is fine and cleaning the contacts is not working, you may have to contact a professional to help replace the battery contacts on your leaf blower.
Review the starting procedure
Ensure you’re following the correct starting procedure for your Craftsman leaf blower. Install the battery pack correctly, then push the speed dial forward until you hear a click, and the blower should turn on. Turn the dial forward to increase speed up to 150 MPH.
Impeller
Check that the impeller or fan has not jammed. Check for sticks, leaves, or dirt to prevent the fan from turning. If the impeller is moving, turn it manually to see if you hear a grinding noise, which indicates worn bearings. If the bearings on the impeller have worn out, they could lock up when power gets to the shaft. The solution is to replace the bearings.
Electric motor
Open the inspection hatch of the electric motor and check if the central spindle will turn. Replace the battery pack and test the leaf blower. If it still won’t work and there is power reaching the leaf blower, check the on/off switch. Remove the batteries and use a multimeter to test if the on/off switch is working correctly. If the switch has no voltage, replace it.
If the switch is working, it is likely the electric motor is defective and may need a replacement.
Thermal cut out
A thermal cut-out is like a short fuse that will protect the leaf blower from damage when it is overheating. A short fuse will prevent the engine motor from starting to avoid further damage to the components of your leaf blower. Test all the fuses in your leaf blower with a multitester and replace them as necessary.
How to add oil to a 4-cycle Craftsman gas leaf blower
Changing the oil in a 4-cycle Craftsman leaf blower is much like other types of gas-powered leaf blowers. However, old engine oil has fine shards of metal formed by the movement against the piston against the cylinder, and these cause a leak.
Changing the oil eliminates these shards and improves lubrication since old oil loses its effectiveness as it wears out. The Craftsman 4-cycle leaf blower uses SAE 30 motor oil, similar to the type of oil you put in your car. The catch is there is no mixing oil and gas in the 4-cyle engine leaf blower.
Things you will need
- Rag
- Screwdriver
- Oil catch container
- SAE 30 SF motor oil
- Funnel
Directions
- Disconnect the spark plug wire from the spark plug.
- Find the fuel tank cap and remove it. Then wipe down around the cap and surrounding areas to keep dirt from accidentally falling into the crankcase.
- Place a drain pan on a flat surface and let the leaf blower drain all the old fuel into the drain pan.
- After draining all the fuel, wipe any oil around the leaf blower.
- Fill a clean plastic cup with 90 milliliters of SAE 30 motor oil; place a funnel into the oil tank hole and pour in your motor oil.
- Check the oil level. It should be at the lowest thread on the inside of the oil fill hole.
- Screw back the oil plug and reconnect the spark plug wire.
- Change the Craftsman leaf blower oil after every 25 hours of use.
How to use a Craftsman leaf blower as a vacuum
The Craftsman leaf blowers have a built-in vacuum mode that offers a one-tool solution for blowing and bagging leaves and twigs. In addition, the leaf vacuum mode aids in cleaning and picking up small amounts of yard debris.
To switch your power equipment from leaf blower to leaf vacuum, you have to remove the vacuum mechanisms and install the blower tube on the same end of the fan. The difference between models will be the disconnecting mechanism of the tubes onto the blower, but the procedure is the same. Follow the steps below successfully use your leaf blower as a vacuum.
- Turn off the leaf blower and ensure it cools down before removing any attachments.
- Open the zipper of the vacuum bag and attach the curved vacuum tube through the vacuum bag, pulling it all the way through until you reach the narrow elastic neck. Then, pull the curved tube until it stops.
- Attach the vacuum bag to the blower. Use a screwdriver to unscrew the screws at the side of the power unit.
- Disconnect the leaf blower tube from the main body. Turn the blower tube counterclockwise until the tube unlocks from the front of the blower, then pull the tube away from the blower.
- Attach the vacuum tube. Remove the fan cover, then slide the vacuum tube on top of the fan. Turn the vacuum tube clockwise to secure it.
- Take the lower end of the vacuum tube and attach it to the upper end of the vacuum tube. Turn it clockwise to lock it in place.
Craftsman backpack leaf blower not blowing as hard
A few reasons can explain why your leaf blower is not blowing as hard or feels like it’s losing power. While some may be easy to check and troubleshoot yourself, others may require professional help.
Broken fan
If your engine is running as it should, but the blower is not blowing air as it usually would, then it is likely that the blower fan has broken. A broken blower fan will not create the proper suction that your unit needs to blower air with consistent force.
Inspect the fan and first check if it is loose. If it feels wobbly, tighten the screws holding it in place and test it. If the problem persists, the fan is defective and requires a replacement.
Take out the spark plug boot and spark plug and thread a piece of string into the spark plug hole, which will prevent the piston from rotating inside the cylinder while the fan is disconnected. Replace the new fan blade, remove the rope then test your leaf blower.
Muffler and spark arrestor
The spark arrestor is a device in the exhaust muffler that prevents sparks or other flammable debris from escaping through the muffler. But sometimes soot and carbon can clog the spark arrestor, preventing exhaust gases from getting out of the muffler causing the leaf blower to run on reduced power.
Remove the spark arrestor and clean it with a non-abrasive brush and soapy water. Alternatively, you can use a blower torch to burn off the debris stuck in the arrestor. If cleaning it is not effective, install a new arrestor.
Carburetor
If you have been using low-quality fuel or the gas has been sitting inside the carburetor, it can clog the carburetor. A clogged carburetor will not supply the power air-fuel mixture resulting in the leaf blower losing power.
Cleaning the carburetor with a carburetor clean should help remove any blockages. You can also blow compressed air through it after cleaning it to clear its small vents and passages.
The carburetor may also have an incorrect mixture setting, causing it to blow low even at high RPM. Check if the carburetor setting is causing the issue by adjusting the mixture screw on the carburetor by turning it clockwise or anti-clockwise, half a turn at a time until the leaf blower starts blowing hard.
Make minimal rotations of the screws while revving the engine to see if the adjustments were successful.
Spark plug
Leaf blowers have a spark plug that ignites the fuel-air mixture inside the engine’s cylinder. It is common for 2-stroke engine leaf blowers to develop issues with the spark plug quickly since they require frequent spark plug replacements. A worn spark plug will not produce the proper spark necessary to make the leaf blower blow strongly.
Remove the spark plug and examine the electrodes. If the insulator tip has accumulated carbon or engine oil, it is bad and needs a replacement. Also, checking for the electrode cracks and a new spark plug should fix the low power issue.
Air filter
The leaf blower engine required clean air to produce a powerful and consistent airflow. The air filter in the air inlet filters dirt and debris from the incoming air. Over time, the air filter accumulates dirt which restricts the amount of air flowing into the carburetor, and your leaf blower starts to blow low.
Check the air filter and clean it with soapy water. Rinse it thoroughly and allow it to air dry before reinstalling it. If the air filter is excessively dirty, a new replacement should fix the issue.
Battery
If you have an electric cordless Craftsman leaf blower that is not blowing hard, the battery could be running low on charge or defective. Connect the leaf blower battery to your Craftsman battery charger. If it is faulty, the red indicator light will start flashing, and you will need to install a new battery with the correct voltage and amp ratings.
Craftsman leaf blower running but won’t blow.
The following reasons may cause your leaf blower not to work even if the engine is running.
Blower fan
The fan is attached to the crankshaft and provides airflow inside the unit when it rotates. However, the leaf blower can suck up leaves, rocks, and debris, blocking the fan fins stopping the fan from spinning. Instead, access the blower fan, try removing the blockages, and test the leaf blower. If it still doesn’t blow, you have to replace the blower fan.
Nuts
The fan nut holds the fan to the crankshaft. The crankshaft might spin without rotating the fan if the nut comes loose. If the fan doesn’t turn, the unit won’t blow any air. Tightening the nut and Loctite should fix the issue.
Tubes
The tubes in your leaf blower funnel air down to a nozzle that increases the airflow speed. If the tubes are damaged, the blower may not be enough air or no air at all. You will have to get a professional to help replace the tubes.
Conclusion
This article will help you troubleshoot the most common issues with the Craftsman leaf blower. However, if none of the solutions work, there might be a severe problem that may need professional help or replacing the leaf blower. Note that the Craftsman leaf blower requires regular maintenance and proper use and storage to reduce breakdown and improve its lifespan.

