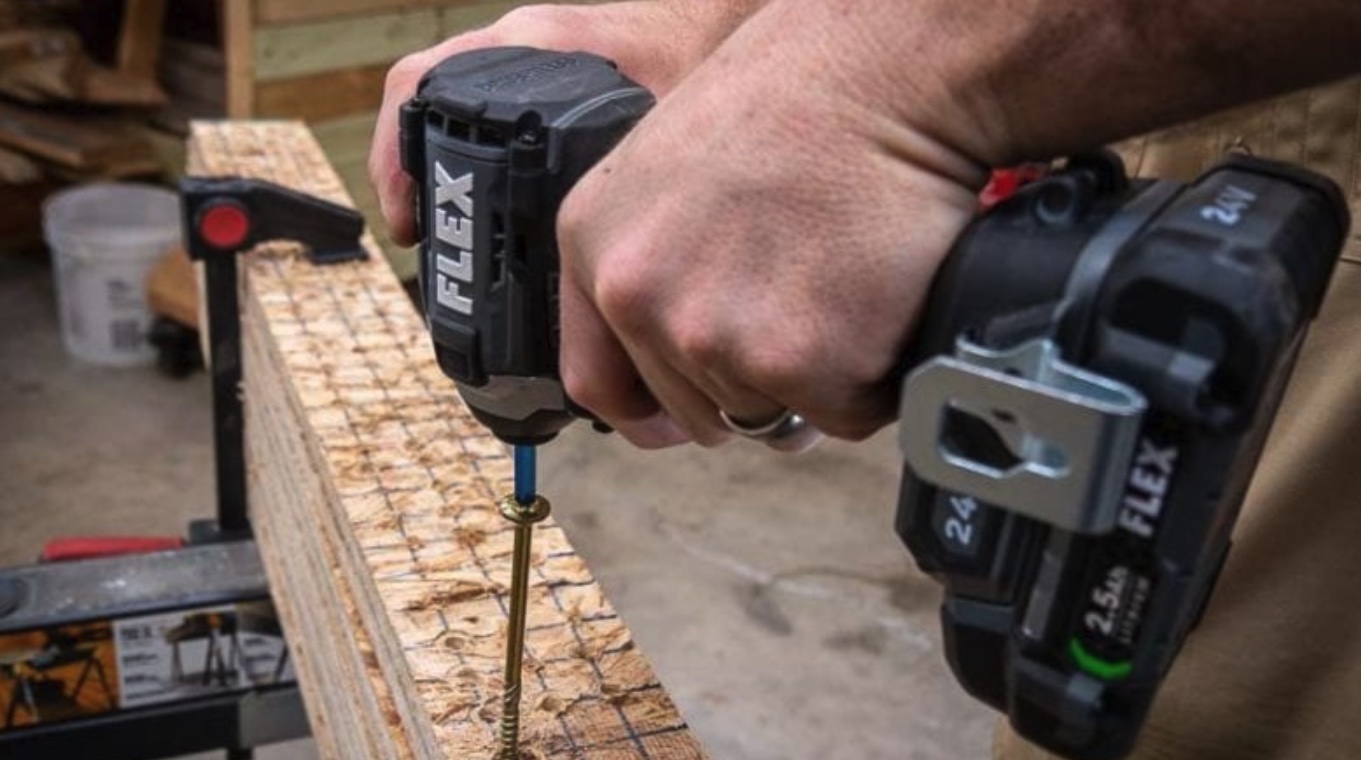
Flex Impact Driver How to & Troubleshooting Guide
An impact driver is an essential tool if you need to handle more advanced Diy projects that cannot be handled by a drill. And the Flex impact driver is one of the best options in the market when it comes to efficiency and reliability.
However, you may encounter some issues when using it just like you would while using any other electronic gadget. Keep reading to learn how to troubleshoot common problems you may encounter and solutions to fix them.
Flex impact driver not working
Here are some reasons why your impact driver is not working;
Batteries
A battery is a container consisting of one (or more) cells, which chemical energy is converted into electricity and used as a power source. If the battery will not hold a charge, then it will need to be replaced. Batteries have a life cycle, which all vary, depending on the materials used to make them.
Eventually, they will reach their charging limit. The battery near the end of its life will not hold as much power and will require to be charged more frequently, eventually dying out. When this occurs, purchase a new battery.
Carbon Brushes
The brushes provide the electrical current to the armature by riding on the commutator. If these brushes become damaged in any way, it can impact their ability to provide the electrical current.
To check the condition and replace these brushes, if needed, start by removing the battery. Remove the screws on the end cap and pull off the impact driver. Locate the spade connectors and remove them with pliers. Insert a small screwdriver in the access hole, close to the center of the housing, and gently pry out the brush.
On some impact drivers, you will have to remove the case on the housing and remove the two screws securing the transmission to the impact driver on the same side the cover is located on. Then, remove the cover. One brush will be in the cover and the other under the motor.
Remove the hold-down bracket on the motor to access the second brush. Check for wear, weak springs, heavy dirt build-up and replace as needed.
Insert back in the housing and then reinstall the spade connectors. Tighten the motor back in the housing with the hold-down bracket. Reinstall the cover on the housing and reattach the two screws securing the transmission to the impact driver. Put the end cap back on and test the impact driver.
Chargers
The charger charges the battery. When you place the battery into the charger, the light should indicate that it is charging. If it is not charging, then check the connectors for corrosions or any other dirt build up. If you notice any corrosion on the contacts, then you will need to clean the contacts.
Unplug the charger before cleaning. Use a small screwdriver to gently scrape any corrosion off the connectors – or, anything else that may work. Recheck to see if the battery will now charge. If the problem persists, replace the charger.
Motors
An electric motor is an electrical machine that converts electrical energy into mechanical energy. To replace the motor, remove the two screws holding the transmission to the motor on the side of the transmission where all of the housing screws are facing upwards on the case, that secure the case to the housing.
Next, remove the screws securing the case to the housing and remove the case. Remove the other two screws on the transmission that secure it to the motor. Remove the screws securing the hold-down brackets on the motor and then the motor and transmission assembly. The motor should just twist away from the transmission.
Twist the new motor onto the transmission – it may take a few tries as you need the gears to mesh up. Reattach the transmission to the motor and secure the two screws. Reinstall back in the housing.
Put the hold-down brackets on the motor, securing it to the housing. Reinstall the second brush holder into the impact driver. Put the case back on the housing and reinstall the last two screws, securing the transmission to the motor.
Switches
The switch turns the power on and off on the impact driver. Make sure the battery is good and that the impact driver will not work in both forward and reverse positions, before replacing the switch. To replace the switch, first removed the end cap on the impact driver.
Next, remove the two screws holding the transmission to the motor on the side of the transmission where all of the housing screws are facing upwards on the case, that secures the case to the housing. Next, remove the screws securing the two halves of the case together and separate the halves.
Remove the other two screws on the transmission that secure it to the motor. Remove the screws securing the hold-down brackets on the motor and then the motor and transmission assembly. Remove each wire from the brush holder and do not mix up where they attach.
Take the switch off of the impact driver. Install the new switch in the housing and connect the wires in the slots, inside the housing. Reattach the wires to the correct brushes and insert the brushes back into the impact driver housing. Reinstall the motor and transmission assembly back into the impact driver housing.
Reinstall the hold-down brackets and secure them with the screws. Reinstall the two screws securing the transmission to the impact driver case. Reinstall the second brush holder into the impact driver. Reinstall the case back into the housing followed by the two other screws securing the transmission to the motor.
Holder
Holders provide stable support of the brush, in the proper position in relation to the contact surface of the commutator. If the holder has become damaged and can no longer support the brush properly, it will need to be replaced. On some models, you can just remove the end cap to access the holders.
Remove the holders and inspect for breakage and replace, if needed. For other impact driver models, you will need to remove the cover and the two transmission screws that are located on the same side as the cover.
Pull the cover off. One brush holder is located in the cover and the other is found under the motor in the housing. Remove the motor hold-down bracket and lift the motor up to access.
Inspect the holders and replace as necessary. Reinstall the holder in the housing and reinstall the motor, securing it with the hold-down bracket. Reattach the cover and tight. Reinstall the two transmission screws and reattach the end cap.
Flex impact driver trigger not working
Reasons the trigger is not working;
- Not applying sufficient pressure to the tool
- The battery is not charged properly
- The tool is free rotations no workload
- Not enough battery power
- Inner friction
Possible Fixes;
- Applying a suitable pressure to the tool
- Always use a fully charged battery
- The impact mechanism is activated with the workload. So use it with a screw and test it.
- Use battery fully charged
- Apply grease, lubricants inner as hammerhead hit and slip through the anvil
Flex cordless impact driver keeps working with trigger off
This could be as a result of a looser faulty impact switch. Take it to a professional to fix the switch or replace it. Alternatively, you can use online tutorials to guide you in the right procedure.
Flex cordless impact driver clutch slipping
You can remedy this issue by tightening the clutch.
How to Tighten a Cordless Impact driver Clutch
The controlling mechanism is a rotating collar between the keyless chuck and the body of the impact driver.
Items needed
- The impact driver
- Screw bit
- Screws
By adjusting the setting of the clutch, you can alter the amount of torque transferred to the chuck. This is particularly useful when driving screws, as you can tighten the DeWalt cordless impact driver clutch to the proper setting so that the head of the screw is flush with the surface of the board.
Hold the body of the impact driver with one hand, and rotate the clutch (a collar with incremented numbers around the collar) so that the desired setting is in line with the pointer on the top of the impact driver. Higher numbers mean more torque, while lower numbered settings will have less torque.
Drive a screw into the board or other material. Release the impact driver’s trigger when the clutch begins to slip.
Inspect the head of the screw to see if it is above or below the surface of the board. If the head is protruding from the surface, increase the clutch setting one or two numbers, and continue driving the screw. If the head of the screw went too deep into the material, reduce the clutch setting.
Repeat step 2 with another screw. Continue testing and adjusting the clutch until the screws are being consistently driven to the proper depth.
Warning:
When using a cordless impact driver, be sure to wear appropriate safety equipment, including safety glasses to protect your eyes.
Flex impact driver overload protection keeps triggering
The Impact driver may stall if overloaded causing a sudden twist. Always expect the stall. Grip the impact driver firmly to control the twisting action and avoid injury.
To minimize stalling or breaking through the material, reduce pressure on impact driver and ease the bit through the last fractional part of the hole.
Keep the motor running when pulling the bit out. Always make sure you are using the correct impact driver bit for the application.
If impact driver stalls, it is usually because it is being overloaded or improperly used. Release trigger immediately, remove impact driver bit from work, and determine cause of stalling. Do not depress trigger on and off in an attempt to start a stalled impact driver. This can damage the impact driver.
Why the Drill Is Overheating?
Reasons it is overheating;
- Use in a high-temperature area
- More workload
- Inner circuit short
- No inside lubricants
- Covering the ventilation
- Apply more pressure to the tool
Possible fixes;
- Use tool in low temperature are (do not use in heavy sunlight)
- Do not work continuously in more workload
- Check the inner circuit and smell
- Apply inner lubricants, grease on the bearings
- When you use do not cove both side ventilations
- Apply enough pressure to the tool. Do not pressure too much
Why would impact driver bits not work in an impact driver?
Regular impact driver bits usually have rounded ends. This prevents them to be installed in impact drivers as they only work with hex bits. However, some regular impact driver bits come with hex ends which means these can be installed in most impact drivers.
On the other hand, impact-driver bits have hexagonal ends. This design is thought so that way because impact drivers have hexagonal shanks.
However, regular impact driver bits are not designed to withstand the stress of the torque an impact driver outputs. As a result, if stress-tested, regular impact driver bits with hex ends placed in impact drivers can easily snap which could also break the impact driver itself.
How long does it take to recharge a Flex impact impact driver battery?
Most impact driver batteries can be recharged in 30 to 60 minutes with the worst taking 6 hours. For brand new batteries, charging it overnight will ensure you have a full charge on each individual cell. From that point on, future charges can take between three to six hours to achieve a full charge
Flex impact driver not impacting
Impact driver power is lost due to brush wearing, winding burning, low battery capacity, broken trigger, worn bearings and rarely, magnets can be crashed due to damages. More than this, lack of lubricants, overheating, back EMF also will be the reasons for impact driver lose power.
Worn Brushes
When you use a brushed impact driver, you can see there is a carbon brush that will touch the commutator. The brush is used to supply the current to the winding (wiring loop). Each and every rotation brush is in touch with the commutator.
When the brush touches, it can be worn due to friction. There is spacing in the commutator. When the brush is moving on it, it can be scratching.
When the tool is used for a long time, its brush is worn, and the electric supply can be weak. When the electric supply is weak, it affects the motor rotation directly. So you had better change the brushes when they reach 1/4 of the original length.
Sometimes worn particles can be attached to the inner parts, and it can short the commutator panels.
Use the tool in low temperatures. It will help to minimize the wearing due to friction.
Low Battery Capacity
When a battery is used for a long period, its capacity can be decreased. Because battery current is a result of a chemical process. When the same process is happening for a long period, its efficiency can be decreased.
If this is happening continuously, replace the battery. Before you use the battery every time, make sure it is fully charged. Follow the steps on how a battery can last long with its maximum efficiency.
Winding Burning
Normally when the windings are increased, its power and smoothness also increased. When the winding is damaged due to any reason or burning it, its power can be reduced from the total power.
Although a winding plane has burned, the motor can be worked. But it will not produce the maximum torque and power that the motor had. Its efficiency can be reduced due to this. You can observe only the torque has reduced when you use it.
You have to use an experienced electrician to check the windings. Changing the brushes will not solve this.
Check this too: Ryobi Leaf Blower How to and Troubleshooting Guide
Sometimes dust can scratch the winding, and due to electricity, it can be short and burn. Ensure you lubricate the tool as much as possible and not to use it in the dusting area.
Trigger Damage
The trigger is used as a power switch of the impact driver. When the trigger is pressed, it provides electricity and power is generated by the motor. Mostly RPM depends on the trigger pressing.
If you press less, there is low RPM, and if you press completely, high RPM can be seen. So now you can realize if there is a problem with the trigger, its RPM can definitely be changed.
If the trigger inside is clogged with dust or damaged wire and the current is leaking, its performance will not be seen. To test the trigger with proper RPM before you use it. When you see this while you are working, you can see there is power lost. Service and maintain the trigger correctly.
Worn out Bearings
This is mostly happening in brushless motors. The bearing is used to fix the rotor with housing. So bearing supports to complete the rotation of the rotor. If there is a problem in the bearing, it can directly affect the impact driver spinning mechanism.
So if you use a brushless motor, you should pay attention to this matter. That is the most problematic part of the brushless impact driver.
You can replace the bearing if there is a problem. But identify that early to reduce the damages.
Magnet Crashing
This is a really rare situation. If the tool is dropped from the high, it can break the inner magnets. When the magnets are breaking its magnetic field can be weird. So you can’t have the expected power from the tool.
If you use the brushless impact driver, this can be seen. Because most magnets are included in the rotor which is outside the stator. If the torque is reduced, remove the part by part to find the problem.
Power Supply Problems
Electric impact drivers are of two types. Cordless and corded are them. Both are based on the power supply to the impact driver. Normally corded impact drivers are powered with the permanent power cord.
If there is any damage to the power cord, its performance can be reduced. So you had better check the power cord for a better power supply without any problem.
If you use the cordless impact driver, its battery and tool can be overheated due to high torque usage. So performance can be reduced due to this. Do not use the impact driver in the high torque requirement area.
When you fix the battery, it can be loose fixing. So its power will not receive to the motor. Therefore, you can see there is low performance. Make sure the battery is fixed with the tool, and there are no internal particles to clog the connections.
Flex impact driver not spinning
In general, an impact driver bit may slip or not spin if the chuck has not been tightened properly. An electric impact driver with a keyed chuck needs to be tightened in at least 2-hole locations. While a Keyless chuck should be done up by hand in which you will hear it clicking.
Using a impact driver-on hammer can cause the chuck to loosen.
Keyed Chuck
To ensure adequate tension on the impact driver bit, you need to use the key and tighten it in each hole location of the chuck. All chucks have 3 holes and you need to use all of them.
Keyless Chucks
To tighten keyless chucks, just hold the chuck and pull the trigger. Am I right? Yes, this is good to start with. To get it properly tightened, you need to do the following:
- Hold the impact driver with one hand
- Use the other hand to turn the chuck counterclockwise.
- You will hear the chuck clicking as it gets tightened
- Once its as tight as you can get it, turn the chuck clockwise a small amount, and you should feel the chuck click into place.
This ensures the chuck is completely securing the impact driver bit
The Impact driver Chuck is Loose
Most chucks are fixed to the actual impact driver via a large reverse threaded screw located in the bottom of the chuck. Open the chuck jaws fully and see if you can see the screw.
Does the chuck seem loose on the actual impact driver? It can be tightened by turning this screw anti-clockwise. If you can’t see a screw in there it may be held on by other means or it may not be the issue. Worth checking this before moving on.
Why Does My Flex Impact Driver Keep Stopping?
An impact driver may stop spinning if the internals of it is damaged and needs replacing. Due to the cheap cost of impact drivers these days, it may be cheaper to buy a new impact driver than replace its parts.
Below are some reasons why your impact driver is seizing and hot to fix them;
Switch position
Sometimes, people just forget to flip the switch properly. Some switches on these impact drivers can be turned on, off, or put in neutral. In some instances, people think that they have the switch in the on position. It may have been stuck in the off or neutral position after all. Check the switch, maybe you just didn’t move it well enough.
However, if the switch is in the right position and your impact driver isn’t moving at all, then you may have a battery or power problem. Well, it’s either that or you have a broken switch. If you’re sure that you have a fully charged battery (for cordless impact drivers) and you have power from the strip, then you should have the switch replaced.
Power Problems
If you’re using a cordless impact driver, then one probable reason why your impact driver has stopped spinning is that the battery ran out of juice. The two trouble points that you can test are:
- The charger
- The battery
To test the charger, you need to use a multi-meter. You need to plug the charger into an outlet. A multi-meter is a device or tool that has two metal probes. You use it to test for an electrical charge. You can order one from Walmart, Amazon here, or other suppliers. If you are not confident with this, then take it to your local electrician for an inspection.
Next, plug the probes into the charging slots in the impact driver’s charger. Be careful not to touch the metal ends of the probes or the charging slots. Turn the probe on and check how much electricity is coming in.
Do the same for the battery. Test the connectors with the multi-meter. Note that if the meter shows zero either on the battery or on the charger, then that part needs to be replaced. To help you see how this is done, check out this video:
Flex Cordless Impact Driver Won’t Start?
Many cordless impact drivers are usually sold with a backup battery. You can then remove the battery currently installed on your impact driver and replace it with your backup. You can then charge the previous battery while using the new one.
If you don’t have a secondary battery or the battery is fixed onto your impact driver, then you will have to charge it for a few minutes. After the battery has been charged, you can then use the impact driver.
If you’re using a impact driver with a cord, make sure that there is power coming from the outlet or power strip. Unplug your impact driver, get another appliance, and plug it in the same socket. Turn the appliance on. If the appliance turns on and works, then your impact driver may not be getting any electricity.
The power issue may also be caused by a faulty power cord. To test this, follow these steps:
- Plug your impact driver into the wall socket and then turn it on.
- Grab hold of a section of the cord—the one near the outlet—and then flex it back and forth. Make sure to bend it in different directions. If the impact driver spins in any of these directions, then the cord near the socket is faulty.
- If that doesn’t do anything, then this time flex that section of the power cord near the impact driver. Do the same test on this end of the cord. If the impact driver spins (or spins and stops), then this is the end of the cord that is faulty.
- If you’re not too savvy with removing power cords or you don’t have a spare cord, then you may have to take your impact driver to a shop to have it repaired.
- If the power cord or the battery isn’t the problem, then your impact driver may not be spinning due to something more serious. Check out the other options in the guide below.
Pulling Your Impact Driver Apart
In the next few parts of this guide, I will show you how to replace faulty parts that prevent your impact driver from spinning. This will require you to remove the housing of your impact driver.
Take note that there are two types of impact driver housings:
- Clamshell type
- Stacked housing
The clamshell type of housing is the most common one out there. It is made up of two plastic halves that are identical. These are the easiest to open because all you need to do is to remove the side screws.
The image above shows an open impact driver with the two parts of the clamshell casing side by side.
The second type, stacked housing, is a bit trickier. This type of impact driver case has four parts:
- Handle
- Switch housing
- Motor housing
- Gear housing
Which part of the housing should you remove first? It will depend on the model and make of your impact driver. Some impact drivers will have you remove the handle first. However, there are models where you can access either the motor or gear housing without having to remove the handle.
How to Disassemble a Cordless Impact driver
Refer to the user’s manual that came with your impact driver before attempting to disassemble this type of impact driver housing.
Checking the Gear Case
The gear case is one of the parts that you will need to check, especially if the impact driver keeps on spinning but the chuck stays in place. The gear is made up of the clutch as well as the transmission. The gear case itself can get worn out due to regular wear and tear.
Another way to verify that the gear case is failing is when you hear some kind of grinding sound when you make the bit spin. Don’t press it against any material—just let it spin. If you hear the grinding of metal on metal, then it might be that the gear case is damaged.
The hammer function of your impact driver may already be faulty, which causes metal parts to grind against one another. If it’s not that, then it could be that the clutch is already slipping, which causes the grinding sound.
In any case, you need to replace the gear case. Now, as was mentioned earlier, each impact driver model will have a different way of removing the gear case. You should check the user’s manual just to make sure you’re doing it right.
However, the process basically begins by removing the handle first, getting it out of the way. That will be followed by the removal of the chuck. You will need a certain type of screwdriver. Some impact drivers will require a Philips screwdriver and some will need a flathead. Some rare models will need a hex or a star screwdriver.
Again, inspect your impact driver (or check the owner’s manual). You can tell by the shape of the screw that’s on the handle. Note that the chuck screws are usually at the bottom and they’re in a reverse thread.
Apart from screwdrivers, you will also need the right-sized Allen driver to remove the actual chuck. The cover can then be removed, which will allow you to remove the gear case.
Chucks
Sometimes, it’s not the entire gear case that’s causing the problem. Sometimes, the noise will come from the chucks. If the internal parts of the chuck are damaged, then it won’t be able to grab hold of the impact driver bits.
If you make the impact driver spin for a quick inspection, you will see it spin even if the chuck isn’t gripping it properly. However, once you press it against some kind of material, then the problem will be obvious.
The impact driver bit will stay in place and the chucks will spin on the impact driver bits. You will hear the impact driver make its usual noises but the impact driver bit isn’t spinning.
If this is what you’re experiencing, then it means that the impact driver chuck will need a replacement. There is no workaround that you can apply here since the chuck itself is worn out.
To replace the chuck, follow these steps:
You need to use the right type of screwdriver to remove its screw. Again, it’s usually found at the bottom. You will then need the right-sized Allen driver to dislodge the worn-out chuck off the spindle.
To install the new impact driver chuck, insert the new one into the spindle. Tighten it using an Allen driver. And then put the screws on afterward.
Check the Spindles
If upon inspection you notice that the chuck is still able to “bite” onto the impact driver bit, then something else is wrong. Remember that the chuck rests on the spindle, which is the part that makes it spin.
If the impact driver chuck has no problems, then the next part that you should inspect is the spindle. Spindles get worn out over time as well due to regular wear and tear.
To test for a broken spindle, make sure that your impact driver is turned off. Remove the plug from the outlet just to be sure. After that, use your hand to spin the chuck. When you do this, you will normally feel some sort of movement in the gears. There will also be some resistance when you try this easy test.
However, if the chuck spins freely with no resistance, then the spindle is broken.
To remove the spindle, follow these steps:
- You should first remove the case, handle, and chuck. Follow the steps described earlier for removing the impact driver chuck. Once you have the chuck removed, there are several parts that you will have to remove to release the spindle.
- Note that the actual parts may be different for your impact driver. Again, check the user’s manual for the actual steps for your model. However, according to my personal experience, you will need to remove the cam plate, retaining ring, gear, steel ball, change plate, and leaf spring.
- The bearing will be a bit tricky to remove. I recommend that you use either a puller or a bearing separator to make things easier. Once you have the bearing removed, the compression spring should be easy to get to. If the spindle is stuck, use a vice grip.
Gears
The gears also get a lot of wear and tear. And with frequent use, they tend to get stripped eventually.
Follow these steps to inspect the gears in your impact driver with the housing in the front of the impact driver:
- You need to locate the gear housing. If it is in the front of the impact driver, it will be easy to access.
- Remove the screws that hold the housing in place.
- After that, remove the cover.
- Once the cover is removed, you can inspect the gears. Look for chipped or damaged gear teeth.
If the gears look damaged or have visible signs of wear and tear, then it’s time to replace them. To do that, follow these steps:
A lot of impact drivers have gears that can be removed from the shaft. The shaft should be easy to pull out once the cover is removed. Once you’ve pulled it out of the case, then you can work on removing the actual gears that are attached to the shaft.
To get the all-in-one gear unit off the shaft, you need to get a bearing separator. Install it on the bearing and then place everything on a bench vice.
- Grab a hammer and gently tap on the shaft. You can use a punch with the hammer. This makes removing the bearing much easier.
- After removing the bearing, you need to take out the retaining ring.
- This will then allow you to remove the wave washer.
- After that is taken off, you can then remove the keyway and the gear as well.
- To replace the old gear, do everything in reverse. Install the keyway and the gear onto the shaft first.
- Follow that with the wave washer, retaining ring, and all the other parts. Note that you will need to use a socket on the bearing race. This will hold it in place. Use a small hammer to tap the bearing into place.
Note: before you reinstall the case cover, you should put grease on the bearing. This will help reduce wear and tear.
Flex impact driver lights not working
This could be as a result of a faulty trigger switch. Try to clean the inner part of switch or insulate seized wire. If this does not work, replace the trigger switch.
How to clean and maintain a Flex impact driver
Below are important points to always adhere to when cleaning your Flex impact driver;
Wipe Fuels and Solvents on The Tool Immediately
When you are using your cordless impact driver, and it has come in contact with fuels and solvents like a thinner, gasoline, and acetone, you should wipe them away quickly. You should use a paper towel when wiping the tool but skip using any cleaning solvent. You should also skip abrasive cleaning as this can affect the appearance of the housing.
Keep Dirt and Debris Away from The Tool’s Openings
When using a cordless impact driver, you have to make sure that you keep any dirt, debris or perhaps metal fillings away from the openings of the tool’s housing. Dirt and debris can actually affect the tool’s performance. Moreover, it can become stuck in the tool’s mechanism. This can result to damage on the different parts inside the cordless impact driver.
How to clean power tools
When it comes to cleaning your power tools, you need to take extra special caution in protecting the motor casing and open or exposed parts of machinery as well as any cables. It is a good idea to have the tool manufacturers’ guide or data sheets handy just in case.
It’s always a good idea to use a toothpick or Q-tip for these areas. For the body, you’ll be using the same formula as above without putting it directly in the bucket.
Don’t be afraid to apply your cleaner to clean power tools and get to it. Don’t submerge it in the liquid as this can easily damage the motor and electrical parts.
- Simple green All-Purpose cleaner or a similar cleaner/degreaser
- Wire brush or steel wool
- Bucket
- Soft rag
- Toothpicks / Q-tips
- WD40 or 4 in 1 oil
- Air compressor or a can of compressed air
Cleaning steps
Items needed
- Use an air compressor or a can of compressed air to get rid of any dust and debris. You may have build up in the harder to see or vented areas
- Fill a bucket halfway with hot water. Add your cleaner to fill in the rest of the way
- Use a wire brush with your cleaning solution and steel wool to remove rust. Scrub lightly to avoid putting any scratches in your tool
- For the little nooks and crannies and vents, you’ll want to use a toothpick or a Q-tip
- Wipe off with a soft rag and repeat if necessary
- You may want to replace worn rubber grips if they’re really torn up. This method works really well to get them clean and non-sticky
- You can use corrosion protector like WD40 to apply lightly to the metal parts
- You can clean the power cords by running them thru a rag dipped in a little of the cleaner. This is the same for power cords too. Just make sure they’re dry before you plug them back in to use
Note: Ensure the impact diver is not plugged into a power outlet before you get started.
How to clean impact driver bits
When it comes to cleaning your power impact driver bits the method is pretty simple and straightforward but it is however important to note that cleaning your impact driver bits is not the same thing as sharpening them.
A dirty impact driver bit can leave its mark of roughness on your surface. So keeping your bits clean is just as important as keeping them sharp.
Items needed
- Simple Green or any All-Purpose cleaner or a dedicated bit & blade cleaner like CMT formula 2050.
- A shallow pan or a 5-gallon container lid
- Brass wire brush, a softer tooth style brush style
- A regular style tougher type wire brush
- Rag or heavy-duty paper towels
- File, or popsicle stick & sandpaper (coarse & fine)
Cleaning steps
- Place the blade or bit/s into the shallow pan or lid and fill it up with the cleaning solution you’ve chosen
- Let it soak in there for around ten minutes to soften the build-up of pitch, tar & gum
- Next, remove the blade or impact driver bit and set it on the rag or paper towel
- Now take your soft wire brush and clean the cutting edges by stroking outward from the centre.
- Next, rinse it off with just a little bit of clear water and pat it dry with a rag or if you prefer you can let it air dry
- The process is the same for blades and regular type impact driver bits but when it comes to router bits you’ll need to take off the bearing so your cleaner can remove some of the grease and gunk that’s in there
- You should be able to spin that bit freely by holding the bearing with your fingers and spinning it. If it doesn’t spin freely, you’ll want to lubricate that bearing until it does
- For longer bits such as Auger bits, you can use a thin tube such as PVC tubing instead of a shallow pan and after soaking a while you’ll want to use a tougher wire brush to get off any rust or debris left on the bit. This may take a little while and some elbow grease
- You may want to remove the set screw from the tip and soak that also or you can replace worn set screws with new ones pretty inexpensively.
- Once you’ve cleaned the bit and dried it with a rag you can sharpen it with either a dedicated Auger bit file, a regular file or even sandpaper that you can glue to a small thin piece of wood such as a popsicle stick with a coarse grit on one side and fine on the other
- One thing to keep in mind when sharpening Auger bits is you never want to sharpen the outside edges of the cutting spurs as it reduces the diameter of the bit which would cause the bit to bind up as the diameter would be different at that end of the bit. Make sure you have data sheets or notes on the precise sizes
- When you’re filing the spurs keep your file to the inside and sharpen them to a fine edge which will result in a much cleaner hole
- Sharpen the cutting edges of the rest of the bit in the same manner by filing on the inside until a nice sharp edge is produced
- You can really get a good clean screw tip by taking your power impact driver and impact driving a hole into some wood just slightly before the spurs are engaged and then putting a little oil into the hole and repeat the impact driving into that hole.
Note: a citrus-based cleaner will work very quickly to dissolve pitch, gum, and tar.
How to maintain your Flex impact driver
Below are crucial tips for maintaining your impact driver;
Store Batteries Properly and Ensure Proper Charging
In the past, it has been a considered a concern when it comes to preserving the life of cordless impact tools like the cordless impact driver. However, with recent advancements in technology, there is no memory effect on the new and improved lithium-ion batteries of cordless tools.
You just have to keep in mind that the life of this type of batteries is maximized if you keep then in 50 percent stage of charge. Additionally, it is normal to charge the battery overnight. In fact, this will not have a negative effect on the battery and its performance.
Use The Appropriate Type and Size of Accessories for A Cordless Impact Driver
When using cordless impact drivers, it is important to take remember that you should use the right type of accessories for the tool. Impact drivers are designed to work with impact sockets.
Thus, you have to make sure that you use one when working with a cordless impact driver. Using regular sockets with a cordless impact driver affects the performance of the tool.
In addition, this also poses a significant safety concern while in the workplace. A regular socket cannot with stand the amount of torque that an impact driver delivers. The regular socket can shatter and become a safety hazard.
Regular sockets cannot handle high torque delivered by an impact driver because of the materials used to make the sockets. Regular sockets are created using chrome, which is fairly brittle and can shatter when subjected to excessive vibration.
On the other hand, impact sockets are made from a more malleable and softer material that allows it to absorb vibrations and higher impact.
Should I lubricate my Flex impact driver?
Yes. Unlike most pneumatic impact driver which should be lubricated daily, a cordless impact driver should be greased every few months, depending on the application as well as usage of the tool. Lubricating your cordless tool properly will help extend its life. In addition, this should also contribute to improving the tool’s performance.
The areas that need to be lubricated are those parts where you can hear noise from the tool when the tool is powered on. If there is a change in this noise, you can wipe off the old grease and reapply new lubrication to improve the tool’s performance.
If you are in doubt, you can check the tool’s manual to determine which parts of the tool require lubrication.
You may be aware that the motor needs regular lubrication, but did you know that the impact mechanism needs lubrication too? Both systems are independent from one another, and therefore must be lubricated separately.
The motor is lubricated by a specific airline lubricator that you add in the FRL or directly at the air inlet (at the tool). Whereas the impact mechanism is lubricated in one of two ways depending on the system the tool uses. These are:
- Grease impact mechanism
- Oil bath impact mechanism
Understanding the two types of lubrication systems for the impact mechanism
Lubricating the impact mechanism is vital to minimize the friction between the impact contact points of the anvil and hammer, and therefore keeps the driver running in excellent condition. Let’s look at these two systems in greater detail:
1. Grease system:
In this system grease is applied only on the contact points between the anvil and hammer to prevent friction between them.
An impact driver mechanism with a grease system needs regular grease replenishment.
However, over time, the grease will move from the contact points to the outside of the hammer and so will become absent in this critical area. As a result, there will be increased friction, and heat, and the tool will ultimately stop working. It needs regular grease replenishment.
2. Oil bath system:
In the oil bath system, the entire front part of the impact driver is submerged in oil. There is no question as to whether the oil is present or not because it surrounds the whole system. One advantage is that lubrication is always present on the contact points, requiring less maintenance.
Check this too: DeWalt Impact Driver How to & Troubleshooting Guide
How to lubricate the impact mechanism of an impact driver properly
1. Grease system:
To lubricate the impact mechanism properly, open the tool and add grease carefully with your hands or a brush on the critical contact points: the anvil (area in contact with hammer) and in the hammer’s inner area.
Most pneumatic tools have multiple grease fittings, and if it isn’t possible to lubricate the impact mechanism as described above, it is sometimes possible to add grease through these holes.
If you aren’t sure where they are, check your manual or ask your service provided. Don’t forget to remove the old grease before adding the new one!
| Tool operating conditions: | Tool frequency of use: low | Tool frequency of use: high |
| Low | Around 6 months | Around 3 months |
| High | Around 3 months | Around 1 month |
2. Oil bath system:
To change the oil, you have to open the tool carefully, drain the used oil and dispose of it appropriately, and then replace it with a new oil. It is imperative that you use oil, which is only suitable for impact systems, for example oil type SAE30. Note: this is different oil from oil used in air lubrication.
| Tool operating conditions: | Tool frequency of use: low | Tool frequency of use: high |
| Low | Around 12months | Around 6 months |
| High | Around 6 months | Around 2 months |
The frequency at which lubrication checks should be carried out depends on your usage and maintenance schedule, follow the manufacturers’ advice here.
Note: regardless of the lubrication type, only use cleaners and grease that have been recommended by the manufacturer. Double check with the tool manual or your service provider if you are not sure.
What are the consequences of not lubricating correctly?
If the lubrication is applied correctly and frequently, the durability of a tool with a grease mechanism and an oil batch mechanism will be very similar. However, most of the time, grease is not added often enough, and the impact mechanism durability decreases considerably.
An impact driver that has not been lubricated properly will operate with lower power output, and if the tool is continually used when starved of grease, the internal components will wear down, and the tool will not last nearly as long as it could.

