How Do You Get Scratches Out of Vinyl Flooring
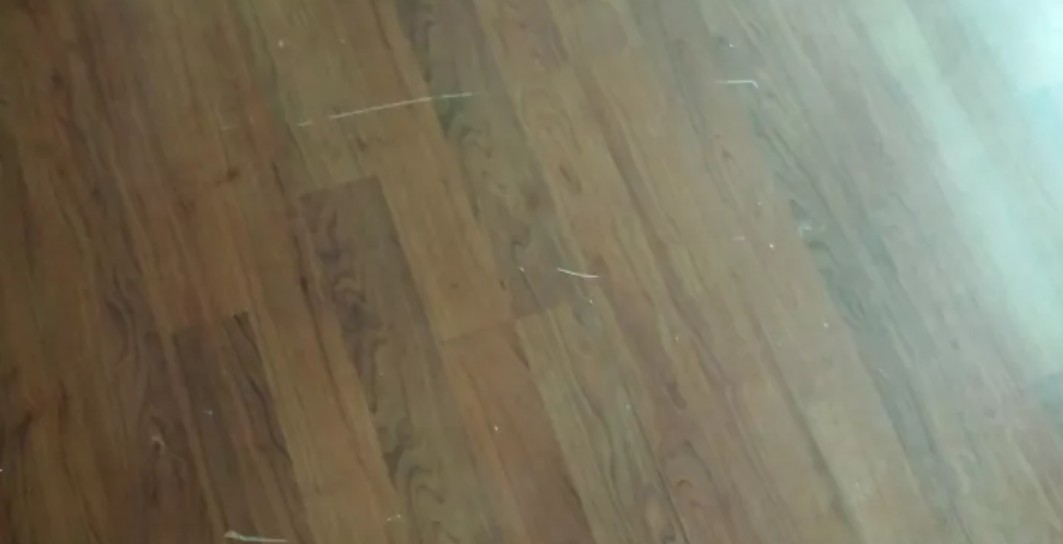
Vinyl floors are affordable, attractive, fashionable, resistant, and versatile. However, being resistant doesn’t mean that they can’t get scratches. A scratched vinyl floor is unwelcoming and unpleasant to look at; therefore, it’s crucial to repair the scratches as soon as possible.
Read on to learn how you can get scratches out of your vinyl floors.
Does Vinyl Plank Flooring Scratch Easily?
Vinyl plank flooring is relatively scratch-resistant; therefore, it doesn’t scratch easily. In addition, vinyl flooring is designed to be low-maintenance compared to solid wood flooring, and it can withstand wear due to light furniture drags and pet claws. However, that doesn’t mean that vinyl plank floors are entirely scratch-resistant.
Although your vinyl floor won’t scratch easily, it’s still prone to tear under very heavy pressure because vinyl planks are made of plastic material all the way through.
It will help if you avoid dragging heavy pieces of furniture across your vinyl floor, as doing so might leave unsightly scratches and dents behind. If you’re looking for vinyl flooring that is less resistant to scratches, you should try luxury vinyl planks. Although this type of floor might cost more, it’s less prone to scratches and tears.
Can Dog Nails Scratch Vinyl Plank Flooring?
You might be worried about installing vinyl flooring if you have a dog because you assume it might get scratched up by the dog’s claws. However, vinyl flooring is an excellent choice if you have pets as long as you choose the premium or luxurious options present in the market.
If you opt for the cheapest vinyl flooring option, you’re most likely to end up with some damage on your floor very quickly. This is because the installation of the floor is just as important as its quality. If you choose the cheapest floor quality and it’s installed incorrectly, it’s likely to get damaged very quickly.
If you choose good-quality vinyl flooring and install it correctly, it can hold up to many of the frequent challenges of pets. In addition, it can resist scratching, tearing, and many other types of damages unless you try very hard to damage it.
Additionally, luxury vinyl flooring holds up well against accidents like dog urine or food and water bowl spills. Most luxury vinyl flooring is water-resistant or waterproof, making it easy to clean and maintain. Therefore, if you’re trying to house train a puppy, there is a decreased possibility of damaging your vinyl flooring compared to other floor types. If an accident occurs, you can clean it up quickly without concern for any lasting effect.
Luxury vinyl flooring is also soft underfoot, compared to stone or hardwood counterparts. Therefore, it is comfortable for your pets to walk or rest on it. Although pets aren’t picky about the type of floors, having a soft one is a plus for them.
Common Causes of Scratches on Vinyl Floors
Your vinyl floor can acquire scratches due to several reasons; here are some of the common ones:
Heavy Furniture and Appliances Drags
Heavy furniture and appliances can cause scratches on your vinyl floors while being pushed around. If you must push furniture and appliances around, you should place plywood over the floor and use it to slide them. You can also opt for floor protectors to prevent scratches and dents.
It’s also advisable to avoid items with casters at the bottom; however, if you can’t avoid them, always remember that double-wheel casters are safer than single-wheel casters.
Dirt From the Door Entrance
Dirt can be abrasive and scratch your vinyl floor. In addition, it can stick to your feet and scratch the floor as you walk. Adding the right mat at the entrance of any room can reduce scratch risks. However, avoid mats with a latex or rubber back because they can chemically react with the floor. Instead, choose a colorfast woven rug or a vinyl-back carpet.
Check this too: How to Repair Swollen Laminate Flooring
Can You Fix Scratches on Vinyl Floors?
Just like how you can remove scratches from laminate flooring, you can also remove them from your vinyl floor. The appropriate technique for scratch repair for vinyl flooring will depend on whether the scratches are light or more profound. Here is how you can deal with both light and deeper scratches:
How to Remove Light-Fine Scratches
Fine scratches on your vinyl floor are caused by dropped items such as glass, shoes, and pet claws. Here is how you can fix them:
- Prepare the vinyl floor by cleaning it with a vacuum cleaner, broom, or wet mop. This step helps you see the marks on the floor clearly and help you establish how deep they are.
- If you determine that the scratches are mild, use a tennis ball or rubber to rub over the scratch lines on the vinyl flooring.
- If the scratches are still visible after the procedure above, wipe them using a piece of cloth that’s drenched in alcohol.
Retouch Scratches on Vinyl Floor Using PU Cleaner
You can quickly repair more minor cuts and scratches on your vinyl floor using a vinyl floor scratch repair kit called PU cleaner. The PU cleaner works like a polish and fades minor scrapes and scratches. Here is how you can use it on your vinyl flooring:
- Begin by lightly sanding the damaged surface using the white sanding pad. Sanding helps to remove protruding particles and edges and allows the surface to be treated and leveled.
- Clean the surface with a cotton cloth so that it’s free of dust.
- Take the PU cleaner and shake it for at least twenty seconds before use.
- Spray the PU cleaner on the scratches from a distance of 30-40 cm. You can repeat the process up to three times, depending on your desired outcome. However, allow the area to dry for about five to ten minutes between applications.
- Do not step on the floor for at least six hours after finishing the process.
Can You Fix Deep Scratches on Vinyl Planks?
Deeper scratches and dents on your vinyl floor can be due to dragging heavy furniture or dropping very heavy objects on the floor. You can fix the scratches using the following methods:
Method 1: Sand the Affected Surface
You can repair deeper scratches and dents by sanding the affected area. This is how to do it.
Clean and Sand the Affected Area
You can clean the floor using a vacuum cleaner or a broom. After you’re done, you can deep cleanse it using a wet mop and mild soap solution.
Sand the Surface
When you’re done cleaning, proceed to sand the surface with fine-grit sandpaper, follow it with medium-grit, and finally finish with coarse-grit sandpaper. Ensure that you only sand the scratched surfaces because doing so will help level the scratches with other parts of the vinyl surface.
Determine If There Are Any Dents and Deep Scratches Left
Feel the floor surface using your hands to determine any deep scratches and dents left on your vinyl floor. If the surface feels level, then you have dealt with the dents successfully. If it doesn’t feel level, proceed to sand the area some more.
Clean and Wax Your Floor
Proceed to clean and wax your vinyl floor to your desired look after you’re satisfied that you have eliminated all the deep scratches and dents.
Method 2: Use Liquid Joint Sealant to Repair Deeper Scratches
If you don’t want to use the sanding method because it’s time-consuming and labor-intensive, or if the scratches are too deep, you can opt for an alternative method as detailed below:
- Ventilate the room properly, including opening all windows because you will use liquid joint sealer in cleaning, and it has a powerful odor.
- Sweep the affected vinyl plank floor area and then mop it using a wet mop.
- Demarcate the affected floor area using adhesive tape.
- Apply liquid joint sealer into deep dents and scratches to fill them in.
- When all the scratches are sealed, and the vinyl floor has dried up, remove the adhesive tape you’d used earlier to restrict the affected floor area.
How to Protect Your Vinyl Floors from Scratches
Scratches and dents ruin the aesthetic appeal of your vinyl floors and consume your time and financial resources whenever you try fixing them. Therefore, it’s advisable to put preventative measures in place to ensure that you protect your vinyl floor from scratches.
Here is how you can protect your vinyl floors from scratches:
Install Floor Protectors underneath Furniture Legs
Floor protectors (furniture pads) beneath furniture legs will help prevent the vinyl flooring from developing scuff marks and scratches due to furniture movements. Ensure that you size the protectors to the furniture; hence, heavier furniture will require wider protectors. Additionally, you can opt to put a piece of plywood over your vinyl floor to slide appliances and furniture rather than slide furniture directly across the vinyl.
Clean Your Vinyl Floor Regularly
Sweep your vinyl floor regularly using a soft broom to prevent dirt buildup; hence, preventing scratches and dulling. Next, mop the floor occasionally using plain water to remove stains and dirt. If you need a more robust cleaner for your floor, mix warm water and some mild detergent, mop the floor with the solution, and then rinse it with plain water and a second mop. Ensure that you rinse well because soap can dull your vinyl floor.
Do not use abrasive cleaners as they can scratch the vinyl floor easily. It will also help avoid mop and glow-type products because they can dull and seal in the dirt.
Shine Your Vinyl Floors
Regular cleaning should keep your vinyl floors looking good; however, if the floors look a little dull, you can shine them. Avoid solvent-based polishes and if you have a no-wax floor, avoid products that might add wax.
You can shine on a regular, slightly glossy floor using a mechanical buffer and a lamb’s wool bonnet. If your floor is high-gloss with a urethane finish, apply an acrylic emulsion floor polish that’s designed to maintain the shine on such floors. Don’t use a buffer on a high-gloss floor.
Use Mats and Area Rugs
You can add a mat to any room’s entrance with a vinyl floor, especially if the door leads to the outside. Dirt acts as an abrasive and can dull or scratch your floor’s surface; therefore, using a mat will prevent dirt from entering the room.
Colorfast woven rugs or vinyl-backed mats are perfect for your vinyl floors.
Can Vinyl Flooring Be Restored?
The manufacturer uses low-gloss, no-wax sealant to give vinyl floors their shine and luster. However, the glow is most likely to fade after two years, even if you use a proper cleaning regime on your vinyl floors. You can restore your vinyl flooring by stripping off old buildup and applying a sealant that your manufacturer recommends. Here is how to do it:
What You Need
- A quality broom
- A vacuum cleaner with a brush
- Ammonia
- Water
- Face mask
- Rubber gloves
- Absorbent towel
- Low-gloss floor sealant
- Mop
Procedure
- Remove any surface dirt from your vinyl floor using a vacuum cleaner that has a soft brush attachment. If you don’t have a vacuum cleaner, use a soft-bristled broom. Ensure that you get into nooks, corners, and crannies to get rid of any hidden surface dirt.
- Ventilate the area well by opening all your windows well. Wear your rubber gloves and a protective mask before you begin using ammonia to clean.
- Eliminate surface film on your floor using a well-wrung mop dipped in a mixture of one cup of ammonia and a gallon of lukewarm water. You can use a stronger ammonia solution if there is heavier dirt and wax buildup. You can also opt to wash the floor several times using the lighter solution to remove grime.
- Use a soft-bristled scrub brush to remove the tough surface film leftover by dulling soaps, waxy floor cleaners, and trapped dirt. It would help if you always used a water-based, no-wax floor cleaner that’s free from detergents and polishes once your vinyl floor is sealed.
- Use clean and plain water to rinse the floor and dry it with an absorbent towel to remove excess liquid. Let your vinyl floor dry thoroughly.
- Use a manufacturer-recommended, low-gloss floor sealant to seal your vinyl flooring and mop it. You should only use the adhesives once every two years, especially if you clean your vinyl floor properly using the recommended cleaners whenever you clean.
Check this too: How to Clean Rubber Flooring
Repairing deep and minor scratches on a vinyl floor is not a difficult task, especially if you have the correct tools and equipment. The repairing process is fast, and anyone can do it. However, it’s prudent to repair a scratch whenever you see it to avoid having an unpleasant and unwelcoming floor.


