Leaf Blower 101: Common Problems and How to Fix Them
When it comes to clearing dropped leaves, a leaf blower definitely supersedes raking any day. a leaf blower is perfect for not cleaning up leaves as well as cleaning out the gutter. But in order to reap its full benefits, you need to master how to use and troubleshoot it when it breaks down. Keep reading to learn how to use your leaf blower and fix it when issues arise.
Why Won’t My Leaf Blower Start?
Here are the main reasons why your gas-powered engine won’t start;
Defective spark plug
Due to carbon build-up or a weakened electrode, a spark plug will degrade over time and be unable to ignite the compressed fuel and air inside the engine’s combustion chamber to start or run the engine.
You can use an ignition tester to help determine the strength of the spark plug, but it’s probably easier to simply replace it with a new one, something we recommend doing annually.
Restricted carburetor
Old or bad fuel can leave a gummy residue inside the carburetor creating a restriction. This will prevent the proper ratio of fuel and air from entering the cylinder which can cause the engine to have trouble starting. You should always make sure you keep fresh fuel in the tank and use a fuel stabilizer to help preserve its quality.
You can try cleaning the carburetor ports with a dedicated carburetor cleaner, or WD-40, to clear out the restriction, but if the clog is particularly bad, you may need to purchase a new carburetor.
Clogged fuel filter
Fuel residue can clog a carburetor can do the same to the fuel filter. Simply replace the filter with a new one to solve the problem. Again, this is something that is recommended anyway as part of the engine’s annual maintenance.
Broken rewind spring
If the starter’s rewind spring is broken, the rope won’t be able to recoil onto the pulley, making it impossible to rotate the flywheel to induce the electricity needed for the spark plug to ignite the fuel to run the engine. While many rewind springs can be replaced individually, it may be easier to replace the entire recoil starter assembly.
Malfunctioning recoil starter
The recoil starter itself may be malfunctioning and unable to engage with the blower engine crankshaft. If this is the case, you should replace the entire recoil assembly.
Clogged spark arrestor
The spark arrestor is a thin metal mesh designed to prevent sparks emitted by the engine from exiting the muffler and potentially starting a fire. Over time the arrestor can become clogged with debris and affect the engine performance. You can try cleaning the arrestor with a wire brush or replace the part with a new one.
Dirty air filter
By restricting the air coming into the carburetor, a dirty air filter can prevent the engine from starting as well. Yet another part that should always be replaced annually or whenever it is visibly soiled.
Defective ignition coil
Since the ignition coil is designed to send voltage to the spark plug while the engine is running, the spark plug will not be able to ignite the fuel to keep the engine running if the ignition coil is defective. As with the spark plug, you can use an ignition tester to help determine if the coil has failed and requires replacement.
Broken flywheel key
The flywheel key is a small metal piece that fits into a slot in the crankshaft and engages with the flywheel. It is designed to break if something obstructs the blower fan blade or flywheel to prevent damage to the engine. Over time, the key may become worn and break on its own.
In either case, the key will need to be replaced with a new one in order for the crankshaft to rotate the flywheel to start and run the engine.
Other possible leaf blower problems
In addition to the engine parts that can fail, there are other parts as well that can interfere with proper leaf blower operation:
Faulty on/off switch
Many leaf blower models will have an on/off switch that will need to be set to the “on” position before the engine can be started. If the switch is faulty, it may prevent the engine from starting.
Broken throttle cable
If your leaf blower uses a throttle trigger to accelerate the engine, but the trigger appears to have no effect, it’s likely the throttle cable has broken. The throttle cable, as well as other trigger handle components, can be replaced individually to solve the problem.
Old Fuel Left in Your Leaf Blower
Perhaps the number one reason why a leaf blower won’t start up at the start of fall is due to old fuel. Gasoline doesn’t age well, and even if you leave it in your leaf blower for just 30 days, it may already have deteriorated to the point where your machine won’t start properly – so you can imagine what will happen if you leave the fuel in the engine for six months or more.
Oil-Gas Mix
If you have a blower with a two-stroke engine and you don’t use it for a while, the oil and the gas in the fuel mix may begin to separate. You can resolve this issue by just giving the tool a good shake before you start it.
Note: This only applies to 2-stroke engines – if you have a 4 cycle leaf blower, this won’t help at all.
The Primer is not Pumped
When starting a gas leaf blower, you need to pump the primer before pulling the starter cord. If you don’t, there’s a good chance you’ll have trouble starting it. Pump the primer about five or six times and try pulling the cord again to see if this is the problem. Read the user manual to make sure you know how to start and use your blower correctly.
Damaged blower fan blade
If you notice the strength of the airflow coming out of the blower tube is reduced, the blower housing may be clogged with debris or the blower fan blade may be damaged. New fan blades are available for purchase for practically all leaf blower models and are relatively inexpensive.
Why Does My Leaf Blower Start Then Stop?
If your engine starts then dies, you can use our troubleshooting and repair guide to help fix your problem. Some of the parts that should be checked are the air filter, fuel lines, and carburetor, and we can walk you through what these parts do and why they may have malfunctioned.
Faulty Carburetors
A plugged or improperly adjusted carburetor can cause your leaf blower to start, but then immediately die. Over time, especially if fuel has been left in the leaf blower for a long period, some of the fuel will evaporate and you will be left with a thick, sticky substance that can ultimately clog the carburetor.
This clog in the carburetor can make the engine stall. Carburetors can be cleaned and/or rebuilt, which usually solves the problem. If cleaning the carburetor doesn’t fix the issue, it should be replaced.
Clogged Air Filters
Your leaf blower’s air filter is designed to prevent debris from entering the engine. If the air filter is clogged, it can result in too much fuel, as well as not enough air getting to the engine. This can cause your engine to stall almost immediately after it started.
You may be able to simply clean your air filter and correct this problem, but if the filter is damaged or will not unclog, you may need to replace it.
Clogged Fuel Filters
Like a plugged carburetor, a fuel filter that is clogged with debris can prevent enough fuel from entering the engine. If a small amount of fuel gets through, it is possible that the engine would be able to start, but it still may not be enough for the engine to run for more than a couple of seconds.
Old fuel in the fuel tank can result in this clog, so you may want to drain the old fuel and replace the fuel filter to fix this symptom.
Damaged Gaskets
Most leaf blowers have gaskets between the carburetor and the insulator, as well as between the insulator and the cylinder. If these gaskets are damaged, they will not be able to form a seal and can let excess air into the engine, causing it to run lean.
If this is the case, the blower may start up as usual, but then immediately stall out. If you notice one of your blower’s gaskets is damaged, they will usually need to be replaced.
Faulty Spark Plugs
The spark plug in your leaf blower provides the spark that is required as part of the combustion process. A failing or carbon-coated spark plug can cause your engine to fire initially but then die almost immediately. If you can clean the spark plug, the problem may be solved, however, if the spark plug is defective it will need to be replaced.
Damaged Cylinders
The piston of your leaf blower is located inside the cylinder and is connected to the crankshaft. As the crankshaft turns, the piston moves up and down within the cylinder, creating a vacuum that allows for combustion.
If your piston or cylinder is damaged, it may not provide enough compression to allow the fuel and air mix to be ignited by the spark plug. Your engine compression may be enough to start the blower initially, but may also stall shortly after starting up.
Clogged Carburetor
A clogged carburetor can cause your leaf blower to die almost immediately after starting. Over time, the carburetor can accumulate debris, and some of the plastic carb pieces can become hardened, which will result in a plugged carb. It is helpful to inspect your carburetor if you encounter this symptom, like cleaning and installing a new carb kit will often solve the problem.
Fuel Lines
The fuel lines in your leaf blower carry fuel from the tank to the engine. As with the fuel filter, if the fuel lines are clogged, they can prevent an adequate amount of fuel from entering the engine. These fuel lines can be removed and cleaned, and this can sometimes be all that is required to fix the issue.
However, fuel lines can also become damaged because of a crack, and in this case, they will most likely need to be replaced. When the fuel lines are clogged with debris, you should also check the fuel filter, because if it is working properly, and there are no cracks in the lines, debris should not be entering the lines.
Why Does My Leaf Blower Die When I Give It Gas?
When the trigger is pressed and the throttle is increased on a backpack blower, a metal wire pulls open a vent on the carburetor, allowing more fuel into the passages. The increase in fuel translates into an increase in engine speed.
If the throttle is stalling, a problem is occurring in the fuel delivery system and an insufficient amount of fuel is reaching the carburetor to power the engine. This problem often occurs in conjunction with the use of bad, old, or poorly mixed gas.
Here are some reasons why your leaf blower is stalling;
Air Filters
If the air filter in your leaf blower is partially plugged, it can cause your engine to run but die at full throttle. The air filter is designed to prevent debris from entering the engine, and over time this debris can accumulate and lead to a clog.
When it is clogged, the air filter will allow just enough air through to the engine to idle, but when you engage the throttle, it will shut down. A clogged air filter may cause your blower to idle roughly as well. Air filters can be cleaned to ensure they run properly and should be inspected as part of your normal blower maintenance routine.
Check this too: How to Change Garage Door Opener Frequency
Fuel Filters
The fuel filter in your leaf blower is located inside the fuel tank and is attached to the fuel line. The function of the fuel filter is to prevent debris in the fuel tank from entering the fuel line and the blower’s engine. If the fuel filter is partially clogged, the engine still may have enough fuel reaching it to start up and to idle for a while.
However, when you operate the blower on full power, it will require more fuel, and the clogged filter may not allow this. Therefore, the engine will die at full power. You will need a screwdriver or hook to pull the fuel line out of the fuel tank to access the fuel filter. Be sure there is little to no fuel in the fuel tank before you begin this repair. As with all repairs, it is best to disconnect the spark plug before…
Mufflers
The function of the muffler is to decrease engine noise from your leaf blower. The spark arrestor prevents sparks from the engine from exiting the blower and potentially starting a fire.
When your leaf blower expels exhaust gasses, they travel through the exhaust port into the muffler and spark arrestor. Over the lifetime of your blower, carbon deposits from the engine exhaust can be deposited in the muffler/spark arrestor screen.
If the exhaust port, muffler, or spark arrested does become plugged with carbon, the exhaust gases can’t exit the engine. This can result in your engine dying at full throttle. These deposits can build up over time, so it is recommended that you clean your muffler/spark arrestor during routine maintenance.
Carburetor problems
Your leaf blower’s carburetor controls the mixture of fuel and air that enters your engine. If the carburetor is clogged, it may not allow fuel into the engine, which will cause the engine to run, but die when the throttle is engaged.
Often you can disassemble your carburetor, clean it, and re-install it to fix this symptom. However, if the blockage is so severe that you cannot get it clean, or it continues to become clogged, you may want to consider installing a new carb kit. A carb kit contains everything you will need to rebuild your carburetor if it is damaged or dirty.
To avoid confusion when putting your carburetor back together, it is a good idea to make note of the order in which you remove certain carburetor parts. To keep the carburetor in good working order, it is recommended to clean it as part of your regular…
Damaged Fuel Lines
As with the fuel filter, a damaged fuel line can deprive your engine of fuel, causing it to run briefly but die when the throttle is engaged. Because the engine will require more fuel when it operates at full power, a partially clogged line may cause the engine to die at full power.
A small crack in the fuel line can also let air in, which can result in this symptom as well.
How to remedy the issues above;
- Unscrew the cap on the backpack blower’s fuel tank.
- Drain any gas that was mixed more than one week ago from the fuel tank into the approved fuel container.
- Scrub the walls of the tank with the brush and rag.
- Pull the pickup nozzle and attached fuel up into the tank opening with the metal hook.
- Pull the pickup nozzle off the end of the fuel line.
- Replace the pickup nozzle if it’s dirty or the screen is clogged.
- Insert the new pickup nozzle into the end of the fuel line.
- Set them back into the bottom of the fuel tank.
- Unscrew or unhook the air filter cover.
- Pull the air filter pad from the filter box.
- Wash the air filter in water soapy with dish detergent.
- Rinse it under cool water and give it one night to dry thoroughly.
- Reinstall the air filter and cover to the engine.
- Mix a fresh batch of blower fuel.
- Pour the two-stroke engine oil and regular unleaded gasoline into the approved fuel container.
- Combine them using the mix ratio provided with your model’s fuel specifications.
- Shake the gas and oil for one minute before putting it into the fuel tank.
- Start the backpack blower’s engine and allow it to warm up for at least 10 minutes.
- Find the three carburetor adjusting screws on the side of the carburetor.
- Insert a small screwdriver onto the idle speed screw, which is often set apart from the high- and low-speed screws.
- Rotate the idle speed screw clockwise until the blower starts blowing on its own.
- Turn the idle speed counterclockwise again until the blower stops.
- Rotate the screw clockwise again to the highest engine speed before the blower starts working.
- Insert the small screwdriver onto the low-speed adjusting screw, often marked with an “L.”
- Turn the screwdriver clockwise until the engine produces a higher-pitched surging sound.
- Stop turning the screw and move it counterclockwise until you hear a bubbling sound from the engine.
- Move the low-speed screw between these two extremes to find the cleanest, smoothest engine sound.
- Fine-tune until the engine sounds its best.
- Depress the trigger and check the acceleration of the engine.
- Increase the low-speed screw 1/8 turn clockwise if it’s still sluggish.
- Readjust the idle speed in the same manner once the low speed is set.
Battery Powered Leaf Blower Not Working
The reasons why your non-gas-powered leaf blowers won’t start include a faulty battery or an interrupted power supply. Ensure the leaf blower is plugged in, the power outlet is working, and the battery is charged.
Then check to see if the battery is faulty and replace it if needed. If the battery is still good, the next most common culprit is the on/off switch.
Why Does My Battery Leaf Blower Keep Shutting Off?
When an electric motor runs for a short time and then stops, only a couple of things can cause it;
The motor is damaged
The motor is a brush-style motor, and there is brush damage. Sometimes when the brushes on an electric motor wear out, it can cause the motor to run and then stop. Usually, this means the motor needs replacement in the case of most electric leaf blowers.
Interrupted power supply
There is a shortage in the electrical system. A loose wire, terminal, or connection can cause an electric motor to stop suddenly. To remedy this issue, start at one end of the circuit and move along the circuit, checking every connection along the way.
Always check the on/off switch. It is a standard part of the electrical system to break down. Ensure there’s power in the socket you have the leaf blower plugged into.
Plug and Cable
The plug and cable are basic leaf blower parts that can give trouble because of the treatment they receive. To check the plug (unless it is welded to the cable) you need to take the cover off.
Look to see if the terminals inside the plug have come loose. To correct this problem, reconnect the terminals. To check the cable, examine it inch by inch to make sure it has not been cut or worn, causing a short circuit or no circuit at all.
Leaf Blower Terminals
If you have an electric leaf blower, use a mains tester to check that power is arriving at the terminals in the leaf blower.
Impeller or Fan
Unplug the leaf blower and check that the impeller or fan has not been jammed by a stick or other object so that it cannot turn. If the impeller can move, turn it by hand to see if you can hear a grinding noise. If the bearings on the impeller have worn out, they could lock up when power is applied to the shaft.
Electric Motor
Open the inspection hatch for the electric motor and check that the central spindle will turn.
Check Again
Plug the leaf blower in again and test it. If it still will not work and if there is power arriving at the leaf blower, you now need to check the on/off switch. Unplug the leaf blower and use a circuit tester to ensure that the on/off switch is working properly.
Electric Motor
When everything else checks out, there are only two possibilities left. The first is that there is a thermal cut out on the leaf blower. The second is that the electric motor is not working.
Thermal Cut Out
A thermal cut out will usually reset itself after about 30 minutes, or there will be a reset button on the machine. If there isn’t a reset button and the machine still won’t work, the final possibility is that the electric motor needs new brushes.
Replacing the brushes in the motor will require purchasing some new parts for your electric leaf blower.
How Do I Know If I Flooded My Leaf Blower?
A petrol engine floods with fuel when it’s switched off too soon after being started from cold. After switching off, the unburned fuel remains in the engine. That wets the spark plugs, which prevents ignition and makes the car difficult to re-start.
The petrol can also cause ‘bore wash’ when it removes the oil around the cylinder’s piston rings. It lowers the compression, which is why the engine sounds different and turns over more quickly.
Electric Leaf Blower Won’t Turn On
If an electric leaf blower won’t start, there is a problem with the electrical system. Check the power supply for proper operation. One can use a circuit tester for corded units (or plug something else into the extension cord to ensure it’s working) and use a multi-meter to check the batteries on cordless units.
Just make sure the voltmeter is set to DC setting for the batteries. Use all proper PPE and precautions when checking any electrical circuit. The most common culprit for electric leaf blowers is a faulty battery. If the battery is still good, the next most common culprit is the on/off switch.
Why Is My Leaf Blower Running but Not Blowing?
Blower Fan
Your leaf blower manual may refer to a fan, which is simply another name for the impeller. As above, the fan is attached to the crankshaft, and when it rotates it provides airflow. Your leaf blower’s fan will have several fins that move the air while the fan is operating.
Rocks and debris can be sucked up into these fins, causing damage. Damaged fins can cause the fan to malfunction, resulting in the inability to blow air. See the above description of the impeller for more information on why a faulty or damaged fan might cause this symptom.
Nuts
The impeller nut attaches the impeller or fan to the crankshaft. Sometimes the impeller nut is a lock nut, but other times the nut is secured with Loctite. If the nut comes to lose the crankshaft might spin without rotating the impeller. If the impeller does not rotate, then airflow is not created, which will result in this symptom.
Tubes
The tubes in your leaf blower typically direct the flow of air during operation. However, in some models, the tubes funnel air down to a nozzle that increases the speed of the airflow. In this case, it might seem as if the blower isn’t blowing air, or isn’t blowing enough air. This can be a result of missing or damaged tubes.
Impellers
If your blower starts and the throttle runs properly but it still does not blow air, there are a variety of parts that might be causing it.
The impeller is essentially a fan blade that draws air into the blower housing and forces it out the blower tube. The impeller is installed in the blower housing, where you can find it attached to the crankshaft of the engine.
When the crankshaft turns, it rotates the impeller, which causes air to flow through the blower. If your leaf blower does not blow air, it is possible that debris has been sucked into the blower housing, impeding the impeller from doing its job.
If the impeller is loose or the blades of the impeller are damaged or broken off, it can also cause the blower to become unable to blow air.
Leaf Blower Not Blowing as Hard as Usual
If your blower’s engine lacks power, check our symptom and repair guide to help you identify the problem. We will guide you in choosing the most appropriate part to replace, such as the cylinder, muffler, or air filter. This is a common symptom and you can have your engine working in no time.
Reasons why your leaf blower has no power;
Batteries
The battery provides the power to the motor in cordless, electric models. A bad battery can lead to a loss of power in your leaf blower. Order the correct battery replacement for your model; most use a lithium-ion battery. The battery should easily pop out of the body of the blower.
Air Filters
If your leaf blower engine is lacking power, it could be due to a blocked air filter. A plugged air filter will restrict airflow into the engine, reducing power and performance. Changing the air filter is an easy fix, and should solve this issue. Disconnect the spark plug before beginning this repair to your leaf blower.
The air filter is typically a foam rectangle surrounded by a rubber holder, located behind a plastic cover on the exterior of the blower. Loosen the plastic knobs or clips holding the cover on, and pull out the air filter and holder. Pop-out the foam rectangle and insert your new air filter.
Mufflers
A plugged muffler, spark arrestor, or cylinder exhaust port will restrict the exhaust gases from exiting the engine and reduce the engine power. These parts get plugged with carbon caused by a rich fuel mixture. Correcting the fuel mix ratio could solve this issue; consult your owner’s manual to check what the proper ratio for your model is.
Note: If your muffler needs to be replaced, first disconnect the spark plug.
Pistons
The piston, piston rings, and cylinder work together to maintain the compression in the engine. If the piston rings or the cylinder are worn, your blower will lose power. These parts can become damaged for many reasons, such as running your blower with an incorrect fuel ratio. The most common reason to replace this part is because the piston rings are worn.
Spark Plugs
A weak spark plug can cause incomplete combustion, resulting in a loss of power in your leaf blower. The spark plug may be weak because it is incorrectly gapped or has been fouled with gasoline, in which case it will need to be replaced. You will need a spark plug wrench or socket wrench to change the spark plug.
- Start by disconnecting the spark plug boot, then remove the spark plug with the socket wrench.
- The correct gap for your spark plug will vary depending on the model; check your owner manual to find out the correct gap size.
- Thread the new spark plug into the housing, and tighten with the socket wrench.
Cylinders
The cylinder works together with the piston rings to maintain the compression in the blower engine. If the piston rings or the cylinder are worn, power will be lost. The cylinder can become damaged due to the blower being run with an incorrect fuel ratio, or no oil at all.
This issue can also occur if dirt filters into the cylinder from the carburetor. To replace the cylinder, the engine will need to be disassembled and the piston and rings will likely need to be replaced as well. Make sure to disconnect the spark plug before beginning work on your leaf blower.
How to fix the low power problem;
Check the Muffler and the Spark Arrestor
Not to be confused with the spark plug that is fitted on the cylinder head of the engine, the spark arrestor is a device used in the exhaust muffler and it prevents sparks or other flammable debris from escaping through the exhaust muffler.
It is a very useful device because if a spark escapes from a leaf blower it can cause the dry leaves to catch fire, not to mention that a leaf blower would be unbearably loud if the spark arrestor is not installed in it.
But sometimes the spark arrestor can get clogged and it will prevent exhaust gases from getting out of the muffler causing the leaf blower to bog down and lose power when it is revved. You can check the spark arrestor of your leaf blower using the steps explained below:
Locate the spark arrestor:
Locate the exhaust of your leaf blower and at the tip of the exhaust, you will find the spark arrestor.
Note: If your leaf blower has a muffler cover or a muffler tip, you will have to remove it before you can access the spark arrestor.
– Step 2: Remove the Spark Arrestor:
In order to remove the spark arrestor, you might have to use different methods depending on the type of leaf blower you have. For some models, you can remove the spark arrestor screen directly from the muffler tip by using a 15mm socket while in others, you will have to remove it using a screwdriver.
– Step 3: Clean the Arrestor Screen:
With the spark arrestor removed, check the screen and if you can’t see through the screen you will have to clean it up. But if the screen isn’t black and you can see through it, the spark arrestor isn’t clogged.
You can use a hard brush to clean up the screen of the spark arrestor but the proper way to do it is to burn off the debris stuck in the spark arrestor screen using a blow torch. If your leaf blower’s spark arrestor is clogged to the point where it can’t be cleaned, you can always get a new one and install it on your leaf blower muffler to fix the issue of low power.
Here you can find a new leaf blower spark arrestor.
Inspect the Carburetor of your Leaf Blower
If gas has been sitting inside your leaf blower’s carburetor or you have been putting dirty fuel in your leaf blower, it can cause the carburetor to get clogged, and it won’t be able to supply proper air-fuel mixture resulting in the leaf blower engine losing power. Or the carburetor might have an improper mixture setting causing it to lose power at higher RPM.
Check the Air-Fuel Mixture of the Carburetor
To check if the carburetor’s air-fuel mixture is causing a loss of power, you will have to adjust the mixture screw on the carburetor by turning it clockwise or anti-clockwise, half turn at a time until the leaf blower starts producing optimal power.
Make sure not to make sudden adjustments and turn these screws for a minimal rotation while revving the engine to see if the adjustments had any effect on the leaf blower’s power.
Check if the Carburetor is Dirty
If you want to check whether your leaf blower’s carburetor is clogged you will have to disassemble the carburetor completely. If you find any debris in the jets of the carburetor, clean the carburetor using a carb cleaner and reinstall the carburetor to check if the leaf blower is producing proper power.
While you are checking the carburetor of your leaf blower you should also check the fuel lines to see whether they have a blockage or not. If the fuel lines are blocked they can restrict the fuel supply to the carburetor and the engine, causing low power.
Here you can find a new carburetor for your leaf blower.
Examine the Spark plug of your Leaf Blower
Leaf blowers, just like any other equipment with a combustion engine, require a sparkplug to produce combustion inside the cylinder of their engines. Since most leaf blowers have a 2 stroke motor, it is not uncommon for the sparkplug to go bad quickly because 2 stroke engines have a reputation for requiring frequent spark plug replacements.
A bad or worn sparkplug will not produce the proper spark that is required to make an optimal amount of power. So a bad sparkplug is one of the more common causes of poor performance from a leaf blower. You can check the spark plug of your leaf blower by following these simple steps:
– Step 1: Remove the Spark Plug Wire:
Disconnect the sparkplug boot to access the spark plug underneath it.
– Step 2: Remove the Plug:
Take the correct sized socket, seat it on the sparkplug and turn the sparkplug anti-clockwise to remove it from the cylinder.
– Step 3: Examine the Electrodes:
With the sparkplug removed, pay close attention to the firing tip of the sparkplug’s center electrode, specifically to the insulator tip around the firing tip. If this insulator tip is coated with carbon or engine oil, then it is a sign that the sparkplug has gone bad and needs replacement.
Other than the fouled insulator nose, you should also check whether there is any damage to the electrodes or not. If the electrodes of the sparkplug are damaged, or there is a coating on the insulating tip, then replacing the sparkplug might fix the low power output of your leaf blower.
Here you can find a new sparkplug for your leaf blower.
Check the Air Filter of your Leaf Blower
Leaf blower engines require clean filtered air to produce a powerful flow of air. This is why leaf blower engines are fitted with air filters to supply clean air to the engine. But oftentimes, the air filters can become clogged with debris that starves the engine of air, and your leaf blower stops producing optimal power. To check and replace the air filter, you need to perform the following steps:
– Step 1: Remove the Air Filter Cover:
Locate the air filter cover and remove it by either turning a knob or removing a screw.
– Step 2: Replace the Filter:
When the cover is removed you will find the air filter under it. If you notice that the air filter is clogged with debris or it is damaged or punctured replace it with a new one.
If your leaf blower has a foam filter, you can also clean the air filter if it is not cracked or damaged by washing it under warm water, and you can even use soap. But make sure the air filter is completely dry before reinstalling it. With a clean air filter in place, your leaf blower’s engine will be able to breathe in clean air and make the right amount of power.
Here you can find a new air filter for your leaf blower.
Check the Battery of your Leaf Blower
If you have an electric cordless leaf blower and it doesn’t work even when the battery is fully charged, it indicates a problem with the battery of your leaf blower. Unfortunately, you cannot replace a leaf blower battery, and the only way to fix this issue is by installing a new battery. Make sure to get the correct type of replacement battery with the correct voltage and amp ratings.
Here you can find a new battery for your cordless electric leaf blower.
Note: Normally a leaf blower loses power after it has been stored for a long time or if it has not been maintained properly. If you keep an eye on the above-mentioned components and properly maintain your leaf blower you can expect it to produce maximum power for seasons to come.
With some basic tools and care, you can fix the poor performance of your leaf blower at home. So before you throw away your leaf blower or go buy a new one, inspect the components of your leaf blower using the methods explained in this article, and chances are, you will be able to make the leaf blower work at maximum power.
Can I Make My Leaf Blower Less Noisy?
Leaf blowers can be noisy; but you can use one to clean up without disturbing the peace.
Upgrade Your Leaf Blower
Today’s leaf blowers are quieter than older models, with some updated versions claiming to dull the noise by several orders of magnitude compared with older models. If you’re looking to quietly remove the leaves from your yard, the first step is to make sure you’re using a newer model leaf blower. Your ears, and your neighbors, will thank you.
Go Electric
Electric leaf blowers, which plug into an outlet and come equipped with a long cord, are typically quieter than their gas counterparts. Some cities and towns with leaf blower restrictions go so far as to ban the gas models, leaving electricity as your only option.
(There are municipalities that also ban electric models, so make sure whichever model you buy is acceptable for use in your neighborhood.)
But noise reduction comes at a cost—quieter models are simply less powerful. So if you’re clearing a large area, sacrificing that power may not be worth the extra time you spend working with a less powerful motor.
Refer to your Manual
Many leaf blowers come with nozzles or attachments that can help reduce noise, but they work only if you use them properly. Read the user manual thoroughly and familiarize yourself with the accessories. Some leaf blowers also offer variable-speed motors that allow you to adjust the power to fit your needs. Setting the motor at a lower level means less noise.
Be Courteous
Don’t use your leaf blower at sunrise or sunset. Most cities or towns have rules in place that dictate how early or late you can use motorized yard tools.
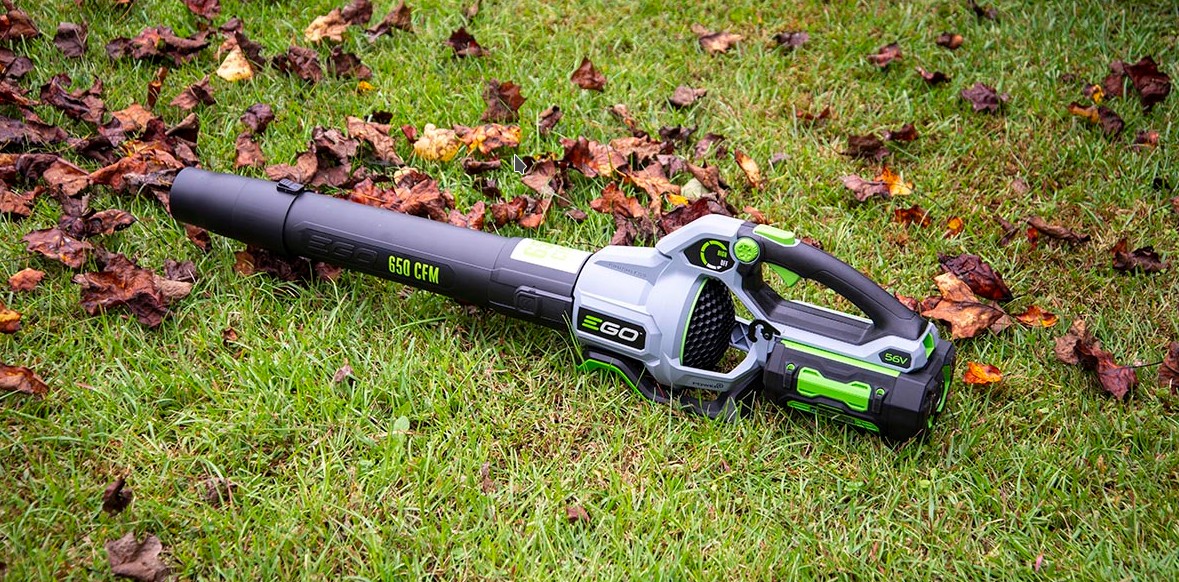
How Many CFM Do I Need On My Leaf Blower?
A good electric leaf blower usually has a CFM between 200 and 400. However, if you have a large property, (one acre or more), a leaf blower with a CFM between 400 and 700 is best. The higher the CFM value, the more air your leaf blower will produce. You’ll be able to clear a wider area in a shorter time.
How Do You Make a Leaf Blower More Powerful?
Below are some tips to help you maximize benefits of your leaf blower.
Use a Specialized Leaf Blower Attachment
Specialized leaf blower attachments matter and should be a top priority. You have to focus on choosing a leaf blower attachment that is going to optimize the task you’re doing.
For example, if you are cleaning gutters and want additional power, you will need a thinner nozzle that is going to provide targeted pressure. Leaf blower attachments help fine-tune performance and will manipulate the air in a way
Push the Leaf Blower to Its Limit
A leaf blower might lose its efficiency if you are not taking the engine all the way to its peak. Do this from time to time, especially when the leaf blower has been sitting for a while.
Master your Leaf Blower
A simple toggle of a switch could unlock additional power. Refer to the user manual to learn how to do this.
How to Turn On a Leaf Blower
Corded Electric Machines
If you have a corded electric leaf blower, you have one of the easiest types to start. Make sure you read the instruction manual to find out exactly how your model works, but it shouldn’t be more complicated than plugging it in and hitting the “on” switch.
If you have problems starting a new tool, check that it is plugged into a power outlet and that the power is on. If you have read the manual and followed the instructions and it still doesn’t work, there might be some kind of problem that needs to be fixed.
Cordless Electric Machines
Cordless leaf blowers are basically the same as corded versions to start. Read the manual, make sure the battery is plugged in and hit “start” – that’s all you need to do.
If you have problems starting a battery-powered leaf blower, the obvious thing to check before taking it to a repair shop is that the battery is charged up and ready to go.
2-Stroke Gas-Powered Machines
Most gas leaf blowers incorporate a 2-cycle engine. That is because this type of engine is both small and powerful. These are slightly more complicated to start than electric versions, so here are the steps you should follow.
Prepare the gas and oil mixture
2-stroke engines require fuel that is a mixture of gasoline and oil to run. Most units run on a solution that is one part oil to 50 parts gas, or a ratio of 1:50. This works out at 2½oz oil to a gallon of gas. However, you should check the manual to be sure this is the correct ratio for your model.
Mix these in the correct proportions in a gas can and give it a shake to ensure they are properly combined. Be careful to measure the amounts accurately since using the wrong proportions will cause your blower to smoke and can even damage the machine.
Pour the mixture it slowly into your leaf blower.
Make Sure The Starter Switch Is In The “On” Position
Some blowers have an “on” switch. Make sure it is in the correct position or the blower won’t start.
Set The Choke To The Starting Position
Before you start the blower, if starting from cold, you need to put the choke into the starting position. Make sure this is done before moving to the next step.
Prime The Engine
The next step is to prime the engine. Press the primer bulb five or six times.
Pull the starter cord
Take the cord firmly in one hand and hold the blower securely in the other. Give the cord a good strong pull. You may need to do this four or five times to start the engine, and after each pull, you should feed the cord back in slowly rather than just letting it snap back into place.
Once the engine starts, you need to let it run for between 10 and 30 seconds. If you have a machine with a manual choke, after the engine has been running for a while, you should put the choke into the “run” position.
Some models have a semi-automatic choke that returns to the run position by itself. If you have one of these models, you don’t need to worry about it.
Note: If you have a 4 cycle leaf blower, the procedure is almost the same as with a 2-cycle machine. The big difference is that they take fuel that is pure gas rather than a gas-oil mix. Simply add the fuel to your machine and follow the rest of the steps for 2-cycle blowers.
How to Test the Ignition Coil On a Leaf Blower?
The ignition coil also called ignition armature, is a crucial functional tool in the power system of a leaf blower, especially the one powered by gas. It is the part that starts the device and may fail to run when there is a problem.
For instance, if your blower has been functioning well but stops and cannot power on or start all of a sudden when you pull the cord, then there are chances that your ignition coil has a problem.
To test the coil;
- Remove the spark plug lead by pulling the rubber boot off the plug.
- Clamp the alligator clip on the ignition tester to the spark plug and insert the other end of the tester into the connector inside the rubber boot.
- Pull the starter rope, but stay clear of the ignition tester leads to avoid a shock.
- Pay close attention to the transparent window of the ignition tester while pulling the starter rope.
- If you see a bright blue spark jump across the terminals in the tester window and the engine starts, both the ignition coil and spark plug are in working order. If not, go to the next step.
- Remove the alligator clip from the spark plug and clamp it onto a bolt on the leaf blower’s cylinder head.
- Pull the starter rope; if you see a bright blue spark jump across the tester window, the spark plug is defective and must be replaced. If there is still no spark, either the coil itself has burned out, or the plug lead is defective.
- Replace the plug lead and retest.
- If you do not see a spark jump the gap, the coil is defective and must be replaced.
What Is a Good MPH and CPM for A Leaf Blower?
For a regular-sized yard, a leaf blower with 120 MPH and 400 CFM will provide enough power to clear up the area. You may find a higher rating for both in corded electric leaf blowers.
The best CFM is midrange between 350 to 600 CFM, blowing north of 190 MPH. Too low will not do the job, too high and you lose control of the leaves, making the job take longer.
How to Store a Leaf Blower in The Garage?
Here are some general tips for storing your leaf blower safely while also making the best use of the space available to you.
Hooks
If you have any free wall space in a garage or shed and you are looking for the simplest, cheapest way to store your leaf blower, the best option is to install wall hooks.
All you need to do is fix them securely to the wall and you will be able to hang any kind of tool there safely and out of the way, including cordless leaf blowers, or backpack leaf blowers or any other types.
Having a range of hooks on the wall is a great way to store your whole collection of garden tools in a place where they remain easily accessible whenever you need them.
Wall Shelving
If you prefer something more substantial than simple hooks on the wall, you might choose to install wall shelving. This is an ideal option not just for your leaf blower but for keeping all your tools neatly stored.
Since wall shelving is a DIY solution, you can make compartments of any size you choose depending on what you need to store. This is an extremely versatile solution that will make the best use of your wall space – as long as you have a free wall you can use.
Workbench
Another idea for storage is to install a long workbench with storage space underneath. This will give you a place to store tools like your leaf blower safely off the floor while also giving you an extra surface to work on.
Ceiling Storage
If you only have a small shed or garage or have already used all the available wall space, look up! The ceiling is another place where you can store tools if you know how to make use of it.
You can use hooks just like on a wall and simply hang your leaf blower from the ceiling, or alternatively, you can rig up a more substantial storage system. It’s possible to fix up a storage system using a pull-rope to raise and lower your tools when you need them.
Corner Storage Shelves Or Cubby
Corners often remain underutilized, but by installing shelves or a cubby there, you can maximize your storage capacity. With several levels, you can store two or three power tools in a corner where they will stay safe and accessible but out of the way until you need them.
Long-Term Storage
With leaf blowers, as with any power tools, keeping them properly maintained is vital if you want them to last as long as possible.
Since a leaf blower is basically a one-season tool – unless you also use it for snow clearing – it will spend most of the year in storage. This means you need to know the correct steps to take before you place it in storage at the end of the fall until it is required again the following year.
Cleaning Before Storage
During general use, you should always make sure you regularly check to ensure there are no leaves or other debris blocking the impeller or other parts of your blower.
It is also advisable to develop the habit of giving your machine a final thorough clean before you put it away for storage at the end of the season.
Fuel Maintenance
Since gasoline does not age well, at the end of each season before packing away your leaf blower for another year, you should remove or burn off any fuel that is left inside.
This is true of any type of gas leaf blower – both 4 cycle leaf blower and 2-cycle version.
If you store your leaf blower with fuel left inside, at the very least you will have to do it at the start of the following season anyway – so best to do it while the fuel is fresh.
However, if you leave the fuel sitting inside your tool for the best part of a year, in some cases, it may even cause damage to your leaf blower. To avoid this, you’re better off removing it before putting the tool into storage just to be sure.
How to Clean a Leaf Blower’s Carburetor?
Items Needed
- Here is a list of the tools you’ll need to complete the carburetor cleaning.
- Carburetor cleaner
- A small container
- Screwdrivers or Allen keys (as your specific blower may require) to loosen the bolts
- Spark plug spanner
- Compressed air blower or fan blower
Cleaning steps;
- Remove the carburetor from the leaf blower.
- You can remove the carburetor by following these easy steps:
- Drain the fuel in the pan or tub to empty the fuel tank.
- Disconnect the spark plug connection to prevent any harm.
- Unscrew the air filter cover carefully.
- Carefully remove the carburetor by loosing the screws.
- Disengage the air-box from the carburetor throttle and choke levers.
- Eliminate the fuel lines for the complete removal of the carburetor.
- Make sure to remember the removal process for the reinstallation process.
- Carefully pull the carburetor off by dismounting it from the engine while protecting the engine gasket.
- Clean the dust, dirt, or debris by using compressed air, soft bristle brush, and carburetor cleaner solvent for easy and quick cleaning.
- Fill a metal pan with carburetor cleaner and place the carburetor in the pan to soak for several minutes.
- Pick up the carburetor and allow as much of the cleaner to drain off as possible.
- Wipe the outside dry with a clean rag.
- Clean the fuel filter by using carburetor cleaning spray for dust and brush for the clogged dirt.
- You can use the tube applicator to blow out the carburetor housings.
- You can also clean the housings directly spraying through the fuel connecting tubes.
- Using compressed air, blow out the extra solvent and rest of the residual from the carburetor ports to ensure the complete cleaning.
- Use compressed air to dry out all the ports, housings, and the entire carburetor.
- Reassemble the carburetor by following the disassembly process in reverse.
- Blow out any cleaner left in the passages of the carburetor, using pressurized air.
- Block the low and high mixture screw holes with your fingers, and spray carburetor cleaner through the pickup orifice.
- Blow air through the orifice to dry it, and reassemble the carburetor to complete the job.
- Reconnect the fuel lines to the carburetor correctly.
- Set the carburetor right back into the air-box by performing reverse tracking.
- Install the carburetor by adequately mounting the screws at the specific location on the engine.
- Reconnect the spark plug wire for spark ignition.
Safety Reminders;
- Clean the air filter by checking the flow of the air through it during the carburetor cleaning process.
- Ensure the proper protection of eyes and skin to prevent any harm from the solvents.
- Clean and replace the air and fuel filters as required.
- Refill the engine with the clean, new, and fresh oil after the cleaning process.
- Make sure before reinstallation that there is no leakage and blocking in the fuel lines and the primer bulb.
How to Adjust a Leaf Blower Carburetor?
Most models of leaf blowers have two screws that you can turn in either direction to adjust the timing of the carburetor. One of these screws is the idle speed screw that controls how fast or slow the machine idles and the other is the mixture screw that controls the ratio of air and fuel that enter the engine.
To access these screws, first remove the screws that hold the outer housing of the machine in place, revealing the screws on the carburetor. Some older-model leaf blowers may also have an additional screw that allows you to set the mixture for use on the high-speed setting.
If you have trouble locating the timing and mixture screws, consult your owner’s manual for a diagram that labels all the parts of the machine.
Adjusting the Timing Screws
To obtain a good starting point for adjustment of carburetor idle speed, turn the mixture screw to the right until it barely rests on the seat. Turn it 1.5 turns to the left as a starting point for adjustment. Perform the same steps on the idle speed screw.
With the machine running, slowly adjust each adjustment screw to the right or the left until the blower runs smoothly. Increase the throttle after adjustment to ensure that the settings allow the blower to run under the increased power load without stalling or dying.
What Kind of Oil Does a Leaf Blower Use?
This depends on whether you have a 2-cycle or a 4-cycle gas engine. Then you can determine which brand of oil to use. some of the best oil options include the Makita 10W-30 Premium 4-Cycle Engine Oil, and the Husqvarna 2 Stroke Oil.
What Size Leaf Blower Do I Need?
If you have a larger area to cover, such as one acre or more, a leaf blower with a CFM of between 400 to 700 will work great. Leaf blowers with a CFM between this range are quite powerful and can handle any type of debris, be it wet or dry.
With these machines, a rating of around 120MPH with 400CFM would give you plenty of power to take care of most leaf clearing tasks in a regular-sized yard.
How to Make a Leaf Blower Vacuum
To convert your machine from leaf blower to leaf vacuum, switch the tube to the opposite side of the fan. You may need special tools to do this. You can also use a leaf blower vacuum attachment.
How to Mix Gas and Oil for A Leaf Blower
The ratio of gas to oil is 50:1, which works out at 2½oz of oil to a gallon of gas. However, not all leaf blowers require the same ratio of gas to oil, and some require a ratio of 40:1. Ensure you check your user manual to find out the correct proportions to mix.
Why Is My Leaf Blower Dying When the Choke Is Off?
When you turn on a cold engine, the choke valve cuts off the air supply so that the fuel in the carburetor’s combustion chamber burns “rich.” It’s called this because there is a high fuel to air ratio, which warms up quickly and heats the engine metal.
After several seconds, the engine is warm, and the choke turns off by opening up and allowing air to flow into the carburetor, either automatically or manually by the user.
A balanced air to fuel ratio burns efficiently, but when too much air is added to the ratio (burning “lean”), the engine stalls and shuts off because not enough power is being generated.
Too much air is usually a result of too little fuel being supplied to the carburetor. If there’s not enough fuel flowing, air will fill the chamber and cool it off, winding down the power supply and turning off the engine.
If the leaf blower only runs on choke, shut it off and inspect it for potential maintenance needs.
Check The Fuel Flow
An interruption in the fuel flow is usually the answer to why the engine needs to run with the choke on. Check the fuel level to ensure it isn’t low, then check on the fuel delivery system. You’ll want to look out for these potential issues:
Clogged Fuel Filter
To check the fuel filter, empty any fuel in the tank into a container before you start. Fish out the fuel line using a long bent or hooked wire, which hangs in the tank. The filter is connected to the fuel line, and you will be able to see whether or not it has absorbed enough buildup to block intake.
This will happen eventually, so if you haven’t checked it recently, it may be the reason your leaf blower’s engine is stalling or shutting off.
Attaching a fuel filter replacement is an easy task, and your model’s manual will tell you what kind of filter you need. The smaller the filter, the more often it should be replaced. Keep an eye on your filter since leaf blower motors are smaller than other lawn care equipment.
Fuel Line Leak
When you’re inspecting the fuel filter, check the fuel line as well. Fuel lines can get brittle or stiff and may crack or break over time. Leaks or broken tubes will interrupt the fuel feed and need to be replaced.
There are usually two tubes that are connected to form the single fuel line from the tank to the carburetor. One line is in the tank, and the other is between the tank and the carb. The tubes are linked by a connector, which fastens with a grommet or a rubber seal in the tank.
To inspect the internal fuel line, you’ll have to remove the screws and lift off the cover of the leaf blower. The carburetor will be located next to the fuel tank, behind the air intake valve, and connected to the tank by the fuel line tubes.
Replacing one or both of the tubes is an easy task, as they should snugly fit around the connector pins and slide off and on with a little force.
Clogged Fuel Intake
As fuel is used, the liquid is turned into gas, and solids are left behind. When fuel is stored in the tank for an extended period of time, some of it will evaporate and similarly leave residue as the liquid dries up.
The fuel filter is meant to prevent this by catching solids in the gasoline, but it doesn’t catch everything. Buildup can occur in the tubes, the connector, or the carburetor.
Leaf air blower and gas can
Examine the filter, connector, or tubes and replace them as necessary. A carburetor cleaner will help with buildup that may be blocking the fuel chamber and keep the engine in good repair.
Leaf Blower Won’t Start When Hot
A gas-powered leaf blower uses a combustion engine to generate power. Normally, when this engine burns gas, the vapors and heated gases are vented away, so the engine can stay cool enough to keep running. If the engine dies after warming up, it is likely the engine is overheating and automatically shutting down to prevent more serious damage.
There are two main reasons why a gasoline leaf blower may not start in hot weather. Firstly, there may be a pressure build up due to evaporating fuel in the fuel tank – Users have reported that this can be solved simply by opening the fuel cap. Secondly, the fuel may have gone stale, causing blockages – refer to the section Fuel above, if this is the case.
Vapor Lock
Vapor lock occurs when the fuel already inside the carburetor overheats and the vapors cause the fuel pump to lock up. A vent on the gas cap allows those heated gases to escape, which prevents the fuel inside the tank and in the fuel system from overheating.
To check for vapor lock, after the engine shuts down again, unscrew the gas cap slightly and try starting the engine again. If it runs without shutting off again, vapor lock is causing the problem. Replace the gas cap, or clean it thoroughly with a brush dipped in fresh gasoline.
Blocked Air Supply
As the engine starts moving, the internal temperatures also start rising. To keep the engine running, cooler air needs to be brought in, and the heated gases need to escape. If the air filter or muffler are blocked, the engine will overheat and shut off again.
Take out the air filter and wash it in soapy water. Clean the spark arrestor screen inside the muffler, and scrub out the muffler and exhaust port with a brush. Brush off the fins around the cylinder.
Warped Diaphragms
The carburetor inside a leaf blower uses several plastic diaphragms to bring fuel into the carburetor, mix and measure the fuel and send it off to the cylinder. These diaphragms can warp after several seasons of use.
This warping will cause the fuel to stop moving through the entire circuit, and the engine will shut off. Usually this happens when the engine starts heating up, as the diaphragms aren’t completely shot yet, but are starting to go.
Remove, disassemble and clean the carburetor. Check for any perforations in the diaphragm and gaskets.
Cylinder Problems
If the engine is dying in rough fits and shakes, and the starter rope is hard to pull out after the engine dies, the likely cause of the problem is inside the cylinder. If air is entering the cylinder from a leak around the seals, the result is a loss of compression.
This compression is required to keep the piston and crankcase moving, and, without it, the engine can’t start. Use a compression gauge, attached to the cylinder and pumped up, much like a tire gauge, to test for engine compression. If the compression reading drops off rapidly, take the leaf blower to a mechanic.
What Gauge Extension Cord Do I Need for My Leaf Blower?
A leaf blower will work with 12 amps or less so the best gauge for this will be 14-gauge (14 AWG) to 16-gauge. You also want to look for the “W” rating to designate the cord for outdoor use. A 14 AWG is the thinnest recommended for a leaf blower or any gardening appliance.
How to Fix a Wet Leaf Blower
Getting your leaf blowing equipment wet doesn’t have to mean a trip to the store for a new leaf blower is in your future. A lot will have to do with what type of power your blower uses. Gas or petrol powered tools usually are no worse for wear from an occasional downpour.
You might see some performance issues if the air filter gets soaked but that can be taken care of pretty quickly by drying it out or installing a new one.
Any damage you’d see from water would come from long-term exposure. In the case you kept it outside in an extremely humid or rainy environment for a whole season, you could start to see signs of rust developing. You might also have trouble with your gas absorbing water – that is a major problem for many 2-cycle engines in use today.
Therefore, it’s my advice that if you have a gas-powered leaf blower, don’t store it outside during the year.
It’s a different story if you own an electric-corded or battery-powered leaf blower/mulcher. Moisture can create short-circuits in electrical equipment, so you can permanently damage your electric-powered tools if you aren’t careful.
Ideally, you’d disconnect any power from your blower as soon as you notice it’s wet. Most modern equipment is designed to not open a circuit until you turn on the mower but if your machine has a hidden fault you could be in for a surprise.
What To Do If Your Leaf Blower Gets Wet
If you find your battery or corded-electric tool has gotten wet, here are the steps you should take:
Disconnect the power source. Dry off the batteries if applicable.
Tilt the tool so any loose water can drain from the chassis. We want to get all the “low-hanging” water out of the device so when we blow dry it, we don’t force water farther into the device.
Towel dry the outside surfaces of your equipment. It’s not absolutely necessary but should speed up how long the next step takes.
(Optional): If you are handy, you can disassemble the device case to get at more surface area to dry. If this scares you, don’t do it!
Air or blow dry through the vents. If you have the time, air drying is probably the safest. It can take a few days, however. Blow drying is much quicker but you do run a small risk of forcing water into mechanical places it isn’t meant to go. It depends on how risk-averse you are vs how quickly you need to use your leaf blower.
The moment of truth arrives: Once you are confident you’ve taken the time or effort to dry your blower, connect the power and start up the tool. If you see a spark or smell something burning, stop immediately and repeat the process. (Hopefully, that won’t happen to you).
Types of Leaf Blowers
Selecting the right leaf blower comes down to your terrain, yard size, and budget. Both gas and electric models take much of the work (and blisters) out of raking up fallen leaves and other yard and driveway debris.
Corded Electric Leaf Blowers
Corded models typically weigh 8 pounds or less and are designed for one-handed use. No-hassle push-button starting and zero exhaust emissions are pluses, as is the power that approaches what you’ll get from handheld gas blowers. But the power cord limits your mobility and can be a hassle around trees and other obstacles. Consider an electric blower if a power outlet will always be within 100 feet of the work area.
Battery Handheld Leaf Blowers
These tools, also called cordless electric leaf blowers, are light (generally less than 10 pounds) and maneuverable. They’ve become popular among people who shun the maintenance requirements of a gas-powered model—and don’t want to be tethered to a power cord.
Power can be on a par with the best gas blowers, too meaning they can blow snow and leaves just as well as a gas-powered unit. Rechargeable batteries run for about half an hour, tops, so if the chore takes longer, you’ll have to take a break while your battery juices up—or have a second battery on hand.
Gas-Powered Handheld Leaf Blowers
Gas models can go anywhere, and they never require a charge. You do need to yank a pull-cord to start the engine, and gas engines require periodic tune-ups. Most models weigh about 10 pounds.
And though they’re quieter than they used to be, gas models are still quite loud—the user should always wear hearing protection. The majority have two-stroke engines, which require mixing fuel and oil. Those with four-stroke engines let you skip that step, and they run cleaner.
Gas-Powered Backpack Leaf Blowers
These blowers typically add power over handheld blowers. Most weigh 17 pounds or more—almost twice as much as gas-powered handheld blowers.
But your back and shoulders, rather than your arms, support the weight. Like handheld gas models, they’re a bit noisier than electrics. They can’t vacuum or shred. And they cost more than handheld blowers.
Gas-Powered Wheeled Leaf Blowers
Need lots of oomph to quickly clear a sizable area? A wheeled blower might fit the bill for large yards. But this type brings a few drawbacks: Wheeled blowers can’t vacuum or shred and require about 8 square feet of storage space.
At 100 pounds or more, they’re bulky and are more difficult to maneuver and push, especially uphill. They’re usually noisy and expensive—though a few models are surprisingly quiet and should meet even the toughest noise limits. Large four-stroke engines require no mixing of fuel and oil.
Gas vs. Electric: Picking the Right Leaf Blower
Speed, convenience, budget—all are important considerations when weighing gas vs. electric.
In the handheld category, gas and battery blowers can each make quick work of leaves and are still the fastest way to clear a yard full of leaves. The best corded-electric blowers are powerful enough for many big jobs, though you’ll have to stay within 100 feet of a power outlet. (Most outdoor extension cords top out at that length.)
Gas handheld leaf blowers go anywhere, but they weigh and cost more than corded electric—and they’re noisier. They also require fueling and maintenance. Cordless electric, also called battery-powered leaf blowers, now offer power on a par with gas models, but they have limited run-time per battery charge—expect 8 to 30 minutes on a charge.
Some handheld blowers also collect yard debris via a vacuum, a feature that comes in handy for sucking up leaves as they fall or for taking care of stragglers. But their relatively small tubes limit how much you can vacuum at once, making them best for really small yards, where you can bag up the mulched leaves.
Check this too: How Do You Get Scratches Out of Vinyl Flooring
Backpack blowers typically cost more than handheld blowers, but they offer more power and transfer weight from your arms to your back and shoulders. Backpacks tip the scales at 22 pounds, but this type can still feel lighter than a 10-pound handheld blower because the weight is better distributed.
These are best for large lawns, and you can go with a traditional gas-powered backpack blower or a battery-powered model. Battery types are relative newcomers to the field, and in our tests, the best of these can hold their own against gas when it comes to sweeping power.
Got lots of leaves and a level property? Wheeled blowers pack the most power by far. They also take up the most storage space, can be tough to push and control, and bear the biggest price tags of all these categories.
They’re really best for large, flat yards that abut the woods. They’re tough to push on hills, and if you live in an area with close neighbors, it’s easy to accidentally blow leaves into an adjacent yard.
How to Properly Clean and Maintain Your Leaf Blower
Most times after the tedious activity of blowing leaves out there we are tempted to just keep the blower away in the store without cleaning it and carrying out some maintenance procedures.
The nature of work the leaf blower performs automatically creates demand for proper maintenance after each use to avoid instances of dust, dirt, leaves, and other debris taking a toll on your leaf blower.
It’s always good to take preventive measures rather than adopting corrective action that will cost you much in the long term. For the machine to be efficient, powerful, and have a longer working life, it is essential to maintain the leaf blower in a clean condition.
One of the first signs that your blower is not in a clean and good working condition is the machine failing to start despite having a full tank of petrol.
This cleaning step-by-step guide includes a thorough cleaning procedure to keep all the important parts of the leaf blower running seamlessly.
Before getting into the cleaning procedure, it will be of great importance if you took a minute to understand critical parts of your leaf blower such as the carburetor, air filter, fuel filter, and spark plug.

Important fuel powered leaf blower parts
Air Filter:
This very important part ensures that the air that enters the carburetor is filtered before it is mixed with the fuel. Mostly a rectangular piece of foam mounted on the carburetor’s air intake part, the air filter plays an important role in the case of a leaf blower as it works in environments full of dust, leaves, and debris.
Any damage to the air filter will cause your blower some difficulties while using. A hole in the filter allows dust and debris to get inside the carburetor, making your blower dirtier as days go by.
It is important to note that an air filter that is clogged will result in a fuel/air mixture that has a higher fuel content that in turn produces more combustion residue. The residues are eventually be dumped in the engine, which is harmful to the engine.
Depending on how often you use your blower, you should replace the filter after six months for standard normal use but if used intensively more frequent replacements should be done.
Carburetor:
In the carburetor air is mixed with the fuel in the right proportions to help in the production of combustible gas that goes into the cylinder.
The machine uses a piston to compress the fuel and air mixture which in turn is ignited by the spark plug; another vital part of your leaf blower. A properly working carburetor is very important in keeping your machine running effectively.
Fuel filter:
The fuel filter is a very essential part attached to every fuel tank to clean the fuel that goes to the engine. The fuel filter ensures that no impurities go inside the engine. Dirty or impurities-laden fuel can be a disaster waiting in the engine.
Most times the fuel you purchase at the gas station is clean, but the fuel tank may be dirty or an older dirty jerrycan might have been used to store the fuel.
Spark Plug:
The spark plug is an important component in a gas-powered leaf blower which plays the role of igniting the fuel and air mixture in the engine. Any damages to the spark plug will make your leaf blower inefficient or worse still stop working.
Cleaning and maintaining your leaf blower should be easier to carry out after acquiring some knowledge on the important components.
Before working on your leaf blower prepare a good, clean, firm, and spacious worktable to minimize chances of losing parts as you remove to clean them. Gather the tools and items you need and put them close to you.
For effective cleaning of the various parts you’ll need:
- Compressed air spray can
- Clean rags
- Soap and water
- A spark plug wrench
- A wire brush
- Screwdrivers
Step 1: Remove debris
Before attempting to begin cleaning the leaf blower you should turn it off and place it on the worktable. Get rid of any visible dirt and debris then open up the machine following the manufacturer’s instructions written on the user guide.
If you have misplaced your user manual and don’t know how to go about opening your machine, check how to open your model of leaf blower on YouTube or Google. For most machines, you will loosen and remove the bolts on the upper part of the carburetor then carefully pull out the air filter.
Step 2: Clean the air filter
Inspect the air filter to determine how clogged it might be. Remember the air filter is a screening material and filters all the air going inside the carburetor, trapping all manner of debris and dust. Cleaning the air filter should be done after every 10 working hours.
Remove the air filter from the blower and use a vacuum to clean it for better results. You may consider performing this procedure from outside as the dust and debris may get into other parts.
Consider replacing the air filter if it is damaged and too dirty that it can’t be cleaned.
Set the air filter aside once you are done, and clean the parts connecting to the air filter.
Step 3: Clean surrounding parts
These include the carburetor, the fins, and the engine fan.
- Clean the fins by spraying with compressed air using quick short bursts.
- Clean and wipe out oil residue on the spark plug using a rag.
Lastly clean the engine cover carefully not to tamper with the air vents or obstruct the free passage of air, essential for proper cooling of your leaf blower’s engine.
In the same way as the engine cover, clean the grille protecting the delicate engine fan to maximize the amount of airflow and prevent overheating in the engine.
Reinstall the filter and close the cover.
Cleaning a Battery Powered or Corded Leaf Blower
Electric leaf blowers are easier to clean and maintain as they significantly have fewer parts compared to gas-powered leaf blowers.
Clean Out Debris
Inspect your leaf blower for dirt and debris trapped on the air filter and use a compressed air can to blow away dust from hard-to-reach crevices and parts.
Clean the outer parts of your leaf blower
You can clean your blower using soap and warm water to remove any dirt and grime on the surfaces. Be cautious not to wet the motor area.
Extension cable maintenance
Carefully check the extension cable for any damage if your leaf blower is corded and replace it immediately if it is damaged.

