Odyssey Garage Door Opener Troubleshooting & How to Guide
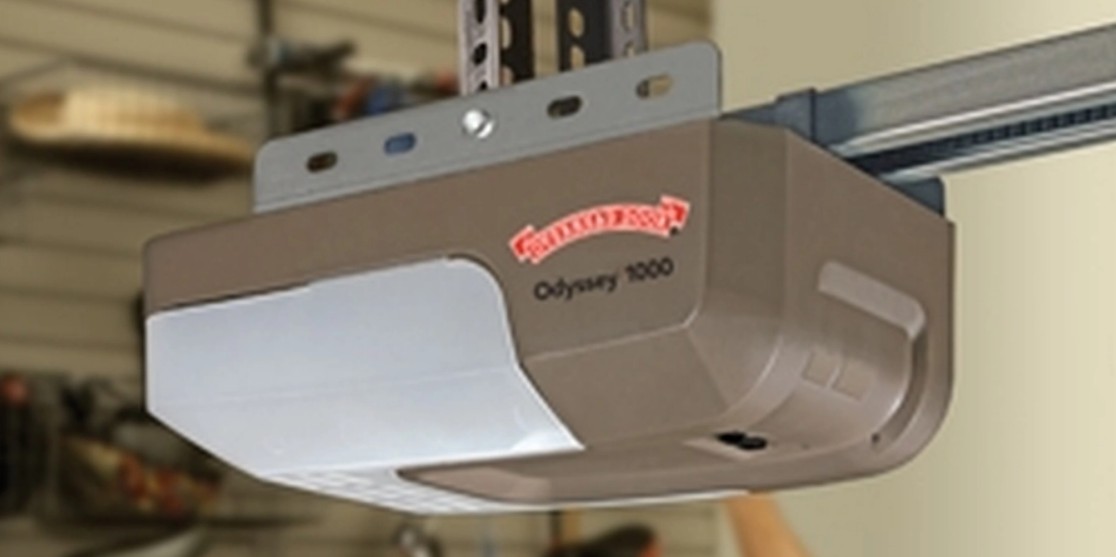
Odyssey garage door openers are manufactured by Overhead Door Corporation; a subsidiary of Japanese-owned Sanwa USA Inc. The company is a leading maker of doors and openers for commercial, residential, industrial, and transportation applications. There are two garage door openers under the Odyssey brand: Odyssey 1000 and Odyssey 1200.
The Odyssey 1000 garage door opener is available with either a belt or chain drive. It also includes the following features:
- Power: 140 V DC motor
- Wi-Fi and smartphone control capabilities
- Battery Backup
- Auto seek frequency range
- DoorDetect monitoring and diagnostic technology
- Two-bulb lighting system
- CodeDodger access security system
- Safe-T-Beam system
- Compatible with HomeLink and Car2U systems
The Odyssey 1200 garage door opener, on the other hand, features a patented direct drive system. It has all the lifting force needed to raise sectional doors up to 14 ft. high or one-piece doors up to 8 ft. high. It comes with the following features:
- DC power: 140V motor
- Speed: Maximum opening speed of up to 10 inches per second
- Auto seek frequency range
- DoorDetect monitoring and diagnostic technology
- Two-bulb lighting system with motion detection
- CodeDodger access security system
- Safe-T-Beam system
- Compatible with HomeLink and Car2U systems
While these garage door openers are of good quality and reliable, like other equipment and/or devices, they also can experience issues. But before contacting service, it might prove a wise decision to troubleshooting the opener on your own first. Below are some common Odyssey garage door opener issues and the steps to follow in order to resolve them.
Odyssey Garage Door Opener Not Working
If your garage door opener is not working, there are several issues that might be causing this. You may be able to diagnose the problems on your own by paying attention to the clues your garage door may be giving you. To troubleshoot, try these tips:
Check the sensors
Safety sensors are designed to prevent the garage door from opening and closing when an object is in the path of the sensor beam, preventing a potentially dangerous event. Check to see if the beam is blocked.
Garage door sensors may also be dirty and need to be wiped free from dust. They may also be out of alignment which might need to be repaired by a garage door professional.
Check all operators
It might sound simple enough, but many times, the battery may be dead in your car remote and the garage door can be activated from the wall unit. If your car remote light flashes in a strange way when activated, it may be displaying a diagnostic code that can be fixed from the instructions found in the user manual.
Check the batteries
While changing the car remote batteries is easy enough, in some cases; you may find that your car remote is working just fine, but the wall unit has stopped functioning. Check the source of power for the wall garage door opener unit—it may be battery-powered as well.
Check the fuses
A garage door opener is powered by your homes’ electrical source. It may simply be an electrical breaker that tripped and needs to be reset. To reset a tripped breaker, open your panel box and look for a breaker switch in the half off/half on position—it will be out of alignment from the other switches and easy to spot. Flip it to the OFF position followed by the ON to reactivate the breaker. If it trips again, call a garage door repair professional right away.
If after trying all the above your garage door opener is still not working, you may have something wrong with your garage door hardware or the opener system itself. With some garage door opener problems; it might even be both. It is always a good idea to call a professional garage door expert to diagnose the system.
Remember, if all your attempts to resolve the issue fails you can pull the emergency release handle hanging from the overhead unit to open and close the door manually. This will allow you to test the spring and rail systems of the garage door hardware.
As you lift the door, stop halfway and check to see if the door stays open on its own. If it does not stay where you leave it, likely you have a problem with worn or damaged springs. However, if the door stays open by itself, then there is likely trouble with your garage door opener system which may need to be repaired or replaced.
Odyssey Garage Door Opener Error Codes, Meaning, and Fixes
If a problem exists with the Overhead Door Odyssey 1000 garage door opener, the small round LED and/or the long rectangle LED will flash (blink) indicating the specific problem.
The following are the powerhead LED indicators that you might see and what they mean:
Round LED(ON/Red Steady), Long LED(ON/RED Steady)
This error code means the limits are not set properly.
To clear this error code, you need to reprogram limits.
Round LED(ON/RED Steady), Long LED(ON/RED Steady)
This error code could also mean there is a program error or component error.
To fix this and clear the error code, you should unplug the unit, wait 5 seconds and plug back in. If the issue is not resolved, contact your overhead door distributor.
Round LED (ON/BLUE Flashing), Long LED (OFF)
This means the remote control is not programmed. To fix this, you need to program the remote control. Refer to the owner’s manual for instructions.
Round LED (ON/PURPLE Flashing), Long LED (OFF)
This means Code Dodger 1 remote control is not programmed. To clear this error, program the remote control using Code Dodger 2 remote control then program Code Dodger 1 remote control. Refer to the owner’s manual for instructions.
Another reason you might be seeing this error code is because of the safety sensor (photocell).
Round LED (ON/RED Flashing), Long LED (OFF)
If you see this error code, it could mean:
- There is a physical obstruction. To fix, remove obstruction and recheck the unit.
- Safety sensor signal obstruction. To troubleshoot, check the alignment of safety sensors.
- Round LED (OFF), Long LED (ON/RED Flashing)
This error code could mean the following:
- Door contact is in up or down travel.
- Door component failure detected.
To fix this, try the following solutions:
- Remove obstruction.
- Check garage door springs, track, rollers, hinges and fixtures.
- Adjust spring tension and provide general service so that the garage door balances and operates properly.
Round LED (OFF), Long LED (ON/RED Continuous)
This error code means thermal cut-out. Do not unplug the unit. Wait until LED clears before operating the garage door opener again.
Round LED (ON/PURPLE Steady), Long LED (ON/PURPLE Steady)
This means there is a component error. You need to contact a trained door system technician.
Round LED (OFF), Long LED (ON/BLUE Flashing)
This code means the door will not open.
To troubleshoot:
- Check Sure Lock. Sure Lock should be OFF for normal operation.
- Round LED (ON/PURPLE Flashing), Long LED (ON/PURPLE Flashing)
This error code indicates radio receiver error.
To troubleshoot:
- Unplug the unit. Wait 5 seconds and plug the unit back in.
- If problems persist, contact a trained door system technician.
Odyssey Garage Door Opener Remote Not Working
If your garage door opener remote is not working or it has less than 25 feet operating range, several things could be causing the issue.
Try relocating the remote inside your car and/or point the remote at the garage door. Does the remote work now?
If the remote still does not work, the problem could be the batteries. They may have run out of charge. The remote should work fine after replacing the batteries with new ones.
Another thing you can try if the issue still persists is to reposition the door opener antenna. Because of the current position of your antenna, it might not be receiving the signal when trying to use the remote.
Competing signals such as radio signals from other devices can also interfere with the proper working of your door garage remote. In this case, eliminating such competing signals should fix the problem.
Also, check whether your doorLED light is interfering with the remote signal. Standard LED and CFL bulbs are known to produce remote interference. Replace with one that is remote radio frequency friendly.
To replace light bulbs, follow these steps:
- Disconnect power to opener.
- Open powerhead lens cover by pressing in on upper locking tab and lower cover.
- Replace old light bulbs with 100 Watt MAXIMUM incandescent, CFL or LED equivalent. Overhead Door LED light bulbs, which are specifically made for garage door openers, are recommended.
- Close lens cover.
- Reconnect power to door opener.
- Test light operation.
How to Replace the Battery on an Odyssey Garage Door Opener Remote
Replace the remote battery with a CR2032 coin cell battery. Follow these steps for remote battery replacement (3-button)
- Open remote case using a washer or coin that fits into the slot on the top of the remote.
- Replace battery. Be sure positive side (+) is UP.
- Align components and snap case closed.
How to Open the Odyssey Garage Door Opener during a Power Outage
During a power outage, your garage door can turn from a real convenience to something that totally messes your day. It is can be really frustrating dealing with a garage door that will not open, especially if your car is parked inside the garage.
To enable manual operation of your garage door, follow these steps:
- Locate the rope with a handle that is attached to the garage door track. You can easily identify the rope as it is usually short and the handle usually is shaped like a red “T.”
- Grip the T-handle and pull it, releasing the garage door from the drive belt or chain. This will enable manual operation of the garage door because it is no longer attached to the opening mechanism.
- Check to see if the door has a manual lock that is engaged. If so, open the lock.
- The inside of the door should have some kind of handhold. Grab it and lift slowly. Should the door fail to open completely, put your hand on the door’s bottom edge and push the door the remainder of the way up.
- Make sure that the door stays open, it is not uncommon for a door to have lost a little spring tension over time. This is one reason that it is recommended that you operate your door manually a couple of times a year. You will know how if you need to and you will also be an early warning system if there is a problem with your door.
There is a chance that your garage door opener is not equipped with a manual lock to use when the garage door is disconnected from the opener. This means you will not be able to lock your garage door after disengaging the door following a power outage. You can close the door, but it simply won’t lock. In this case, you will want to consider whether you want to disconnect the door during a power outage because it will remain locked if you do not disengage it. Better yet, have a lock added to your door if it does not come with one, and do it before the next power outage. Just be sure to disengage the lock when the power returns, otherwise, you may destroy your garage door.
To reconnect your garage door to the opener, follow these steps:
- Makes sure that the carriage unit, which is the part that lifts and drops the door, is near to where the motor is positioned at the center of the garage.
- Pull the rope and push the garage door all the way until it clicks into the open position. It is sometimes possible to reconnect your door by simply running the operator. To do this, close the door nearly all the way, then push the wall switch to run the operator, if it was in the closed position, it will likely pick up the door and open it. If it was in the open position, it will likely pick up the door and close it.
How to Program Odyssey Garage Door Opener
Before programming the opener, check to make sure there are no objects in the garage door opening. Do not allow persons to enter the area of the door while programming and operating.
Also, note that each programming step has a 30 second time limit for completion after the function is initiated. After 30 seconds, both LED’s will illuminate RED indicating time has expired and the step must be restarted. Restart the step as many times as necessary to complete the programming.
To program DOWN limit:
- Press and hold the DOWN arrow button. Long LED will light BLUE.
- Release DOWN arrow button. Long LED will flash BLUE.
- Press and hold the DOWN arrow button until door is fully closed. Use the UP arrow button if door closes too far. Use both UP and DOWN buttons to adjust close travel as necessary.
The door should rest on the floor until the weather strip is compressed enough to seal along the width of the door. Damaged doors or uneven floors may not seal properly. Repair these conditions to achieve a proper seal. DO NOT compress the seal so much that the door will bend or buckle.
- Press and release the SET/PRGM button. Both LEDs will flash BLUE then go out.
The DOWN limit is now programmed.
To program UP limit:
- Press and hold the UP arrow button. Long LED will light BLUE.
- Release UP arrow button. Round LED will flash BLUE.
- Press and hold the UP arrow button until door is fully open. Use the DOWN arrow button if door opens too far. Use both UP and DOWN buttons to adjust open travel as necessary.
SECTIONAL DOOR UP LIMIT: The door should be fully open so that the door seal is even with the door header. Do not adjust so much that the door will bend, buckle or stretch door spring cables backward. Stop carriage short of the opener powerhead.
ONE-PIECE DOOR UP LIMIT: The door should fully open so that the door arms will be in line and push forward and up on the door. Door damage can result If the up limit is set too far back and door arms are angled downward pushing against the natural travel direction.
The door should be fully open so that the door seal is even with the door header. Do not adjust so much that the door will bend or buckle or stretch door spring cables backward.
- Press and release the SET/PRGM button. Both LEDs will flash BLUE then go out.
The UP limit is now programmed.
Force Controls programming:
The force controls are automatically set when the wall control is used for the first time with garage door opener. The door must complete one full cycle, from full open to full close and then, full close to full open, before the settings are automatically recorded.
- Press and release the Wall Control button and allow the garage door to travel and stop at the DOWN limit.
- Press and release the wall control button and allow the garage door to travel and stop at the UP limit.
Force settings are programmed from the factory to remain within safe parameters. These should not require adjustments. However, certain circumstances may require adjustment. To adjust the force settings, follow these instructions:
- Press and hold both UP & DOWN arrow buttons until the ROUND LED turns RED. Release buttons. LEDs will show current force level.
- Press either the UP or DOWN arrow button until the desired UP force setting is shown.
- Press and release the PRGM button to lock the desired UP FORCE setting. LEDs will now show the current DOWN FORCE setting.
- Press either the UP or DOWN arrow button until desired DOWN force setting is shown.
- Press & release the PRGM button to lock the desired DOWN FORCE setting. Both LEDs will turn BLUE then go out confirming that the force settings have been changed and are locked.
- Opener is now ready to operate and test.
- Operate door from the wall console two full cycles then perform safety contact reverse test.
Contact Reverse programming
You must complete the limit and Force settings before performing the Contact Reverse Test. Once you have, follow the steps below to perform the Contact Reverse Test:
- With the garage door open, lay a 2 X 4 board flat on the floor at the center of the door opening.
- Close the garage door using the wall control.
- When the door contacts the board, it should stop and reverse direction within two seconds to the full open position.
- The long LED light on the powerhead will begin to flash RED with the reversal of the door.
- Remove the 2” x 4” board and operate the opener with the wall control again. This cycle will clear the flashing red LEDs.
Contact Reverse Adjustment:
If the door stops before contacting the board or if it does not reverse direction to fully open after contact with the board, it may be due to an improperly set DOWN limit. Verify settings by:
- Repeat the “Down Travel Limit” section to make certain the door is closing tight against the floor.
- Repeat the “Force Control” section on the left to set force limits.
- Repeat the “Contact Reverse Test”.
Repeat this process as needed until the door passes the Contact Reverse Test.
How to Program Odyssey Garage Door Opener Remote Control
When programming your remote, take note of following:
- Each programming step has a 30 second time limit for completion after the function is initiated. After 30 seconds, two LED’s will illuminate RED indicating time has expired and the step must be re-started. Restart the step as many times as necessary to complete the programming.
- Do not hold remote too close to the powerhead when programming remote buttons.
Each button of the remote control must be programmed separately, following these steps:
- Pull straight down the battery’s protective film to remove it from the remote.
- Press and hold the SET/PRGM button on the opener for two seconds. The ROUND LED will turn BLUE. The LONG LED will then flash PURPLE.
- Stand at least five feet away from the opener and slowly press and release the desired button on the remote 2 times. Both opener LEDs will flash and turn off indicating the remote has been programmed.
- Press the desired remote button again. •The opener should run.
Repeat the steps above using one of the other remaining remote buttons to program the same remote for other garage door openers
Repeat steps 1-4 for each opener and remote.
Note that it is possible to press the remote button too quickly or lightly. If the LEDs do not go off, press the remote button several more times to achieve confirmation.
Basic programming is complete and your garage door is ready to use.
How to Program your Odyssey Garage Door Opener to a Car
To program HomeLink system, follow these instructions:
- Clear HomeLink
Clear HomeLink by pressing and holding down the first and third buttons until the indicator on the HomeLink blinks slow and then fast for 20 seconds; then release both buttons. Note that clearing the HomeLink will remove all previously programmed garage door openers.
- Train HomeLink to the Remote
Choose the button on the HomeLink that will be used to open the door. NOTE: Hold the Remote two inches from the HomeLink button. Hold down the remote button. While holding, press and hold the chosen HomeLink button. Hold down both buttons until the indicator on the HomeLink blinks slow then fast. Once it blinks, release both buttons.
- Program HomeLink to the Opener (Put opener into programming mode)
- Press and hold the PROGRAM button on the opener until the round blue LED is ON. Release the button. The long purple LED will begin flashing.
- Press the chosen HomeLink button for two seconds and release. Press that same button again for two seconds and release. The long LED will flash blue and then turn off.
- Press the HomeLink button a few more times until door moves.
Note that to program the HomeLink transceiver, some vehicles may require the ignition to be turned on or the vehicle to be running.
To program Car2U system, follow these steps below:
- Clear Car2U to default settings
The default setting for the Car2U system is:
- Button 1 = Overhead Door Manufactured Openers
- Button 2 = LiftMaster Manufactured Openers
- Button 3 = Wayne Dalton Manufactured Openers
Press and hold buttons 1 and 3 for 20 seconds or until all three LEDs begin to flash. Then, release both buttons. The Car2U system is now set to the Factory Default setting. Doing this will remove all previously programmed garage door openers.
- Program Car2U to the OHD Opener (Put opener into programming mode)
- Press and hold the PROGRAM button on the opener until the round blue LED is ON—release the button. The long purple LED will begin flashing.
- Press the designated Car2U button for 2 seconds and release. Press that same button again for 2 seconds and release. The long LED will flash blue and then turn off.
- Press the Car2U button a few times more until door moves.
- Changing Factory Default Button for an Overhead Door Opener
- Press and hold buttons 1 and 3 for one second and release—all three LEDs will light solid red.
- Press and hold the button (2 or 3) to change it to— the corresponding LED will flash. While continuing to hold that button, press and release button 1. Press and release button 1 again.
- Release the button being held in the previous step and wait for the LED to stop flashing. This button is now set.
Repeat the second step for the second Opener.
Why is My Odyssey Garage Door Not Closing?
There are several reasons why a garage door may not be closing. The most common reasons why a garage door will not close are:
Safety sensor problem
The safety sensors are mounted near the bottom of the garage door and are typically located about 6 inches above the ground. These sensors are part of the automatic garage door opener and send a signal across the length of the garage door. The purpose of the safety sensors is to detect if anything crosses the path of the garage door while it is closing. If there is something in the path of the garage door, the safety sensors will not allow the garage door to close properly.
Obstruction problem
If there is an obstruction, the safety sensors detect that there is something under the path of the garage door and will not allow the garage door to close. Typically, the LED’s on the safety sensors will blink to indicate that the problem is an obstruction. Sometimes the obstruction can be as simple as a broom or shovel blocking the safety sensors. The obstruction could also be as obscure as a cobweb interfering with the safety sensor lens cover. To resolve this problem, simply remove the obstruction.
Wiring issues
The safety sensors are powered by low voltage wires that are connected to the garage door opener motor. Due to various reasons, the wiring in the back of the safety sensor or on the garage door opener motor can be disconnected. If the wiring is disconnected, the safety sensor LED’s are typically off because they are not receiving power from the motor. If you find the wires disconnected, simply reconnect the wires to the terminals on the back of the safety sensor.
The ends of the low voltage wire can also be corroded causing the safety sensors not to receive power and therefore not allowing the garage door to close. In this case, remove the low voltage wire, cut the old ends off, strip off the wire covering to create new ends, and reconnect the new ends to the safety sensors.
Out of Alignment Problem
In order for the safety sensors to operate properly, they must be pointed directly at each other. Sometimes, the safety sensors can be knocked out of alignment by familiar items in a garage. If the safety sensors are out of alignment, the LEDs will be blinking. Simply, adjust the safety sensors so that they are pointing at each other again to resolve the problem.
Faulty safety sensors
If the above issues check out but the problem remains the safety sensors may be faulty and need to be replaced.
Broken springs or cables
A garage door utilizes springs that are under a tremendous amount of tension. These springs allow the garage door to open and close. If a spring is broken, the garage door becomes too heavy for the garage door opener to open and close the door properly. Very often you can see that a spring is broken because it has a gap between the coils. If you determine that the problem is a broken or damaged spring, it is recommended to contact a certified garage door technician to make the necessary repairs.
As for the garage door cables, they are attached to the bottom of the garage door and are then attached to the springs by either using a pulley or drum assembly. If a garage door has a broken or damaged cable, the door may appear to have a broken spring. Since the cables are attached to the springs which are under a tremendous amount of tension, it is again recommended to contact a certified garage door technician to make the necessary repairs.
Faulty garage door opener
The automatic garage door opener is compromised of several electronic components such as a circuit board, wall console or push button, optical sensor, and transformer. If any of these electronic components are faulty, the garage door opener will not function properly and may not allow the garage door to close. Assuming you have determined that the problem is with the garage door opener and not the other issues above, it is recommended to contact a certified garage door technician to make the necessary repairs.
How Much Does It Cost to Replace a Garage Door?
There are a number of variables that can affect the price of a garage door. There are 3 main categories of garage doors and their pricing can vary depending on the door size and the options a homeowner chooses. Below is an outline of the possible price ranges:
- Builder grade (non-insulated)
- Single car garage ( $700- $800 per door)
- Double car garage ($1000- $1100 per door)
- Classic style
- Single car garage($900- $1400 per door)
- Double car garage( $1450 -$2200 per door)
- Carriage house
- Single car garage ($1400 -$2000 per door)
- Double car garage ($2500 -$4000 per door)
The actual installed price of a garage door will depend on the additional options selected and the specific installation requirements unique to each. The above pricing is to provide a guideline as to the starting price ranges to replace a garage door.
Odyssey Garage Door Opener Maintenance Tips
Regularly maintaining your garage door can save you money while improving the overall functionality of your door. Simple maintenance tasks can be easily completed by homeowners. Major repairs and part replacement should be left to a professional garage door technician. The following tips will set you up for success and extend the life of your garage door.
- Perform a Contact Reverse Test monthly
- Lubricate door hardware monthly. Lubricate Rollers and Hinges with a light weight general purpose grease.
- Perform the Safe-T-Beam check at least once every month. Check wiring for loose connections, cracks or worn insulation.
- Check door balance every month. To perform the door inspection, follow these instructions:
With the door closed, pull the manual emergency release handle DOWN and away from the door and let go to disengage the carriage from the drive chain or belt.
Check this too: How Long Does a Garage Door Opener last?
- Raise and lower the door manually. Door should move freely and smoothly.
- Raise door manually about 3’ to 4’ feet from floor and let go. Door should remain stationary or slowly drift closed. If door opens or closes rapidly, contact a trained door system technician to have your door springs serviced.
- Close the door.
- Place the carriage in the “engage” position.
- Operate door using remote or wall control. The carriage will reattach itself to the drive chain/belt.
- Check the battery backup system every month. Unplug opener from outlet. Test opener with remote or wall console. Replace battery if needed.
- Lubricate screw drive yearly. Use Overhead Door Lube to keep screw drive rail operating smoothly.
- Replace remote battery as needed.
- Replace light bulb as needed.

