Jackshaft Garage Door Opener How to & Troubleshooting Guide
Jackshaft garage door openers, once only common in commercial applications, are now being used more and more often in residential applications. Some homeowners have unique situations that require a Jackshaft opener.
Whatever the reason for installing a Jackshaft garage door opener, you would always want it to run smoothly, without hitches. But that may not always be the case. From the day-to-day use, your opener may experience issues, or start misbehaving for various reasons, including wear and tear.
Before you call for a technician for issues you may have with your garage door opener, however, it can prove a wise decision to troubleshoot the opener on your own first. Common problems with the Jackshaft opener have been resolved by performing simple DIY troubleshooting procedures, saving homeowners time and money. Read on to learn the simple fixes and solutions for some of the commonly-reported Jackshaft garage door opener issues.
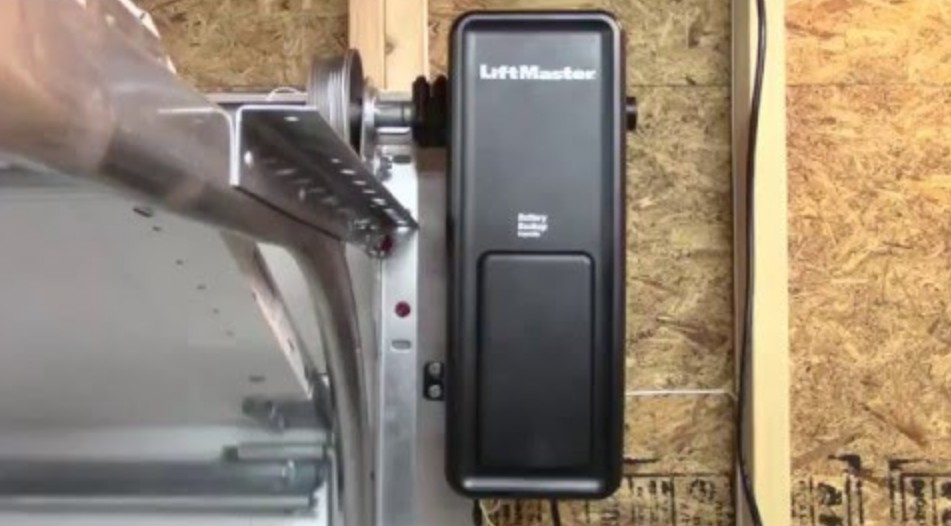
How to Install a Jackshaft Garage Door Opener (Liftmaster model 8500)
Liftmaster garage door model 8500 is for residential and light-duty commercial use. It is to be installed on sectional doors with torsion assemblies only. The garage door is compatible with:
- Doors that use a torsion bar and springs. The torsion bar must be 1 inch (2.5 cm) diameter.
- 4-6 inch (10-15 cm) drums. Do not use it on tapered drums over 6 inches (15 cm).
- High lift (up to 54 inches (137.2 cm) high and standard lift sectional doors up to 14 feet (4.3 cm) high.
- Doors up to 18 feet (5.5 m) wide.
- Doors up to 180 sq. ft (16.7 sq. m).
To assemble, install and adjust the garage door, you will need the following tools:
- A stepladder
- Drill
- 5/32”, 3/16”, 5/16” and ¾”drill bits
- 1/4”, 5/16” and 3/8” sockets and wrench with 6” extension
- Tape measure
- Pliers
- Wire cutters
- Pencil
- Needle nose pliers
- Claw hammer
- 3/6” and 1/8” hex key wrench
- Adjustable end wrench
- Torque meter
You can install the garage door opener on either side of the door. Follow these instructions to assemble and install the door:
- Attach the collar to the garage door opener
- Loosen the collar screws.
- Attach collar to the garage door opener motor shaft. Place the side of the collar with the larger hole on the motor shaft. Make sure the collar is seated all the way on the motor shaft until stop is reached.
- Position the collar so that the screws are facing out and are accessible when attached to the torsion bar.
- Tighten the screws on both sides of the collar equally to secure the collar to the motor shaft (to 12-14 ft./lbs. of torque).
- Attach mounting bracket to the garage door opener
- Loosely attach the slotted side of the mounting bracket to the same side of the garage door opener as the collar, using the self-threading screws provided.
- Position and mount the garage door opener
- Close the garage door completely.
- Slide the garage door opener onto the end of the torsion bar. You may need to cut the torsion bar if it too long or is damaged. Make sure the collar does not touch the bearing plate.
- Use a level to position and vertically align the garage door opener. Confirm the mounting bracket is located on a solid surface such as concrete, wood, or door/flag bracket.
- When the garage door opener is properly aligned, mark the mounting bracket holes. Tighten collar screws on the torsion bar if necessary to hold the garage door opener in place while marking holes.
- Remove the garage door opener from the torsion bar. Drill 3/16” pilot holes at the marked locations. Drill through steel plate if necessary.
- Slide the garage door opener back onto the torsion bar until the pilot holes are aligned with the bracket. Securely tighten the collar screws to the torsion bar to 12-14 ft/lbs. of torque.
- Securely tighten both set screws. You may need to manually raise the door slightly to reach the set screws.
- Secure the mounting bracket to the wall and to the garage door opener. Use the 14-10×1-7/8 inch screws to secure the mounting bracket to the wall.
- Secure the antenna wire with a staple to prevent antenna from being entangled in a door roller.
- Attach the emergency release rope and handle
- Install power door lock. It must be mounted within 10 feet (3.05m) of garage door opener with approximately a 3 inch (7.6 cm) distance between the center of a door roller and the hole for the power door lock bolt.
- Attach the cable tension monitor. It is recommended that the cable tension monitor be installed on the same side of the door as the garage door opener.
- Install the door control (MyQ control panel). Install within sight of the door at a minimum height of 5 ft (1.5 m) where small children cannot reach, and away from the moving parts of the door.
- Install remote light (garage door opener light). Select an appropriate location on the ceiling to mount the light within 6 ft (1.83 m) of an electrical outlet so that the cord and light are far away from moving parts.
- Install the protector system. The safety reversing sensor must be connected and aligned properly before the garage door opener will move in the down direction. It is a required safety device and cannot be disabled.
- Connect power. You can plug in the garage door into a grounded outlet or, through permanent wiring if it is required by your local code.
- Install the battery backup (optional).
How to Adjust Jackshaft Garage Door Opener (Liftmaster model 8500W)
Programming the Travel Limits
Travel limits regulate the points at which the door will stop when moving up or down. Adjust the position of the door by using the black and yellow buttons. Black moves the door up (open) and yellow moves the door down (close).
Follow the steps below to set the up position:
- Press and hold the black button until the LED starts flashing slowly, then release.
- Push and hold the black button until the door reaches the desire UP (open) position.
- Push the door control or programmed remote. This sets the UP (open) limit and begins closing the door.
- Immediately the door starts to close, press and release either the black or yellow button. This will stop the door.
Follow the steps below to set the down position:
- Push and hold the yellow button until the door reaches the desired down (closed) position.
- Once the door is closed, if there appears to be too much pressure on the door, you may toggle the door back and forth using the black and yellow buttons to reach the desired closed position.
- Push the door control or programmed remote control. This sets the DOWN (close) limit and the door should open.
Force setting
The force setting measures the amount of force required to open and close the door. To set the force, follow these instructions:
- Push the yellow button twice to enter into the Force Adjustment mode. The LED will flash quickly.
- Push the door control or programmed remote control. The door will close (DOWN).
- Push the door control or programmed remote control again. The door will open (UP).
- Push the door control or programmed remote control a third time to close the door (DOWN).
- The LED will stop flashing when the force has been programmed.
What is a Jack Drive Garage Door Opener?
A Jack drive opener is a wall-mounted garage door opener that is mounted to either the left or right side of the garage door opener. Jackshaft openers are connected to the torsion bar of the garage door to raise and lower the door. The system is suitable for any type of garage door including vertical lift, standard lift and high lift doors.
Are Jackshaft Garage Door Openers Reliable?
Jackshaft garage door openers are the most common type of wall-mounted operators. Traditionally used for commercial applications, Jackshaft garage openers have become popular for homeowners and residential applications due to their security, smooth operations and dependability for the long term.
Common Jackshaft Garage Door Opener Problems and Their Fixes
Cables come off the drums
On jackshaft openers, the operator turns the torsion shaft to open or close the door. The cables normally loosen momentarily until the weight if the door pulls on the cables. Sometimes, however, the cables come off the drums when closing the door from the open position.
To fix this problem, there are several solutions you can try:
- Pitch the horizontal tracks at least an inch for every foot of track length. This will allow the weight of the door to push down into the opening, thereby keeping the cables on the drums tight as the door closes.
- If pitching the tracks is not possible or feasible, a second solution you can try is to install push down spring bumpers in the back of the tracks. This will push the door down from the open position.
- Another option you can try is to install a large drive sprocket on the end of the torsion shaft. This will minimize the turning speed of the torsion shaft rotation, and possibly eliminate the chances of the cables coming loose.
- Installing cable keepers can also help resolve the problem. These can pull a few inches of loose cable away from the drum.
- Door doesn’t open completely
- Check power door lock.
- Check whether there is something obstruction the door and remove the obstruction.
- The door could be out of balance or the springs are broken. Inspect the door to ensure that it is balanced and is not sticking or binding. Replace broken springs.
- Door opens but won’t close
- Check cable tension monitor. The cable tension monitor must be connected and properly installed before the garage door opener will move in the down direction.
- If the garage door opener lights blink, check the safety reversing sensor.
- If the garage door opener lights do not blink and it is a new installation, make sure you set the force properly. For an existing installation, repeat the safety reverse test after adjustment is complete.
- Garage door opener strains to operate door
The door may be out of balance or the springs may be broken.
- Close the door and use the emergency release handle to disconnect the door.
- Open and close the door manually.
- A properly balanced door will stay in any point of travel while being supported entirely by its springs. If it does not, disconnect the garage door opener and call a qualified door systems technician.
- Garage door opener moves when the door is in operation
- If minor movements, this could be normal for the garage door opener. If excessive the collar will wear prematurely.
- Check to make sure the torsion bar is not moving left/right excessively.
- Check to make sure the torsion bar is not visibly moving up and down as it rotates.
- Check that the garage door opener is mounted at a right angle to the jackshaft. If not, move the position of the mounting bracket.
- Garage door opener won’t operate due to power failure
- Manually open the power door lock.
- Use the emergency release handle to disconnect the door. The door can be opened and closed manually. When power is restored, pull manual release a second time.
- If you have connected a battery backup, the opener should be able to operate up to 20 times without power.
- Door loses limits
- Collar is not tightened securely. Tighten the collar and reprogram limits.
Door will not close and the light bulbs blink
The safety reversing sensor must be connected and aligned correctly before the garage door opener will move in the down direction. To troubleshoot:
Verify the safety sensors are installed and aligned properly, and are free of any obstructions.
Jackshaft Garage Door Opener Pros and Cons
Jackshaft garage openers have several advantages over trolley-type openers, making the best option in several instances. Some of the pros of a Jackshaft open include:
Extra space for storage
Due to being installed on the side of your garage door, homeowners can have more available garage ceiling space that can be used for storing things like bicycles, canoes, or other items. Rail systems used by chain and belt drive openers restrict the amount of available ceiling space. The jackshaft opener design can also be used for high lift garage doors and eliminate the need for installing a false panel.
Quiet operation
Jackshaft openers use DC power, which means that it starts up slowly, speeds up for use, and then slows down before stopping. The fact that the garage door opener is not connected to the joists and instead is located on the wall is going to cut down on the level of noise and vibrations that the opener makes.
Variable installation options
Trolley garage door openers with rails require at least 48 inches of overhead clearance above the garage doors, which many homes cannot accommodate. With Jackshaft openers, garages with either incredibly high or low ceilings can benefit from having the garage door opener installed on the side of the door.
High safety levels
Since a Jackshaft opener is installed next to the door, it is far less likely that a component will fall and hit your vehicle.
Also, modern jackshaft openers include safety features such as safety reversal systems and sensors. Many jackshaft opener models can also be upgraded to include a 200-watt light for added safety and convenience.
Improved security
Garage doors have an emergency release cord you can pull to detach the door from the opener, so homeowners can lift the door during emergency situations. While it is a convenient tool, it can be triggered from outside, allowing burglars into your home. Jackshaft wall-mounted garage doors do not have these cords and can’t be manipulated by burglars.
Check this too: Garage Door Not Opening But Motor Running: Causes and Fixes
Equipped with a backup battery
Some jackshaft openers like the Liftmaster model 8500W comes fully equipped with an emergency battery. Even during a power outage, a battery backup lets you open and close the door up to twenty times.
While Jackshaft openers have several advantages, they also have cons or instances where overhead garage door openers have the upper hand:
Expensive
Jackshaft operators are more expensive than a traditional system.
Less cost-effective
Jackshaft openers are less cost-effective to install, repair and maintain when compared to overhead garage openers.
Load limitations
Overhead garage door openers have the necessary capabilities to lift and lower even the heaviest garage doors. The same cannot be said for jackshaft openers which tend to have a weight limit.
How to Program a Jackshaft Garage Door Opener Remote Control (Liftmaster model 8500W)
To add a remote control using the door control (control panel):
- Press the control panel LEARN button twice, the red learn LED will turn on.
- Press the button on the remote control that you wish to operate your garage door.
- The garage door opener lights will flash (or two clicks will be heard) when the code has been programmed.
To erase all remote controls and keyless entries follow these instructions:
- Press and hold the LEARN button on the control panel until the red learn LED goes out (approximately 6 seconds).
- All remote control and keyless entry codes are now erased.
- Reprogram any compatible accessory that you wish to use.
Why is My Jackshaft Garage Door Opener Not Working?
If your garage door opener is not working, it could due to several reasons. Here is what you need to check:
- Check the power source where the powerhead is plugged in. Plug a lamp into the same outlet, if the lamp works then power source is ok, if the lamp does not work, check the fuse or breaker.
- Verify that you have disabled all door locks.
- Check for ice or snow build-up under the door. The door may be frozen to the ground. Remove any restriction.
- The garage door spring may be broken. If that is the case, have it replaced.
- If the yellow command LED does not turn on in your Liftmaster 8500W, reverse the wires connected to the RED and WHT terminals of the control panel. Replace wire if needed.
How Does a Jackshaft Garage Door Opener Work?
Instead of hanging from the ceiling, a Jackshaft garage door opener is mounted on wall, next to the garage door. It works by turning the torsion bar, thus using springs to raise and lower the door along the tracks.
How Long Do Jackshaft Garage Door Openers Last?
On average, a Jackshaft garage door opener should last about 10-15 years. Your opener may last longer than this, or shorter. How long it lasts depends on several factors, including frequency of use and regular garage door maintenance. Keeping up with maintenance can help increase the lifespan.
How Much Does a Jackshaft Garage Door Opener Cost?
Jackshaft drive openers cost $250 to $500. On the other hand, screw drive openers cost $150 to $300. Belt and direct drive openers cost $175 to $350.
Jackshaft Garage Door Opener Cleaning, Repair and Maintenance Tips
Through proper care and maintenance, you can ensure your Jackshaft garage door opener works smoothly, without hitches, and serves you for a long time.
Consider the following maintenance schedule for your opener:
At least once a month do the following:
- Manually operate the door. If it is unbalanced or binding, call a qualified door systems technician.
- Check to be sure the door opens and closes fully. Adjust limits and/or force if necessary.
- Repeat the safety reverse test. Make any necessary adjustments.
At least once a year:
- Oil door rollers, bearings and hinges. The garage door opener does not require additional lubrication.
- Do not grease the door tracks.
How to Test Jackshaft Garage Door Opener
Safety reversal test
You should test the safety reversal system after the following situations:
- Each adjustment of limits, or force controls.
- Any repair to or adjustment of the garage door (including springs and hardware).
- Any repair to or buckling of the garage floor.
- Any repair to or adjustment of the opener.
To test the Safety Reversal System, follow these steps:
- With the door fully open, place a 1-1/2 inch (3.8 cm) board on the floor, centered under the garage door.
- Operate the door in the down direction. The door must reverse on striking the obstruction. Upon successful safety reversal test, proceed to test the protector system.
- If the door stops on the obstruction, it is not traveling far enough in the down direction. Complete programming the travel limits and set the force. Repeat the test.
- When the door reverses on the 1-1/2 inch (3.8 cm) board, remove the obstruction and run the garage door opener through 3 or 4 complete travel cycles to test adjustment.
- If the opener continues to fail the safety reverse test, call for a qualified door systems technician.
Testing the Protector System
- Press the remote control push button to open the door.
- Place the garage door opener carton in the path of the door.
- Press the remote control push button to close the door. The door will not move more than an inch, and the opener lights will flash.
The garage door opener will not close from a remote if the indicator light in either sensor is off (indicating that the sensor is misaligned or obstructed).
If the garage door opener closes the door when the safety reversing sensor is obstructed, do not operate the door. Call for a qualified door systems technician.
Testing Cable Tension Monitor
If your cable tension monitor has been activated the LED on the opener will blink 9 times.
- Testing Power Door Lock
- With the door fully closed, the power door lock bolt should be protruding through the track.
- Operate the door in the open direction. The power door lock should retract before the door begins to move.
- Operate the door in the down direction. When the door reaches the fully closed position, the power door lock should automatically activate to secure the door.
If the power door lock does not function, you can release the lock manually by sliding the manual release handle to the open position.
- Testing the emergency release
- Make sure the garage door is closed.
- Pull the emergency release handle. The garage door should then be able to be opened manually.
- Return the door to the closed position.
- Pull the emergency handle second time.
- Reconnect the door to the garage door opener

