Senco Nail Gun Troubleshooting & How-to Guide
Senco has set the bar when it comes to construction power tools and woodworking power tools. They manufacture high-quality and lightweight nail guns. However, regardless of brand, wear and tear will take its toll on any tool. When fixing issues concerning the Senco nail gun, it is best to narrow down the part that doesn’t work. This article will help you operate your Senco nail gun and troubleshoot it whenever the need arises.
How to set up the Senco nail gun
While the nail gun features may differ slightly with model and brand, but the principal on how to set up and operate a nail gun is the same. Here is a general guide on how to set up and operate a cordless Senco nail gun.
Charge the battery
- Press the buttons on both sides of the battery compartment, lift the cover and lift the battery from the tool.
- Connect the charging plate to a wall outlet.
- Slide the battery into the charger while aligning the treads on the battery with the grooves on the charger.
- Ensure the contacts on the battery engage correctly with the contacts on the charger. The red light will turn on to show the battery is in contact with the charger, and it will start flashing to indicate fast charging mode.
- The battery will also get a little warm to the charge while charging.
- If the LED starts flashing in red and green lights, it means the battery pack is defective. Get a replacement from an authorized Senco dealer.
- When the battery is 805 charged, the red LED will stay on, and the green light will flash. When fully charged, the red LED will turn off, and a solid green LED will light.
- After using your tool, charge it for about an hour.
Adjust the nosepiece for fastener depth
- Always wear safety glasses when using the nail gun to avoid eye injuries.
- Remove the battery before adjusting the nosepiece.
- Press the screw selector pin(a red lock button) until it levels with the nosepiece.
- Turn the depth adjustment thumbwheel to change the countersink.
- To set your desired depth, turn the thumbwheel to the left will raise the fastener, and turning it to the right will lower the fastener.
- Drive the fastener into a scrap wood piece (you can chop one up using a chop saw) to test the fastener depth and adjust accordingly.
- Release the lock pin after adjusting and ensure it fully engages in the nosepiece slot.
Load the nail gun.
- Disconnect the nail gun from power, and the safety button is depressed to prevent accidental firing.
- Turn the nail gun upside down.
- Lift the slide latch at the rear end of the nail gun.
- Keep the slide latch lifted and slide away from the nail gun to reveal the magazine.
- Place the strip of fasteners into the magazine. Make sure the heads are sitting in between the groves and the tips resting on the fastener guide.
- Feed the fasteners towards the nose of the tool.
- Push the slide latch until it clicks into place.
Operate the nail gun
There are two ways you can fire a nail gun depending on the model.
- With contact actuation(allows fast continuous nail firing):
- Press the nosepiece against the surface and pull the trigger. Each time you push the nosepiece against the surface, the nail gun will fire a nail.
- With sequential actuation(for more accurate nail placement):
- Press the nosepiece against the work surface and then pull the
- trigger. The nail gun will only fire after you pull the trigger, and the next fastener will be automatically fed into place when you release the trigger.
- Switch off the tool when not in use. Hold both sides of the selector switch for about a second to turn the nail gun off. If you leave the motor running, the tool will automatically turn off after about 20 minutes.
Unload the gun.
- When done, push the button on the feeder to release the feeder from the strip. Pull the fastener strip out from the top of the side body.
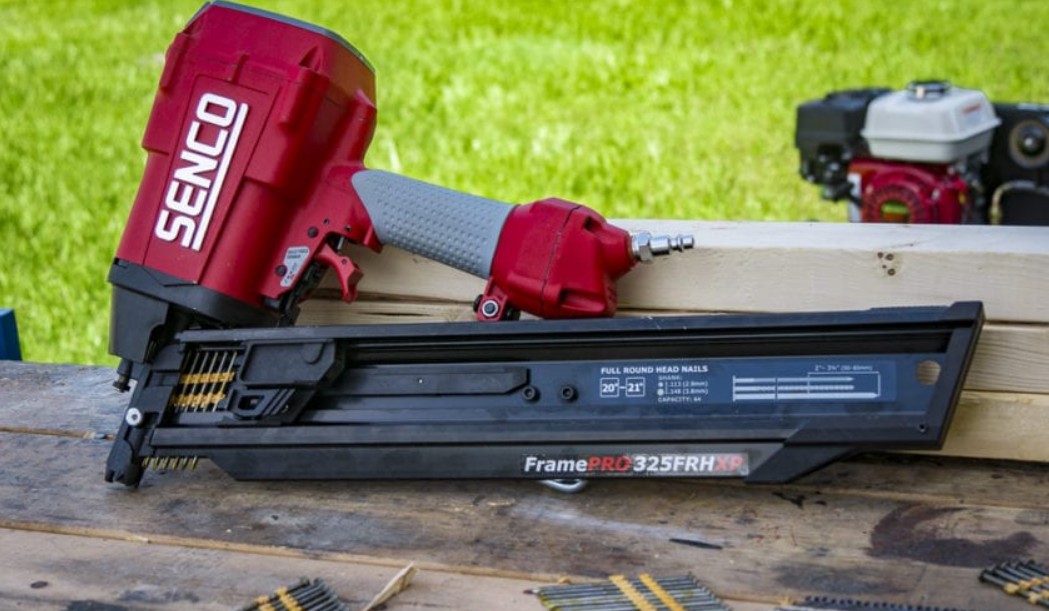
How to connect a Senco nail gun to the air compressor
Connecting your pneumatic nail gun to an air compressor is relatively easy but can be dangerous if done incorrectly.
Things You’ll Need
- Air hose
- Pneumatic tool oil
- Air compressor
Directions
- Turn on your air compressor, and it will automatically start to pressurize. The take pressure gauge, usually on the left, will begin to move up and then stop when it gets to about 200 PSI. Ensure that the outlet pressure gauge is at 0 PSI before attaching the tool.
- Check the safety button on the barrel. A faulty safety button may slide back, engaging the trigger and firing a fastener.
- Test the trigger; without air pressure, the trigger is very loose.
- Connect the female plug of the air hose into the universal plug on the air compressor. Push the coupler up, attach the female plug, and the coupler will snap back.
- Pour about three to four drops of pneumatic tool oil on the coupler of the nail gun. Lubricating will prevent jamming.
- Connect the male end of the air hose to the pneumatic nail gun, making sure the collar clicks into place.
- Pull the pressure regulator knob out and turn it clockwise to increase the pressure to the desired setting. Set the pressure to the recommended PSI for your tool to function correctly. Setting the pressure too high or too low will cause problems or even damage the tool. Most Senco pneumatic nailers work best with pressure between 70-120 PSI.
- After using the nail gun, switch off the air compressor, remove any remaining fasteners from the nail gun, disconnect the air hose, drain the air compressor until it reads below 20 PSI, and drain moisture from the compressor.
How to change the nail gun drive
Over time and with regular use, the drive will start to wear and require a replacement or changing drive types. You can remove and replace the bit using two ways:
- Without removing the feed system
- Remove the nails from the nail gun.
- Slide the bit release button backward.
- Tilt the tool forward, press the trigger, and the bit will fall out.
- Hold the tool upright and insert the new bit into the slide body.
- While sliding the bit release button backward, press the trigger, and the bit will drop into place and then release the button.
- Remove the feed system or tool front end.
- Unlock the locking collar on the detachable feed system by turning it counterclockwise.
- Remove the feed system from the tool to expose the bit.
- Slide the bit release button backward.
- Pull out the old bit and release the button.
- Insert the new bit into the bit retainer and push it until it clicks into place.
- Slight the bit properly by slightly rotating it to prevent any looseness.
- Insert the feed system and rotate the collar to the lock position.
How to fix a jammed Senco nail gun
Your Senco nail gun jams when the nails feed incorrectly and wedge against the driver blade preventing further cycling. Jamming happens to all nail guns, coil, and stick framing guns. Therefore the process of unjamming the tool is pretty similar.
- Turn off the power supply to the nail gun. Remove the battery of a cordless nail gun and disconnect the air hose for a pneumatic model.
- Pull the strip of fasteners out of the magazine to avoid any accidents or injury during unjamming.
- Remove the jamming nail from the driver blade. Some mode
- Use the quick release lever on top of the tool to open the barrel. Remove the nose latch, open the latch outward, and the jammed nail will pop out. Some newer Senco models have this release lever, such as the 16GA FinishPro nailer.
- If your nail gun does not have a release button or lever, use a wrench to remove the screws holding the depth adjustment.
- Gently separate the magazine assembly from the nose assembly with a screwdriver to expose the jammed fastener.
- Use a screwdriver to pry the jammed fastener, and you can also tap the driver blade down to release the fastener.
- Reassembly the magazine and tighten the screws.
- Connect power to the nail gun.
- Load the fasteners and test the tool.
- If your nail gun jams too frequently, you should fix the underlying problem first to avoid damaging your nail gun.
Why is my Senco nail gun not firing
There are many reasons that can cause your nail gun not to fire other than a jammed nail. Here is how to troubleshoot this problem.
Check the nails.
- The nail gun will refuse to fire when you have the wrong length of nails, the wrong gauge, or the wrong angle for the magazine. You should always use Senco branded fasteners for the best performance. Always confirm the length that is appropriate for your model type.
- Check for a jammed nail in the magazine. Sometimes when you fire the nail gun, the nail hits the surface and reverts into the nailer preventing any nails from firing.
Check your power supply.
- If your nail gun is firing partially or not firing at all, your tool is likely not receiving sufficient power. For a cordless nail gun, you should charge the battery for about an hour before using it. If the battery is faulty, get a replacement from a Senco dealer.
- For a pneumatic nail gun, check the compressor and air hoses. Make sure the hoses and fittings do not have any leakages and replace them if necessary. Also, it is crucial to ensure you are using the correct air compressor size for your tool. Typically, pneumatic nail guns require a pressure range of 70 to 120 psi to work correctly. If your air compressor does not have enough CFM or has a small tank, it will not power heavier nail gun models like the framing nail gun.
- Reload the magazine
- Check the tool’s magazine for any fasteners and reload the tool with a new strip or coil of fasteners. Some models have the fastener lockout, which is a mechanism that prevents the last 3-6 fasteners from firing. It prevents dry firing, which may wear other parts of the tool.
Clean the nail gun
- If the gun is firing, but the fasteners are not moving, there may be dirt and gunk clogging the magazine. Inspect the magazine by removing the fasteners and sliding the feeder back and forth. If the feeder does not move smoothly, clean the magazine with a toothbrush or canned air—clean other moving parts such as the trigger assembly and the trigger actuator on the nose piece.
Replace any worn seals and O-rings
- Poor tool maintenance will cause the internal seals to break down. To identify if the seals are damaged, you will hear the drive piston moving when your shake the tool; for a pneumatic tool, you will hear a hissing sound from the tool’s trigger or exhaust vent. Open apart the tool and replace the broken seals and O-rings with Senco parts and reassemble the tool.
Check the tool for other damages.
- Disconnect the tool from power and carefully inspect it for other damages. Look for twists and bends in the magazine or if the feeder spring is bent or broken. Check the trigger assembly, hose fittings, and nose piece for cracks and other damages and repair where necessary.
Signs that your Senco nail gun is leaking air
Pneumatic nail guns are prone to breaking down over time. If your air pressure setting is correct and the air compressor is in good condition, but the nailer is still shooting blanks, you could be dealing with an air leak in the nail gun. Signs to look out for that indicate your nail gun is leaking air include:
- The nail gun doesn’t work at all.
- The driver does not retract or retracts too slowly after firing. There could be damaged O-rings in the driver, allowing air to leak through.
- The fasteners do not sink entirely into the work surface.
- The nail gun is splitting wood.
There are two common types of air leaks in a pneumatic nail gun, as discussed below.
1. Air leak through the exhaust vent heads
If you notice air leaking through the exhaust vent or exhaust port, then the most common reason is the O-rings found around the head valve at the top of the cylinder have holes and letting air through.
The O-rings are a rubber seal that secures the area around the head valve to prevent air from escaping and causing an imbalance in pressure.
Purchase a rebuilt kit that matches your nail gun model and replace the worn-out O-rings.
2. Air leak through the trigger
If your press the trigger and feel air blowing through the trigger assembly, it means there is an air leak through the trigger valve. Another sign of a faulty trigger valve is no nail fires when you press the trigger, and it also means the trigger valve is not cycling correctly due to damage. The trigger valve usually wears out after regular use of your nail gun. Get a new trigger valve that matches your nail gun model and replace it.
Why is my nail gun skipping nails?
There are several reasons that can cause your nail gun to misfire.
- A nail jam will prevent the nails from moving forward.
- If you are running low on power, the nail gun will keep firing intermittently until it shuts off completely. For a cordless nail gun, if you fully charged your battery, check to see if it’s defective and may require a replacement. If you have a pneumatic tool, ensure the air hose is attached correctly to the tool.
- Non-compatible fasteners. There are several types and sizes of fasteners, and what you use is determined by the kind of nail gun.
- A dirty nail gun will not fire smoothly. Clean the nail and lubricate moving parts, primarily if you use the nail gun regularly.
- A failing motor will not fire properly.
The nail gun hammer is not returning or retracting.
Typically, when you press the trigger of a nail gun, the piston uses the force from an air compressor or electricity and pushes the hammer, which hits the nail’s head, pushing it into the work surface. The hammer retracts to its initial position. Here are some of the reasons that can prevent your nail gun hammer or driver from returning.
- Low air pressure. Most pneumatic nail guns function well with air pressure between 70 to 120 PSI. The solution is to increase the air pressure.
- Broken seals in the exhaust component. The exhaust valve has a rubber O-ring that seals the cylinder inside the nail gun. After releasing the trigger, the pressure below the piston is greater than the pressure above it. The exhaust valve opens and forces the used air through the exhaust port. When the O-ring is damaged, the piston which attaches to the hammer cannot retract. Replace the O-ring with a Senco O-ring compatible with your nail gun model.
- Poor lubrication. Lubricating your tool regulatory is part of the maintenance to prevent components from wearing out too quickly. Use nail gun oil to lubricate all moving parts at the valves. Ensure you are also using the proper lubricant for your nailer; otherwise, the wrong oil will clog the nail gun parts and make your nail gun sluggish.
- Blocked vents. The vents will clog from dust around a workshop mixing with the nail gun oil. When the vents are blocked, it increases the returning piston’s resistance and prevents it from returning to the firing position. Clean all the vents and repeat every time after using the nail gun to reduce the accumulation of dust and dirt.
Fasteners are not seating fully.
Sometimes when you fire the nail gun, the nail may not go entirely into the work surface; here’s how to troubleshoot this problem.
- Switch off the air compressor and disconnect the air hose from the tool.
- Check the magazine and make sure the fasteners sit correctly. Place the points of the fasteners at the front of the clip and adjust if necessary.
- Make sure the type of fasteners is compatible with the nail gun.
- Inspect the compressor and ensure the set air pressure is correct. Low air pressure will not have enough force to drive the nail deep enough into the work surface.
- Use an Allen wrench to tighten the screws holding the back vent cover at the top rear of the handle.
- Reconnect the air hose and test the gun. If the problem persists, seek professional servicing.
Conclusion
The best way to prevent the reoccurrence or frequency of nail gun problems is to practice preventive maintenance. Lubricate the nail gun regularly with nail gun oil, clean it after every use and store the tool in plastic to keep dust and the elements out. Remember always to use Senco parts when doing replacements to avoid any compatibility issues.

