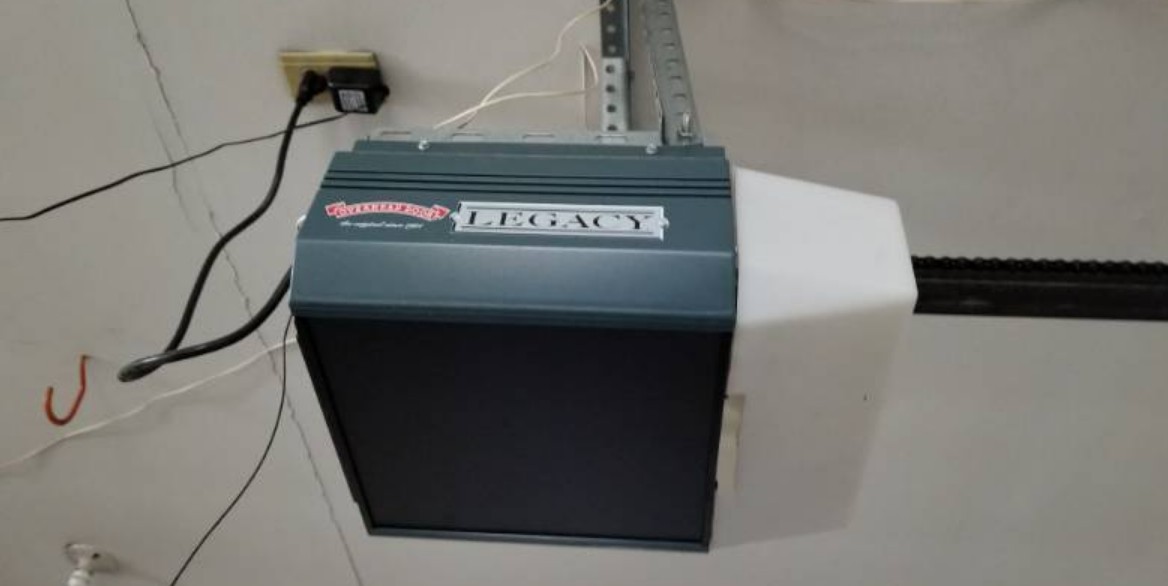
Legacy Garage Door Opener How to and Troubleshooting Guide
The Legacy garage door opener is one of the best garage door openers on the market. Not only is it durable, but it is also easy to operate and maintain. However, it is prone to malfunctioning just like any other electronic machine. Keep reading to learn how to troubleshoot any issues you may experience and how to resolve them.
How do I program my Legacy garage door opener?
These wireless keypad instructions apply to the OWK-BX and the OKP-BX keypad models;
- Start by selecting a model to view the programming instructions for that particular wireless keypad.
- Select Wireless keypad programming>program garage door keypad>garage keypad programming.
Program Keypad for One Garage Door (CodeDodger 2)
Create Your Wireless Keypad PIN (Personal Identification Number)
On your wireless keypad:
- Press in order 3, 5, 7
- Press the PROGRAM key
- Enter your PIN (3 to 8 characters)
- Press the PROGRAM key again.
- Close keypad cover and wait 30 seconds
- Program the keypad for a single door
On the power head:
- Press and hold the PROGRAM button until both LED lights turn BLUE
- Release button. Only the round LED will remain BLUE.
- Press and hold the PROGRAM button again, then release. The Long LED will blink PURPLE
- Enter your PIN using the keys on the keypad
- Press the UP/DOWN button. LEDs will stay on solid.
- Press the UP/DOWN button again. LEDs will turn off.
- Press any key to stop the opener. (It will automatically stop at the fully open or fully closed position.)
- The keypad backlight will turn off in approximately 30 seconds.
- Proceed to the Mounting Instructions.
NOTE: If the door does not move, check the LED on the keypad. If the LED is blinking rapidly, the PIN was entered incorrectly. After the LED stops blinking, re-enter your PIN ad try again. Any keypad button will control the door for 30 seconds after the door starts moving. Rapid blinking of the red LED indicates an error. After a few seconds, the LED will turn off. Start over.
Program Keypad for Multiple Garage Door (CodeDodger 2)
- Create Your Wireless Keypad PIN (Personal Identification Number)
- Press in order 3, 5, 7
- Press the PROGRAM key
- Enter your PIN (3 to 8 characters)
- Press the PROGRAM key again.
- Close keypad cover and wait 30 seconds
Program The Keypad for Multiple Doors
All garage door openers will use the same PIN.
On the wireless keypad:
- Enter your PIN and press the PROGRAM button.
- Press the PROGRAM button again.
- Press the number of doors you wish to control (2 or 3)
- Press the program button again.
On your garage door opener powerhead:
- Select the first opener and press and hold the PROGRAM/SET button until both LED lights turn BLUE.
- Release the button. Only the round LED will be BLUE.
- Press the UP/DOWN button again. The LED indicators will automatically turn off.
- Press any key to stop the opener. (It will automatically stop at the fully open or fully closed position.)
- The keypad backlight will turn off in approximately 30 seconds.
- Proceed to the Mounting Instructions
NOTE: If the door does not move, check the LED on the keypad. If the LED is blinking rapidly, the PIN was entered incorrectly. After the LED stops blinking, re-enter your PIN ad try again. Any keypad button will control the door for 30 seconds after the door starts moving. Rapid blinking of the red LED indicates an error. After a few seconds, the LED will turn off. Start over.
Garage Door Opener Keypad Mounting Instructions
The keypad must be mounted in sight of the door(s), at least 5 feet above the ground, and clear of any moving door parts. Mounting screws are located inside the battery compartment.
- Remove battery cover and batteries
- Drill a 1/16″ pilot hole for the tip mounting screw.
- Install a screw into the drilled hole, leaving a 1/8″ gap between the screw head and the wall.
- Hook the keypad over the screw.
- Mark and drill the pilot hole and fasten the bottom screw.
- Install batteries and cover.
How do you change the PIN on your Keypad?
- Enter your current PIN and press the PROGRAM button
- Enter your NEW PIN and press the PROGRAM button.
How to set a Temporary PIN for your Keypad
A temporary PIN allows temporary access to your home by repairpersons, meter readers, and delivery drivers.
- Enter your current PIN and press the PROGRAM button three times.
- Enter your temporary PIN and press the PROGRAM button.
NOTE: Do not reprogram the garage door opener(s). The temporary PIN remains active only until the next time your regular PIN is entered.
How do you reprogram a Legacy overhead door keypad?
- Press and hold the PROGRAM button
- While holding the PROGRAM button, press and hold the UP/DOWN button for 5 seconds.
- Release both buttons. You must now start from the beginning and reprogram your wireless keypad.
- Changing Battery
- If the keypad backlight does not come on, this indicates the need to replace the batteries.
- Press in on the front of the battery cover and slide it down off of the keypad.
- Remove used batteries and replace them with “AAA” batteries.
Note: No programming is lost during the replacement of batteries.
Legacy garage door opener not connecting to Wi-Fi
Here are some reasons why your garage door opener is not connecting to Wi-Fi;
Inadequate Wi-Fi router
Your Wi-Fi router must meet the following specifications;
- 802.11 b/g/n, 2.4GHz with WPA2 or WPA Security.
Additionally, you must have your Wi-Fi home network name and password available to complete the setup.
Poor Wi-Fi signal strength
Wi-Fi signal strength in the garage depends on many factors. To test signal strength, go into the garage where the garage door opener is located and use the designated smart device to access and surf the web. If the web pages load quickly, the signal strength is strong.
The OHD Anywhere App Is Not Setup Correctly
Ensure you follow the app instructions to complete the setup of the device. Also, confirm that the correct Wi-Fi password has been entered correctly in the app.
Legacy Garage Door Opener Remote Not Working
Being unable to open your garage door due to a malfunctioning remote can be a bit of an inconvenience, especially when you get home after a long day at work or running errands.
Below are some reasons why your remote is not working;
Remote Batteries Are Depleted
Check whether the batteries have died before calling your local garage door repair professionals. Garage door remote batteries typically last about two years before needing to be replaced.
To check if your transmitter batteries are dead, try using your wall-mounted control panel to open the door. If the door responds, then dead batteries are likely the cause.
Remote Signal is Disrupted
If your remote is not working after replacing the batteries in your remote, then the signal between the remote and the opener transmitter may be disrupted. This could be because the remote is out of range or the opener receiving antennae is damaged.
Ensure that you stand within 20 feet of your garage door and attempt pressing the button. The signal won’t be strong enough to prompt the door if the remote is further away from the door.
The garage door opener antenna is broken
Check the garage door opener’s antennae and ensure it doesn’t have any excess debris buildup. It should also be pointed towards the garage door, and it isn’t broken. If the antennae appear damaged, call your local repair professionals to inspect the problem and make repairs.
The Lock Button Engaged
Another simple garage door fix is to make sure the lock button on your garage door’s wall-mounted control panel hasn’t been engaged. You could accidentally press this button while performing normal daily activities, and you can quickly disengage the door lock by pressing the lock button. Then, after unlocking the door, test the door’s operations by pressing the panel’s open button.
The Remote Needs Reprogramming
Try reprogramming your garage door remote to the opener machine. Sometimes, the signal between your opener and remote can be disrupted and need re-association with regular use.
To reprogram your garage door remote;
- Locate, then press your opener to learn button.
- Hold the button on your remote for three seconds.
- Or until the garage door opener’s lights flash or the LED light on your opener blinks.
Then try using your remote to open or close your door to determine if the reprogramming was successful.
Door Control Wiring Malfunction
If the remote and wall-mounted panel method doesn’t raise or lower your door, then you may have a problem with your garage door system’s control wiring or the opener’s receiver board.
Follow the steps below to test the quality of your opener’s wiring;
- Unplug the opener and disconnect the two wires from the motor
- Reconnect your machine to power, then clear its memory and reprogram all remote controls
- Unplug the device for a second time and reconnect the control wiring to the motor
- Locate the wall-mounted controls and disconnect the wiring
- Use your garage door opener remote to test the functionality of your door
Blown GFI
Another common reason your garage door remote control might not work is because of a blown Ground Fault Interpreter (GFI). The GFI is responsible for protecting your home from any potential electrical dangers, such as overheating.
A malfunctioning GFI would generally stop the door from functioning or might use the backup battery in some models. To remedy this issue, press the reset button on the wall outlet corresponding to your garage door. It is usually located in the garage, laundry room, or main bathroom.
How to Adjust the Sensors On a Legacy Garage Door Opener
You should start by inspecting the sensor. The inspection will help you determine if a minor adjustment will do the trick. First, check to see if the sensors have LED lights are on. If one has a lit LED while the other is flickering or entirely off, you may be able to manually adjust the unlit sensor so that it lines up again (which will result in both lights remaining lit).
Note: Also, check to see if the lens on one or both is dirty. Gently clean the debris, taking care not to bump them out of alignment, and see if that solves the problem. If neither of these adjustments works, then you can continue aligning the sensors from scratch.
How to align the sensors;
- Cut the Power to prevent any electrical accidents from happening while working on the garage door opener.
- Then loosen the sensors’ screws that hold the sensors in each of the mounting brackets using a screwdriver.
- Don’t remove the sensors entirely or loosen them too much. You should be able to move the sensors but only with intentional repositioning. They shouldn’t slide on their own.
- Reposition the sensors by sliding the sensors on each side of the door down as far as they’ll go (without unscrewing the sensor mounting bracket).
- Then tie a string (long enough to span the width of the garage door) around the bracket on one side so that the string will line up with the sensor lens.
- Pull the string taut and tie it to the other bracket in the same position.
- Using a level, check that the string is level. If not, adjust one or both of the sensors to bring the string up to level.
- Then tighten the screws to fasten the sensors into their newly aligned position.
- Ensure the string stays level while you tighten the screws.
- Finally, remove the string, turn the power back on, and close the garage door.
Legacy garage door opener light not working
When troubleshooting garage door opener light problems, apply these steps to tackle the inconvenience. Following these easy procedures won’t take you much time. However, many factors can damage the opener lights, so be sure to check every possible failure. In the end, you may need to replace the opener lights completely.
Check the Fuse Box
Before examining the light bulb, check the fuses. They might need to be replaced. A surge of electricity can both harm the fuses and cause issues with your opener lights. If the fuse needs replacement, purchase new fuses at the hardware store. Make sure to switch off the electricity before carefully installing the new fuse. Resettable fuses are helpful as they automatically help balance the current electricity, but sometimes these fuses also need to be replaced.
Check the Wires
Every once in a while, you should check the wires’ condition and check that everything is wired correctly. If this is an issue, electricity won’t be conducted properly, and you won’t be able to turn on the lights. Even replacing the bulb won’t make a difference. Wires can also be purchased at any hardware store. In addition, it’s possible to use bell wire for low voltage applications.
Check the Socket
The socket could be damaged, especially if you haven’t been conducting proper maintenance and cleaning. Rust and dust could accumulate and need to be managed. If the socket is corroded, replace it immediately, don’t wait until the lights stop working.
Replace the Bulb
To replace the bulb, start by setting a ladder next to the light housing. In this position, you’ll work most comfortably. Once you’ve climbed up the ladder, unplug the opener. Next, locate the bulb and proceed to remove each screw.
If it’s a tab model, push it out. Next, use a rag to remove the bulb by turning it in a counterclockwise direction; do this gently even if it’s very tight. The rag will protect your hand in case the light bulb cracks.
Since you’re up there, take the opportunity also to clean out the housing area and be sure to remove dust from the socket. To install the new bulb, screw it in. Put the screws back in and plug the opener back in.
How to install the overhead app on your phone
Download the app and create an account
You will need to download the free OHD Anywhere® App onto your smart device and set up your account.
Add a device
Under the HOME tab, tap the image to add a device, or under the DOORs tab, press the (+) button in the upper corner of the screen.
Scan the QR code
The QR code should be under the lens cover of the operator, on top of the operator, or the back of the Door Control Module. It is positioned on the same label as the text “iDCM S/N.” Tap “Press to Scan” in the app on your screen.
Note: allow the app to use your device camera to scan the QR code) or you can also type in the serial number from the label instead.
Register
The OHD Anywhere® will register your device for you and ask you to complete any final installation of the garage door opener. When this is done, press NEXT.
Opener or Door Control Module
Press and hold the blue button next to the red LED until the opener beeps after approximately 7 seconds, and then release the button. The red LED will change to BLUE.
Then press and hold the Wi-Fi button until the device beeps and then release the button. The red LED will change to yellow, signaling the device is ready to be configured to your home network. When this is done, press NEXT.
Connect and configure the app
Enter your Wi-Fi password into the device to connect the app to your home Wi-Fi network. First, you will need to know your home Wi-Fi network name and password. When this information has been entered, press NEXT.
Confirmation
As the device connects to your home Wi-Fi network, a series of confirmation messages will appear indicating a successful Wi-Fi configuration. And the acknowledgment that the setup is complete. Next, be sure to cycle your garage door opener multiple times from the wall station (move the door up and down several times).
Final setup
Return to the HOME tab to find your recently added device. And perform the following steps;
- Go to the DOORS tab, find the device you just added and give it a name you will remember.
- Go to the RULES tab and set customizable schedules, and personalize notifications based on your needs.
- Go to the USERS tab and Invite up to 19 additional users to access your garage door through OHD Anywhere®.
Note: You can set up full access for family members, recurring access with limited schedules for babysitters or dog walkers, or even temporary one-time access for service providers such as plumbers and cable technicians.
Why is the garage door opener not working?
Below are some steps to help you remedy the issue;
Make sure the opener has power
Check the plug and ensure it’s fully plugged in, and try the door again. The cable could have been pulled out, tripped over, or pulled loose without anyone realizing it.
Check your breaker panel
Find your breaker panel and see if the circuit for your garage has been tripped. It’s so easy for a small power surge to trip your circuit breaker, and you do not even realize it. If it has been tripped, flip it back on and see if that solves the issue.
Align the sensors
Over time, these sensors may fall out of alignment, resulting in what seems like a broken garage door. If this is the case, you will need to align the garage door sensors to point directly at each other.
Most garage doors have a set of two sensors located at the foot of either side of the garage door. These are in place to ensure the door can’t close when something breaks the beam, effectively preventing personal injury and property damage.
Clean the photo-eye
The photo-eye on your garage door is a safety precaution that won’t allow the door to close fully if something is blocking it. It does this by shooting a beam across the bottom of the door. If the beam is interrupted, then it senses something is there and won’t work.
Check if there’s any dirt on the photo-eye, as this is often enough to stop it from working. Also, ensure that the wiring hasn’t been damaged.
Look at the springs
The springs on your garage door are a vital component of the opening mechanism. They give the door the tension it needs to be opened. Springs wear out over time, meaning that they lose their tension. In some cases, they’ll even break.
If you can’t get the door open, inspect the springs and check if they are worn out or broken. You can replace springs yourself, but it’s a dangerous job. You are better off hiring an expert to take care of this for you.
See if the door is locked
When you use a garage door opener, it should lock the door against anyone who doesn’t have the right remote control to open it. As an additional security measure, you can also lock the manually too. This is a good idea if you’re going to be away for any period. If you can’t open the door, use the key and check to see if it has been locked.
Reset your remote
One good test to do is to try opening the door with the control panel in your garage. If the door will open with this but not the remote, it’s the remote causing the issue.
You can check the batteries to see if they’re dead, but the remote will need resetting if it’s not working with new batteries. If the remote doesn’t work with new batteries or after resetting, you may need to consider purchasing a new one from your local garage door service provider.
Put the door back on the tracks
Sometimes, a garage door can be knocked off the tracks, which means it won’t open. If that’s the case, you may be able to fix the problem yourself. To do this, you’ll need to pull the door open by hand and maneuver the door back onto the tracks.
You’ll need at least two people to do this properly. If the damage is too significant, you’ll need to call an expert to repair those tracks for you.
Adjust the limit setting
This is something you’ll need to do if you find the door closes and pops open again right away. The opener’s settings may sense that the door has hit an obstacle when it has just touched the ground. In this case, the limit setting is too high and so will need adjusting.
The limit setting knob is usually located on the control panel itself. Adjust the knob in small increments until you have the door opening and closing as it should.
How to replace the battery in a garage door opener
- Locate the battery compartment at the bottom of the control panel.
- Open the compartment and take out the old batteries.
- Then replace them with new batteries compatible with your garage door opener.
- Ensure you insert them correctly. For example, the battery compartments should have the correct placement stamped into them.
- Then test your garage door opener to see if it works.
Note: In some garage door openers, the door will slide off to reveal the batteries. But you may have to unscrew other panels to access the batteries.
Additional issue you may experience while using your garage door opener
| Problem | Solution |
| The opener does not operate when wall control is pressed. | Turn Sure-Lock™ off. Check power source. Plug a lamp into the outlet used for the powerhead. If the lamp works, the power source is OK. If not, check the fuse or circuit breaker. If power is OK: Check connections at powerhead terminals and wall console. Check for reversed, broken, or cut wires. Staples can cut insulation and short wires. Repair or replace. |
| The opener runs, but the door does not move. | Make sure carriage is engaged with chain/belt/screw. Check to make sure the chain/belt is not broken or off its pulley. |
| The opener works from wall control, but NOT from remote. | Check all remotes. Replace the remote battery. Program remotes to the powerhead. |
| Remote has less than 25 feet operating range or no operation. | Relocate remote inside car and or point remote at the garage door. Replace battery. Reposition door opener antenna. Eliminate possible competing signals (radio, etc.). LED bulbs may be interfering with the remote signal. |
| The door starts down, then STOPS and goes back up. OR Safe-T-Beam® System malfunction. | If it’s a NEW installation, check the Door Arm position. If it’s a NEW installation, make sure ONLY the Safe-T-Beams® that came with this opener is installed. Check if limits are properly set. Adjust limits as needed. Check if Safe-T- Beam® red LED is flashing. Check Safe-T-Beam® system for beam obstruction or misalignment of lenses. Check garage door for binding. If an operational problem exists and the opener will not close, the opener can be forced to close as follows: Press and hold the wall control button until the door is completely closed. Check for interference from adjacent Safe-T-Beam® units. |
| The door starts down, then STOPS before it is closed. OR Door will only open. | Check Safe-T- Beam® wire connection at powerhead and STBs. Check if limits are properly set. Adjust limits as needed. Check CONTACT REVERSE. Check garage door for binding. Check closing “FORCE” control. |
| The door starts up but STOPS before it is entirely open. | Check if limits are properly set. Adjust limits as needed. Be sure the door, opener, and springs are in good repair, properly lubricated, and balanced. Check closing/opening “FORCE” control. If you suspect a garage door hardware or springs problem, call Overhead Door and hire a local door service professional. NEVER try to repair door hardware or springs yourself. |
| The door will only run closed. | Turn Sure-Lock™ OFF. Check if limits are appropriately set. Check door balance, condition, and door spring. Check opening “FORCE” control. If you suspect a garage door hardware or springs problem, call Overhead Door and hire a local door service professional. NEVER try to repair door hardware or springs yourself. |
| The door opener starts for no reason. | Button stuck on wall control or remote. Was the remote lost or stolen? Erase all remotes from powerhead memory and program new remotes. |
| Noisy operation. | Be sure all door fasteners are tight. Be sure the garage door is in good repair, properly lubricated, and balanced. Be sure the opener is in good repair. |
| The door opener runs slow. | Check the operating condition of the door. The door may need professional repair/adjustment. |
Check this too: Jackshaft Garage Door Opener How to & Troubleshooting Guide
Garage door opener LED lights meanings and fixes
| Powerhead LED | Possible Problem | Solution | |
| Round LED | Long LED | ||
| OFF | OFF | No response from the unit. | Check power supply. Contact a trained professional. |
| ON/RED/ STEADY | ON/RED/ STEADY | Limits are not set correctly. | Reprogram limits. |
| ON/RED/ FLASHING | ON/RED/ FLASHING | Program error. Component failure. | Unplug the unit, wait 5 seconds, plugin. |
| ON/BLUE/ FLASHING | OFF | Remote not programmed. | Program remote. |
| ON/PURPLE/ FLASHING | OFF | Remote not programmed. | Program remote. |
| ON/RED/ FLASHING | OFF | Safe-T-Beam® physical obstruction. Safe-T-Beam® signal interference. | Remote obstruction, recheck unit. Check alignment of Safe-T-Beam® pair and nearest other Safe-T-Beam® pair. |
| OFF | ON/RED/ FLASHING | Door contact in UP or DOWN travel. Door component failure detected. | Remove obstruction. Check door spring, track, rollers, hinges, and fixtures. |
| OFF | ON/RED/ STEADY | Thermal cutout. | DO NOT unplug the unit. Instead, wait until LED clears before operating. |
| ON/PURPLE/ STEADY | ON/PURPLE/ STEADY | Component error. | Contact a trained door system technician. |
| OFF | ON/BLUE/ FLASHING | The door will not open. | Check Sure-Lock™ Sure-Lock™ should be OFF for regular operation. |
| ON/PURPLE/ FLASHING | ON/PURPLE/ FLASHING | Radio receiver error. | Unplug the unit. Wait 5 seconds and plug the unit back in. If problems persist, contact a trained door system technician. |

