Miter Saw 101: A Comprehensive Beginner’s Guide
When you first encounter a miter saw, it can be a little bit intimidating. A miter saw is great for making straight and angled cuts. It makes neat cuts for baseboards, window trim, and crown molding.
Miter saws are also known for their precise cuts, which makes them efficient for various angled cuts. But to maximize your miter saw, you have to acquire the necessary skills. Below we have a detailed guide for beginners on everything essential about using a miter saw and making simple cuts to unusually angled cuts to safety and precaution measures.
How to Use a Miter Saw
Before cutting, you need to account for the kerf for very accurate cuts. A kerf is the part of the board that turns into sawdust, usually determined by the width of your blade. For example, your miter saw blade is 1/8 of an inch thick, and you have a 10-inch board that you need to cut into two equal 5-inch pieces, you need to start with a board of 10 and 1/8 inch board to have two equal parts. Make sure the thickness of the blade falls on the spare piece of the board.
Secondly, you have to know the different kinds of cuts that a miter saw can make
- Crosscut is a regular 90 degree cut across the board.
- Miter cut is an angled( any angle except the 90-degree angle) cut across the board.
- A bevel cut is an angled cut across the thickness of the board.
- The compound cut is a combination of the bevel and miter cut.
Like any power tool, be sure to read and understand the manual, familiarize yourself with the saw parts, and the safety measures before operating it.
Steps
- Remove any jewelry or hanging clothing, and always have your hair tied and out of the way. Wear your protective glasses, mask, and hearing protection first.
- Using a speed square and pencil, measure and mark where you want to cut using a straight line on the board.
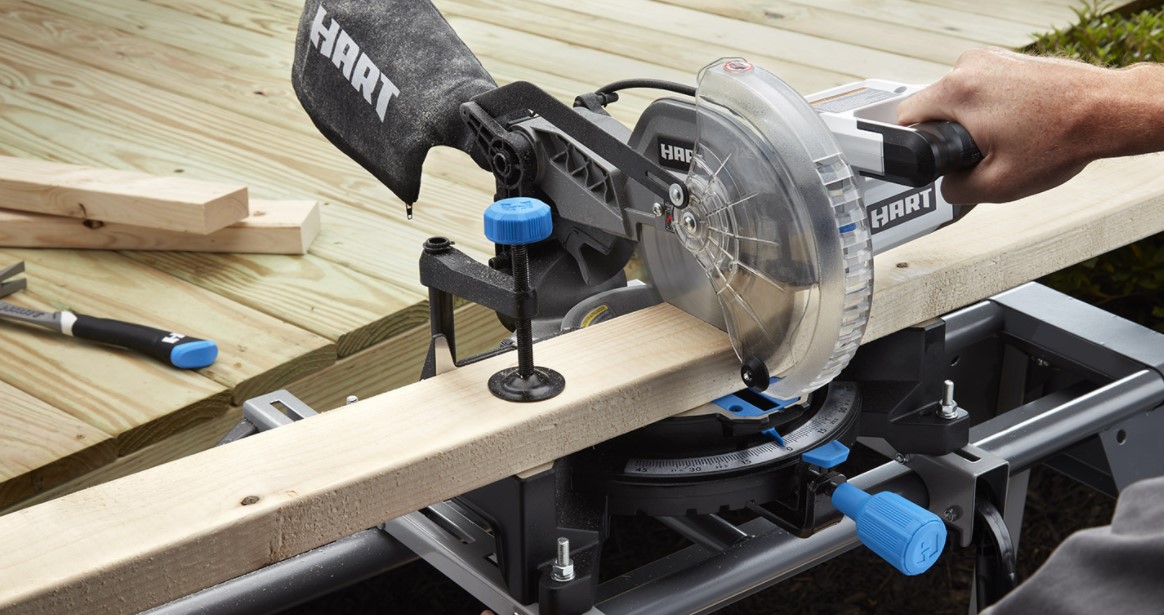
- Push the board against the fence and secure it in placeon the table with a miter saw clamp.
- Without pressing the trigger, place the blade on the board to check your alignment. Ensure the blade’s curve falls outside your mark or on the spare piece of the board and adjust accordingly.
- Push the blade upwards, press the trigger, wait for it to get the maximum speed, and slowly lower the blade through the wood piece.
- For a miter cut, squeeze the miter handle to adjust the table (unless you’re cutting without a table) and set it at your desired angle. Clamp your board tight to the fence, then lower the blade and cut through your board.
- For a bevel cut, loosen the bevel handle and tip the saw head to your desired angle; once secured, clamp your board tight to the fence, then lower the blade and cut through your board.
- At the end of the cut, release the trigger, then wait for the blade to stop spinning entirely before lifting it.
- When using the sliding miter saw, always bring the saw out and then cut towards the fence and away from you.
Pro tip: Always cut off about an inch to half an inch off of the end of the boards you get from a lumber yard since they are never perfectly square.
Cutting Tips
- You set the regular or perpendicular cut at zero degrees.
- To cut boards that are slightly bigger than your blade, cut through then slowly lift the board, keeping it tightly against the fence, allowing you to cut through that extra width.
- To cut bowed boards, always place the bow side facing you and tight to the fence.
How to Unlock a Miter Saw
The locks of a miter saw guarantee safety and control angles, the up-down, and side movements. Some miter saws move to one side only while others can move in both directions. The head of the miter saw locks down for transportation and storage.
Instructions
- Unplug your saw from the power source.
- Locate the locking pin or knob on the side or behind the miter saw head.
- Hold the handle and gently push it down to release pressure from the pin.
- Pull the pin out to unlock the head from the lowered position. Slowly release the handle, and the head will automatically move to the up position. A sudden release of the handle can cause injury.
Tip: Some models have twisting mechanisms; it works the same way.
The unlocking mechanism is similar to all miter saws, but the pins and knobs’ position varies between models. Here’s how to unlock some of the most common miter saws:
How to unlock a Ryobi miter saw.
The Ryobi miter saw is a compound type that allows both the miter and bevel cut. For more comfortable transportation and storage, you should lock the head in a lowered position. For the Ryobi miter saw, the lock pin is a cylindrical button on the saw arm’s right side.
To unlock the head, press and apply pressure on the saw arm, then pull out the pin to loosen the saw head. Then slowly release the saw head and allow it to rise.
How to unlock a Dewalt miter saw.
To unlock the head, you need to push the saw arm down and pull the lock pin located at the back of the saw blade on the right-hand side. Then release the saw head slowly.
How to unlock a Hitachi Miter saw.
To unlock the head of the Hitachi Miter saw; locate the pin directly at the back of the blade on the right side of the saw. Push down the saw arm and pull the lock pin, then slowly release the saw arm
How to unlock a Bosch miter saw.
To unlock the Bosch miter saw, locate the knob( usually a red or black knob) on the right side of the miter saw. Slightly press the saw arm down to release pressure from the lock pin and turn the knob to loosen the saw head.
How to Make a Dust Bag for a Miter Saw
The dust bag is used for dust disposal because dust can clog your machine, including other tools in your workshop, and it’s also a health hazard. Even though dust bags were reserved for top dollar saws, they’re now proliferating the market and you can find them even on an entry-level saw. Here ill explain how to make a dust bag:
Instructions
- Get some plastic tubing that can fit the vent opening of your miter saw. The tubing should be snug enough that it won’t come loose but not too tight that it cant be easily removed when emptying the dust bag.
- It is best if you also use a bag of synthetic material and with a zipper on one end to make emptying it more effortless. The bag should not be too big to get in the way of operations but not too small that it fills up too quickly.
- To make the bag, cut the material in the shape of a sock. Sew in your zipper on one side of the longer edges and sew the rest, leaving an opening to fit onto the plastic tube. Secure the hem more with the industrial-strength glue.
- Connect the open end of the bag to one end of the plastic tube and pull it over the pipe to give it a few inches of clearance. Apply about 2 inches of industrial-strength glue and secure it further with a zip tie. Make sure it’s not too tight that it deforms the tubing.
- Tightly fit the other end of the tube to the vent opening and give the dust bag a test drive by cutting some wood and making the necessary adjustments.
How to Change a Miter Saw Blade
You may need to replace your miter saw blade at one point either to remove a dull blade or to change your blade for different functions, and the loading and unloading process of the blades may vary from model to model. Below are the general guidelines for replacing a miter saw blade:
Directions
- Unplug the miter saw from the power source and make sure it has cooled down if you had just used it. Remove the blade guard. Pull the blade out of the way. Loosen the front screw that secures the blade guard using a screwdriver, then pull it back. It will give you access to the blade mounting screw.
- Remove the blade. Locate the blade locking pin or spindle lock pin on your saw, usually on the right side and behind the blade. Press the lock pin and rotate the blade until you feel the blade lock in its position, allowing you to remove the bolt safely. If your saw does not have the blade lock pin, secure the blade onto a block of wood to prevent the blade from rotating when you remove the bolt
- Remove the bolt from the saw using a 10mm wrench by turning it clockwise, then the outer washer and followed by the blade.
- Replace the blade. First, wipe the outer and inner washers. Then, mount the blade on the miter saw using the direction arrows indicated on the blade, then re-install the outer washer and the blade bolt.
- To tighten the bolt securely, press the blade lock pin, use a wrench, and tighten the bolt in place by turning it counterclockwise.
- Lower the blade guard mount back to its position and tighten its front screw with a screwdriver.
- Make sure you disengage the blade lock before turning on your miter saw.
How to Square a Miter Saw
A miter saw is known for making precise cuts, but it may lose its alignment over time, requiring regular squaring. Setting your saw square on the detent helps to solve all other angles. If you correctly square your saw and the other angles are misaligned, it means the detent plate is defective and needs replacing.
The adjustments processes and knob locations will depend on your saw model, so refer to your operation manual while following the instructions below:
Directions
Clean your saw
Before realigning your saw, sawdust and debris can clog your machine and contribute to the misalignment. Use an air compressor or a shop vac to rid of any sawdust from joints and crevices on your saw. Then wipe down the saw with a clean cotton cloth.
Check the blade for dullness, then sharpen it before continuing with realignment.
Align the fence
Place the straight edge of your square against your fence and check for gaps. If there are gaps, loosen the screws and adjust until it squares, then tighten the screws in. Square both sides of the fence separately for a more accurate alignment.
Align the blade
Set your blade’s level angle at zero degrees, then put the miter angle at zero degrees. The miter should square with the fence. Place a combination square on the base and against the fence. Lower the saw to the lowest possible position on the blade, then slide the blade’s square plate ( not the teeth).
Check for gaps between the blade and the fence. If there are gaps, loosen the knob on the miter, adjust the miter angle until the blade is square to the fence, and then tighten the knob to hold the angle. Loosen the screws on the detent plate to adjust it to make the saw’s zero degrees position accurate.
Align your bevel angle
Whether your saw bevels turn to the right and left or only to the left, you only need to set up your zero-degree angle to be square to the table.
To do this, place your square with one edge on the table and the other edge rising straight from the edge of the table. Lower the saw with the blade guard raised and slide the square towards the blade. Ensure the blade aligns with the square’s vertical edge and check for any spaces between the blade and the square. If gaps are present, loosen the bevel knob and adjust until the saw blade aligns with the square. Tighten the bevel knob to hold the angle.
How to cut Angles With a Miter Saw
The angles calibrated on a miter saw are off 90 degrees to the protractor’s angles, which can be confusing, especially for beginners. For example, if you set your miter saw to zero degrees, that reads as 90 degrees on a protractor. Therefore, if you need to cut your wood at 70 degrees, you need to set you saw at the 30-degree mark. A simple way to remember this is to either take 90 degrees minus the degree labeled on the saw or using a sharpie to mark the angles on your saw using the protractor angles.
To cut accurate angles, it is best if you have a digital protractor.
The number of degrees surrounding a point total to 360 degrees; therefore, several smaller angles can create 360 degrees or larger angles. For example, to make a 90-degree corner, you can use two-45 degree angles, 70 and 30-degree angles, or three-30 degree angles.
The formula is dividing the total degrees by the number of sides to get a corner angle. Then divide it by two to get a miter angle. For example, your project requires six sides with all equal angles;
Corner angles- 360/6= 60 degrees
Miter angle- 60/2= 30 degrees
So, each piece will have a 30-degree miter cut.
Some projects may require unusual angle cuts. Here is how to make some standard cut angles:
How to Cut 135 Degree Angle on a Miter Saw
A 135-degree angle is an obtuse angle. So the trick is to set your miter saw to cut at an acute angle, and it will cut at an obtuse angle by default; you have to find the complementary acute angle. The acute angle of 135 degrees is 67 1/2 degrees. So set your saw at 22 1/2 degrees, which usually has a lock on most miter saw brands. Cutting the right angle on trim pieces will make using your finishing nail gun easier.
How to Cut a 70 Degree Angle with a Miter Saw
Since there is no 70 degrees angle on the miter, we have to improvise. Assuming you can cut the 70 degrees angle from the miter saw, which is 20 degrees from the 90 degrees fence. To achieve a 70 degrees cut, make a 45 degrees jig to act as the fence for your wood piece. So we will subtract 20 degrees (45-20=25). So, set the miter saw to 25 degrees to get that 70 degrees cut.
Use this method for any jig, and it will work.
How to Cut a 22.5 Degree Angle on a Miter Saw
Measure and mark where you want to cut. Adjust the miter knob by pulling and moving it left or right, set and lock it at 22.5 degrees. Most miter saws have a stop at 22.5 because that is a standard angle to cut. Then make your cut.
How to Cut PVC Pipe With a Miter Saw
A good quality miter saw can cut PVC pipe, but some factors make the process much more efficient.
Directions
- Unplug your miter saw from power.
- Replace your usual woodcutting blade with a PVC cutting blade recommended by your manufacturer.
- Measure your PVC pipe and mark it using a permanent marker.
- Place your pipe on the miter saw table, align your cutting mark with your saw, and clamp it securely using a pipe and bar clamp.
- Hold the saw arm, press the trigger, wait for the blade to reach maximum speed, and then cut your PVC pipe.
What Size Miter Saw Do I Need?
The size of the miter saw you need is determined by the type of project. A miter saw with a large-sized blade( more than 12 inches) is for making broader and deeper cuts, while a smaller-sized blade(10 inches and below) is more economical and makes narrower and shorter cuts.
We define the size of a miter saw by the diameter of the blade used; they include 8 inches, 10 inches, and 12 inches. The saw’s size dictates the type of material you can cut, the thickness of the material, how fast it cuts, and whether it is hand-held or a table saw.
- 8-inch miter saw: This saw is excellent for beginners as it is simple to work with, easy to handle, which also reduces the risk for injuries. It is also economical to buy and maintain. One downfall of this size is it the least versatile of all the sizes.
- 10-inch miter saw: This saw does everything the *inch saw does but with more power speed and accuracy. It can also cut denser wood pieces.
- 12-inch miter saw: This saw is the largest miter size available, which is for very wide and deep cuts with precise miter cuts of various angles. Most 12 inch miter saws are sliding compound miter saws with a dual bevel that allows bevel cuts in either direction.
It’s also important to note that blades are not interchangeable. So you can’t put a 12-inch blade on a 10-inch miter saw head. Choosing the right size is all about determining your use case.
How to Make A Bevel Cut With a Miter Saw
A bevel cut is a cut at an angle other than 90 degrees done along with the material’s thickness. We measure bevel cuts against a square edge cut and made by adjusting the miter blade’s blade.
Directions
- Place your wood piece on the saw table against the fence and clamp it down.
- Adjust the bevel knob to your desired angle and lock it in place. The location of the bevel knob is under the blade at the front.
- Hold the saw arm, press the trigger, wait for the blade to reach full speed, and slowly lower it through the wood.
How to Care for Your Miter Saw
A miter saw is a very reliable tool; however, its performance will reduce if not well maintained or from improper use. To prevent this, you’ll need to perform regular maintenance; below are a few tips and trick to help:
Cleaning
A miter saw tends to collect a lot of dust during use, and it is best if you clean remove the dust at the end of every workday. Using an air compressor or a shop vac, you can remove the dust and debris and pay more attention to moving and crevices.
Your miter saw should also have an installed dust exhaust system, which should be emptied and cleaned once in a while. Remember to clean your blade using a brush to dust off the debris and pour some cutting oil on the blade.
Lubrication
The moving parts need to be lubricated to prevent corrosion from humidity and friction, which wears down the miter saw just as it would damage an unlubricated garage door. To oil your saw, you have to disassemble your saw to expose the internal parts. Clean the parts using a brush and a cotton cloth to remove old grease and then pour some lubricating oil.
Always refer to your manufacture’s recommended lubricant to avoid performance issues. We recommend a dry graphite or silicone lubricant where possible as they tend to last longer and perform better on saws.
Sharpen the blade
Check your blade for bluntness and sharpen and sharpen regularly using a sander or the correct file. Different blades have different sharpening techniques. Ensure you use the right one. Wear some heavy-duty leather gloves like the ones you use when sharpening a chainsaw to prevent injury while sharpening. Also, remember always to apply sharpening oil.
Replace the blade
Your blade will get blunt over time and need replacing with a new one. Operating your saw with a dull saw blade overworks the processor leading to gradual malfunction of the saw.
Repairs
If you use your miter saw often, it is best to check for damages and wear every 2-3 months and perform the necessary repairs and replacements. Running your saw on damaged parts will overwork your saw and reduce its lifespan.
Tip: Always make sure your saw is unplugged from power during any maintenance procedures. Wear eye protection, ear protection, and a protective mask during cleaning.
How to Stay Safe When Using a Miter Saw
Like any other machinery, safety measures have to be observed during handling, whether by a beginner or a professional. Below is a list of safety precautions when using a miter saw;
- Always read the manual before operating the saw and familiarize yourself with the parts and maintenance procedures. When using the miter saw, wear protective gear: ear, eye protection, and a protective mask.
- Avoid wearing loose clothing, jewelry, and have your hair tied back when operating the saw.
- After making your cut, release the trigger, allow the blade to come to a complete halt, and then lift it back to its position.
- Always unplug the saw from power during maintenance and repairs and after every use. And make sure the saw is OFF before plugging into power to avoid unintentional start-ups.
- Keep your hands and body at least 6 inches away from the saw.
- Use the clamp to secure your material in place and prevent losing control of the material.
- After maintenance checks, always confirm that all the bolts and screws are tightly in place.
- Use only the recommended blade size and accessories by your manufacturer.
It is always best to start small and slow when learning how to use a miter saw. Hopefully, this step-by-step guide with equip you with the skills and confidence to saw like a pro in no time.

